Pages

Wednesday, 27 October 2021

Rudolf Days for October


 Here are the cards I made last month and forgot to post plus a few more I have made this month. Last month we had a really busy weekend karate wise with 8 of my students at a tournament on the Saturday and another 7 going to grading on the Sunday. They were all amazing and did me proud - 5 gold medals 4 silver and 2 bronze in the tournament, then all acing their gradings too! I was so proud I was euphoric for days, completely forgetting Rudolf Days!  I made chocolate cupcakes for the whole class. 

Anyway, on to my cards. 


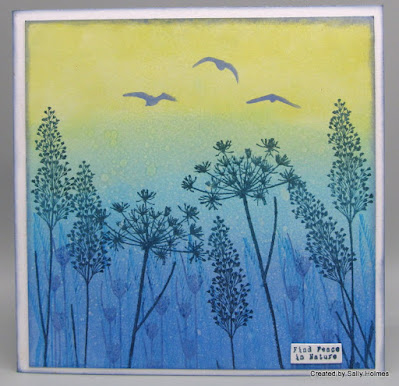
I used stamps and stencils from Inkylicious for these three. All very similar with two on cream cards and one on a white card in shades of blue ink. I added a shadow to make it look 3d - Deby has done a wonderful tutorial on the Inkylicious you tube channel if you want to know how it is done.  
The next one is also using inkylicious stamps and a stencil cut using a die at a crafty session at PDA. I might add a sentiment eventually. 
The next two are also done with inkylicious stamps in more traditional colours, but still single layers. 
Very simple but perfect for quick cards.
Do pop over to Mo's blog for more inspiration and to enter if you get the chance! Mo, if you get round to visiting , I am thinking of you and the family. I really hope your hubby makes a full and speedy recovery. Big hugs! 
Thanks for looking!


Monday, 25 October 2021

Dream Samples for Bee Crafty October Stamp launch

 Last Tuesday was such a fabulous day! Bee Crafty launched 3 new sets of gorgeous stamps and there were all sorts of giveaways, lives, videos and crafting fun on Facebook. If you didn't manage to join in, but want to see some awesome crafting in action, pop over to the Bee Crafty Facebook page to see the videos. You will also be able to see them all on Bee Crafty's YouTube channel very soon.

Here is a closer look at the samples I made.

This first one was stamped over a smooshed distress oxide background with stencilling and stamping with distress oxides too. The face and sentiment were stamped in Versafine Clair Fantasia
Next is a simply stamped single layer card coloured with distress oxides in Twisted Citron, Peacock Feathers and Salvaged Patina. Dream was stamped in black versafine .
This was a very quick card stamped in distress oxides with the Sentiment  in versafine.
For this one I stamped slightly more than half the Dream face at each side of the card and watercoloured them. I added a few stencilled circles and coffee rings in between them.
I used Dylusions shimmer paints for this one, adding a patch of gesso in the middle for her face. I added some stamping with versafine clair and used inkables to apply more paint and Texture paste.
My mdf tag was gessoed, then I painted a little Dina Wakely heavy body acrylic paint at the top before spraying with water and allowing it to dribble down. when it was dry I stamped and embossed the face and sentiment, adding the hearts in Kitsch Flamingo Distress oxide. The lips and eyes were coloured with ecoline pens.
These stamps are so good for art journaling with! For my first page I used them in combination with the previous release of face stamps and journal art elements. 

I then used my Dina Wakely Kraft journal, Scribble sticks and Pencil crayons, along with Dina Wakely collage papers. I so enjoyed doing this one I had to give her a friend! 

The hair on this one was painted with dylusions shimmer paints...
And here they are together. The white stamping was done with the Hero Hues unicorn white ink pad. 
This was the double page spread in my Dylusions mini journal that I completed in my facebook live. 

And finally, here is another in my craft journal using the same paints and ink colours as I used in my live.

The new stamps and bundle offers are all here until the end of the month.
You can find the products I used here
Gold Embossing powder

Thanks for looking and happy crafting!

Wednesday, 20 October 2021

Crafty Individuals Samples

 Hi there! A couple of weeks ago Jean was on the Craft Store with the latest release of Crafty Individuals stamps. They are absolutely gorgeous designs from Dora and from Jean too. You can find the stamps and the gorgeous papers on the website here.

I really loved making my samples! Let me show you them all...

First is a stampboard pendant...

The gorgeous cyanotype papers make a beautiful backdrop for any scene...

Dora's gorgeous flowers also go so well with the papers...

They are equally suited to CAS and to mixed media as well as scene building.
The leaves are also great for creating your own backgrounds...
or match your colours to the papers 
Another of Dora's beautiful flowers just stamped on Kraft and coloured with coloured pencils
A couple of scenes...

and finally a faux printers tray using a stencil from Bee crafty
I hope you enjoyed seeing them! 
It has been a busy week or three with test driving and buying our first new car in 12 years! We picked it up last Thursday and have been getting used to it - technology has changed somewhat since we last bought a car, lol. I am loving it though. I will try and make a few more blog land visits this week. 
Thanks for looking! 
 

Monday, 18 October 2021

Autumn Leaves and a sneaky peek!

Hi there! I am here with a step by step for a simple Autumnal card for Bee Crafty. 

Here is how I made it:

I began by making a border on an ivory card using masking/ stencil tape. 

I then blended distress oxide inks in autumnal colours into the centre and left to dry completely.
After a dust with an anti-static bag I stamped the leaves from the Doodle Art dragonfly set at each corner in versamark and sprinkled over gold embossing powder. The leaves in this set were originally joined together but I have cut them apart carefully with scissors. Next I removed the masking tape carefully.
I heated the embossing powder then stamped the smaller leaf 4 times in the centre and added  embossing powder before heating again.
Using the border stamp from the same stamp set I stamped it centrally on each side of the square in tea dye distress ink
I used a gold gellyroll pen to add a doodled border to each corner and also sprinkled a few drops of water onto the distress oxide ink panel. 
here is the finished card...

...and a closer look at that gold embossing. Don't forget to enter your Autumn colour creations in the October challenge album over on the Bee Crafty Facebook group

Here is a list of what I used:
6x6 ivory card
Masking/stencil tape
versamark ink
Anti static bag
gold gelly roll pen

Before I go, here is a sneaky peak of one of the new stamp sets that Bee Crafty are launching on Facebook tomorrow. There will be facebook lives, videos, giveaways and bargains throughout the day, including a facebook live from me at 6pm. Visit the Bee Crafty Facebook page for details! 


I hope you can join in the fun! 
Thanks for looking and Happy Crafting! 

Monday, 11 October 2021

Bees Journal spread

 Hi There! I have been a busy bee in my journal again! Thought you might like to see how I made this double page spread. 

I began with a page that I had mopped up a stencil or two with in shades of yellow. I smooshed some Wild Honey distress oxide onto a piece of acetate and added more colour to the page before drying it. 
once it was dry I took the smaller hexagon from the Easy Frames and used it to create a large honeycomb pattern across the page using vintage photo and spiced marmalade. 
I sponged vintage photo oxide ink around the edges of the pages, then added more hexagons using the Honeycomb Multi inkable and a mixture of vintage photo and spiced marmalade in the spaces before setting this aside. 

Next I stamped the collage section of the scripted bee stamp in brown versafine clair on some copy paper
I cut out some of the circles and hexagons and coloured them with Wild Honey distress ink
I stuck these randomly around the page, using a few to cover where another colour had seeped through the centre of the page
I stamped some of the smaller bees, the word and honeycomb from the Bee Monarchy set in Wild Honey and Vintage photo Distress ink.
Next I stamped the largest Bee and the Time Sentiment on to plain Dina Wakely collage paper using versafine clair black ink.
I coloured the bee using ecoline pens and trimmed it adding some white pen to the back of the wings and tail. 
I stuck the bee and the sentiment in place with matte medium and added a few white highlights around the page with a gelly roll pen.
Here is another look at the finished page.
I used:
copier paper

If you would like to see a flick through the pages of my journal, take a look at this video on my youtube channel.

Thanks for looking and Happy Crafting!