Showing posts with label big ones inkables. Show all posts

Wednesday, 23 April 2025

Pretty Pastels


 Hi There! I've gone all pastel shades with this card for you today. Here's how I made it.
I began by stamping the script background around a panel of smooth white card measuring 4.5 x 6.5 inches using tumbled glass distress ink. 

Next I attached the circles big one inkable and used blending brushes to add more tumbled glass, Picked raspberry and Squeezed lemonade distress ink
On a separate piece of card I stamped the doodle art sunflower and coloured it with pastel ecoline pens before cutting it out. 
I stamped the sunflower onto the background in the position I wanted it and added the coloured cut out sunflower on top, using Matte Medium. 
On a scrap of white card I stamped the sentiment in Versafine clair ink and sponged a little blue ink around the edge. I added this to the card too. 
Here is the finished card once more. 
I used:
Big one inkable  - Circles 1
Distress inks - I used Tumbled Glass, Picked Raspberry and Squeezed Lemonade
Versafine Clair ink in Morning Mist
Ecoline Pens
Matte Medium
Smooth white card
5x7" blank card
Paper for matting and layering

Thanks for looking! 

Wednesday, 30 October 2024

Baubles galore!

Hi there! I am here with a couple of Christmas cards featuring the brand new Doodle Art Baubles. 
 

I began by blending some red and green distress oxide through a big one inkable. I took the foam layer off my stamp press and was able to use 4 magnets on the base to keep the inkable still enough to blend one handed.
Next I stamped the small holly leaves from the christmas pud set to stamp randomly over the background using old paper distress oxide.
On some smooth card I stamped two of the baubles using memento ink and coloured them with alcohol markers. Then I cut them out.
Using a ruler and a fine liner I added some threads to hang the baubles from. I did one straight line then went over twoce more in a doodle art style.
I added the background to a green 5x7 card then added the baubles using sticky pads.
On a scrap of white card I stamped and cut out the sentiment in Versafine Clair Strawberry.
Finally, I added this to the card with foam pads too. 
Here's another version using a different inkable and coloured base card.

I used:
Inkables Big ones  - I used Pearls for the first and circles for circles for the second
Distress Oxide ink  - I used Lumberjack Plaid, Rustic Wilderness and Old Paper
Memento Black ink
Alcohol markers
I've even managed to add a little decoration to my cast 😊 
Thanks for looking! 

Wednesday, 24 January 2024

Hey, Sunshine!

Hi There! Thought I would share a super quick but colourful card with you that will brighten the dullest of days.

I began by blending 3 shades of distress oxides through the inkable on to an ivory deckle edged card. 
On a piece of card, I stamped the Doodle Art rainbow bird in Black versafine clair and coloured it by painting with Dina Wakley gloss drops.
Next I die cut a circle from ivory card and stamped it with the circles stamp from Journal art Elements 3 using spiced marmalade distress oxide ink. 
I attached this to the centre of the card using foam pads, adding the bird on the top. I added the sentiment in versafine clair ink.

Finally I added a few dayglow highlights using Gelly Roll moonlight pens.
Here is the finished card again.

I used:
6x6" ivory card blank
Distress oxide inks in Twisted citron, mustard seed and spiced marmalade

Today's January savers are the fabulous mdf journals that you can find here . I will be live on the Bee Crafty Facebook page at 8pm this evening, so I hope you can join me. Thanks for looking! 

Tuesday, 16 May 2023

Exploring different ways of using Bee Crafty Mandala inkables

Hi There! I have been finding some different ways to use my mandala inkables over the past couple of weeks. I have used them with my coloured pencils (I will include a couple of photos at the end of this post) and now have used them with a black alcohol marker on a distress oxide background. This one was inspired by the birthday card I got from my friend Lynne. Here's how I made this card.

I began by sponging a rainbow of distress oxide across a 14x14cm of smooth card
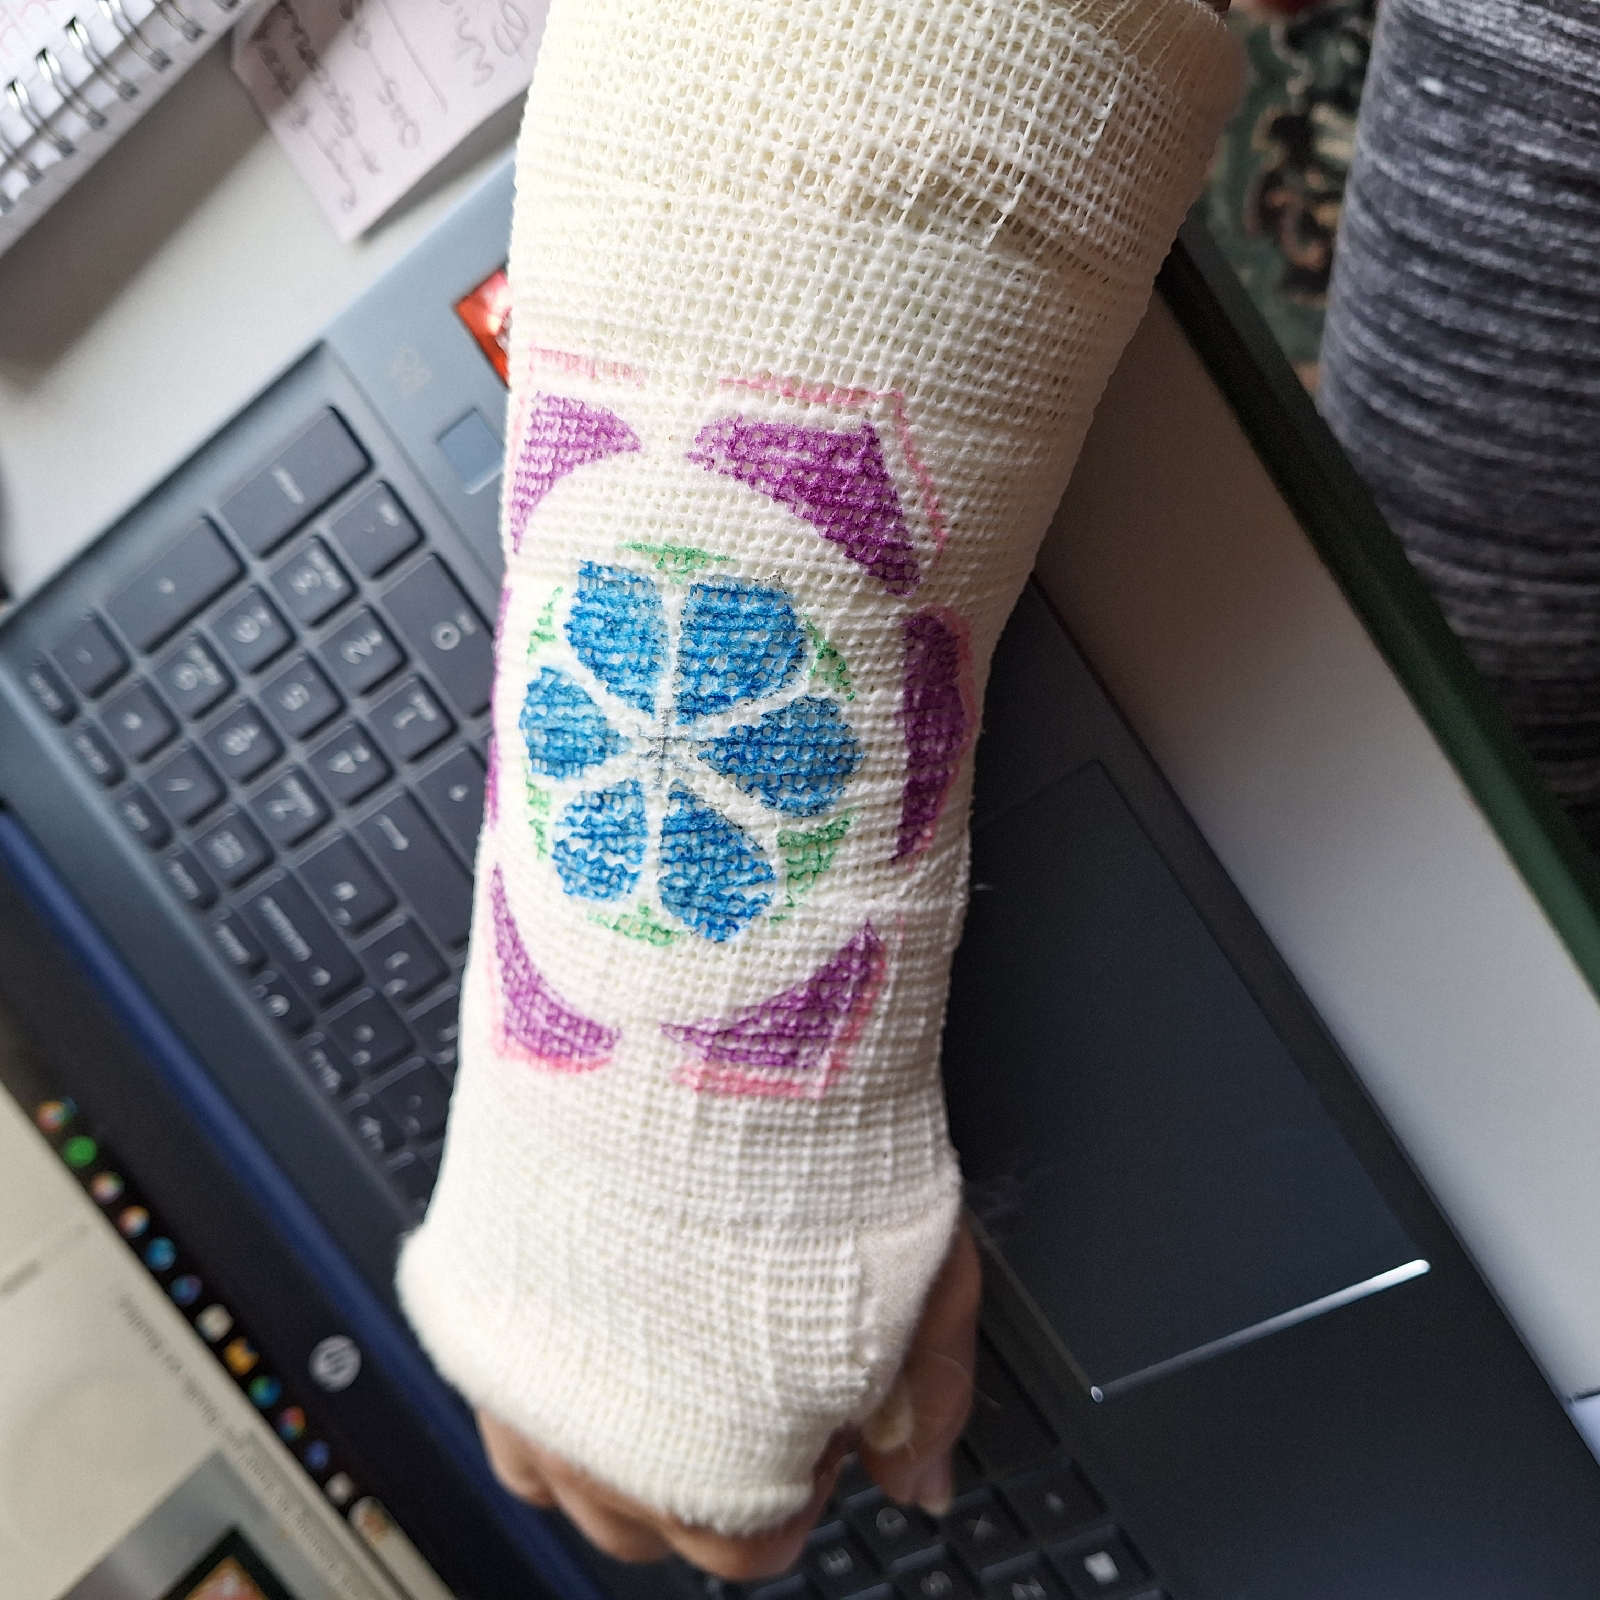
Next I drew around the inkable Mandala 2 with a pencil, before colouring in using a black alcohol marker.
Once this was all thoroughly dry I went over the top using the Big one fern flourish inkable using Lost Shadow and Worn Lipstick distress oxide inks and dried off with a heat gun
I ran an anti static cloth over the whole thing then stamped the two circle stamps from Journal Art Elements 3 in versamark ink, heat embossing in gold.  
On a piece of plastic I sprayed a little water and sprinkled with Apollo explosion powder and then dabbed it onto the background and left to dry.

On a separate piece of black card I stamped and heat embossed the sentiment from mixed messages 2 and cut the end to make a flag.
Finally I matted and layered the background onto a 7" square card, adding the sentiment on 3d foam pads.
I used:
Distress oxide inks in Fired brick, Wild Honey, Twisted Citron, Peacock Feathers, Blueprint Sketch, Wilted Violet and Seedless Preserves, then Lost Shadow and Worn Lipstick.
Black Alcohol marker
Big ones inkable Fern Flourish
Versamark embossing ink
Black card, White card and 7" card blank

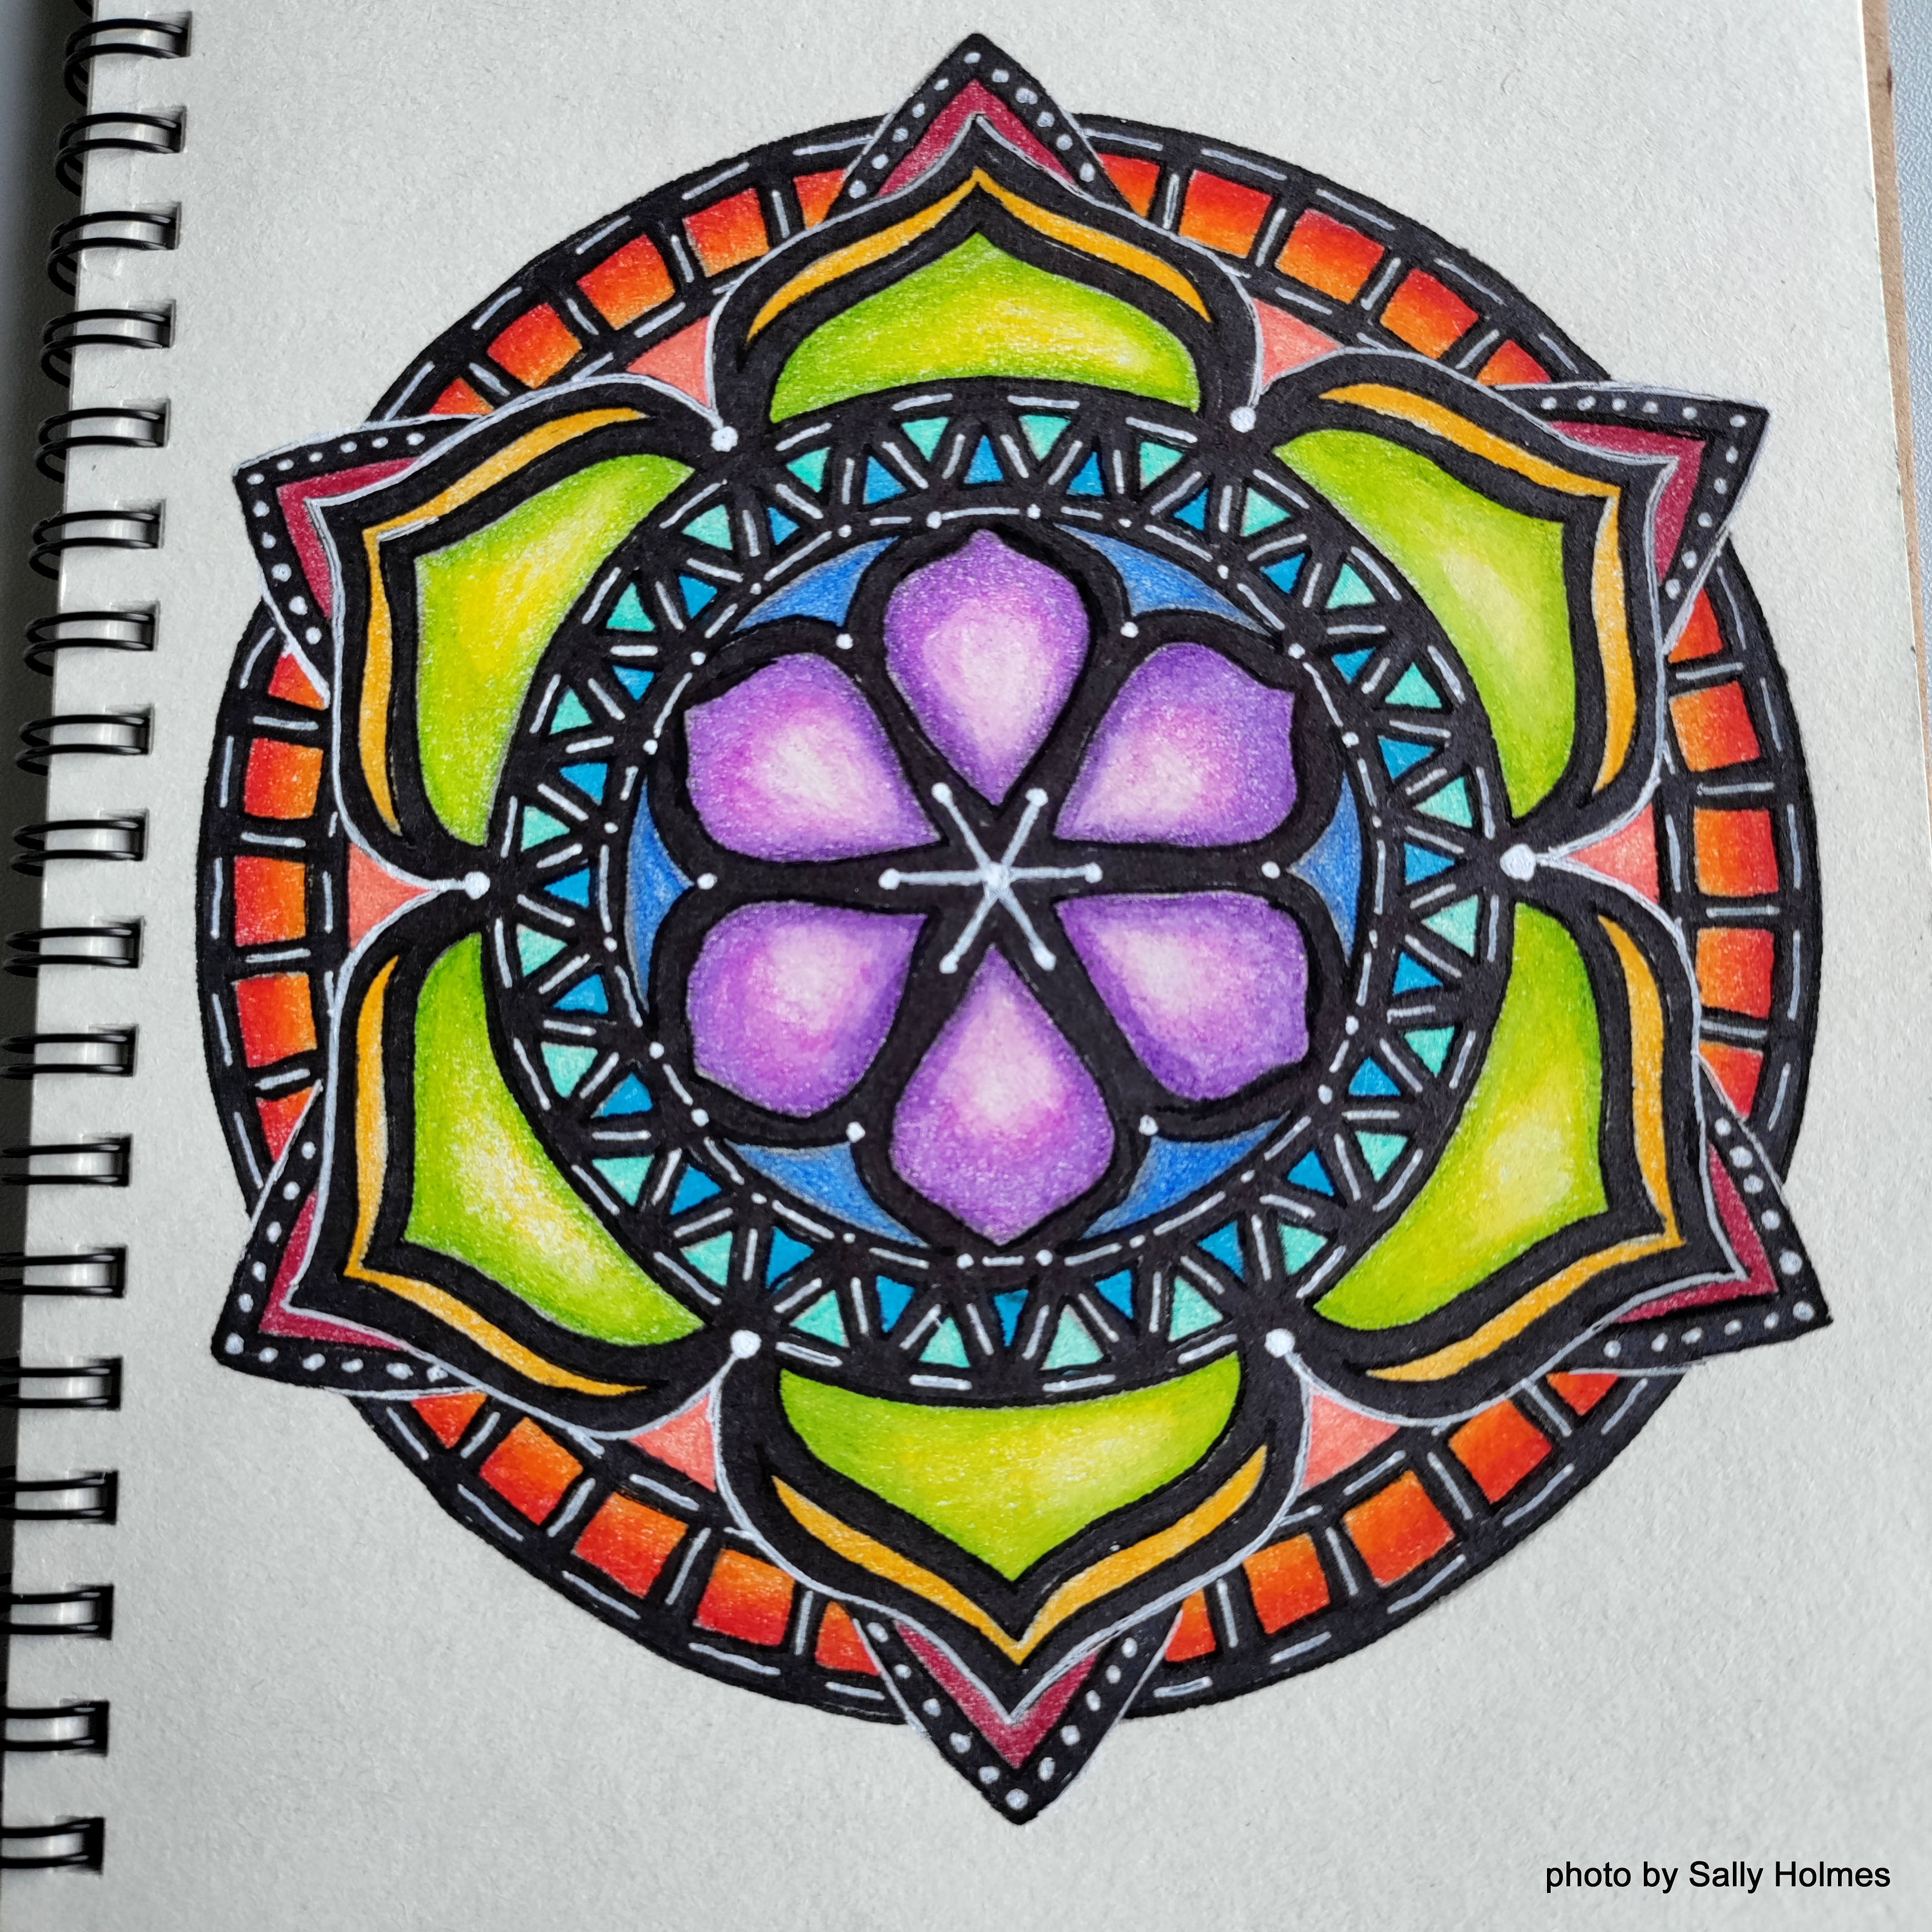
Here are a couple of photos of the mandalas I have coloured with pencil crayons too

There are all sorts of offers on the Bee Crafty Website at the moment as May is their 21st Birthday month, so definitely worth a good look! 
Thanks for looking!

Saturday, 15 April 2023

Inspired by Bev

Hi There! I couldn't wait to play with the latest journaling essentials stamps, so I used them on this card for my daughter's birthday. I also wanted to create a card a bit like the ones that Bev did in this live


I began by smooshing Peacock Feathers and Wilted Violet Distress Oxide onto a 14cm square of mixed media card. 

Next I used the Andalucian Big One inkable to blend some more ink on to the background.
I used the same inks, plus some black Versafine Clair to add stamping to the background. 

Next I stamped a sketchy bird and some sketchy flowers onto a scrap of white card and cut them out.
I coloured the blue tit with coloured pencils but left the flowers white.
I used a black sharpie to add a border to the panel then stuck it to a 15cm square card blank. I added the flowers and bird to the corner of the card using foam pads, and added a few drops of platinum liquid pearls. I also added some glossy accents to the eye and the beak.
Here is the finished card again.
I used:
Distress oxide inks in Peacock Feathers and Wilted violet
Coloured pencils
Platinum Liquid Pearls
Foam pads

Thanks for looking! 

Saturday, 22 October 2022

A quick and simple dragonfly card

Hi there! Thought I would show you how I made this very quick and simple card today.


I began by blending a little salvaged patina distress ink through the Pebble pavement big one inkable onto a 6x6" white card. As this is a clean and simple card I used stencil tape to ensure I didn't go over the edge. I left a diagonal band without any blending.

I removed the big one and positioned the outie from the 4" circle easy frame inkable centrally on the card. I blended some villainous potion ink into the circle. 
I used some of the worker stamps in opposite corners to stamp in the salvaged patina distress ink. 


Next I stamped the dragonfly in memento ink on to a scrap of white card and coloured it with alcohol based markers. I cut it out, cutting off the legs.


I also stamped the dragonfly in memento ink directly onto the purple circle in the position I wanted it.

I used matte medium to attach the coloured one onto the front of the card, lifting the wings a little. 
I added a little glossy accents to the body and parts of the wings.

Finally I added a sentiment.
Here is the finished card again


I used
Distress ink in Salvaged Patina and Villainous Potion
Alcohol markers
Black Memento ink 

Did you see the facebook lives from Thursday's MDF day? They were amazing! You can catch up with Sam and Bev's on the Bee Crafty Facebook page, and Ann's is over in the Bee Crafty Stamps facebook group.

Thanks for looking!