Monday, 14 November 2022

A sneaky peek step by step!

 
Hi there! I thought I would show you a step by step using the brand new stamps out tomorrow from Bee Crafty! The new Robin stamps are absolutely gorgeous and I can't stop making with them!  Here's what I did...

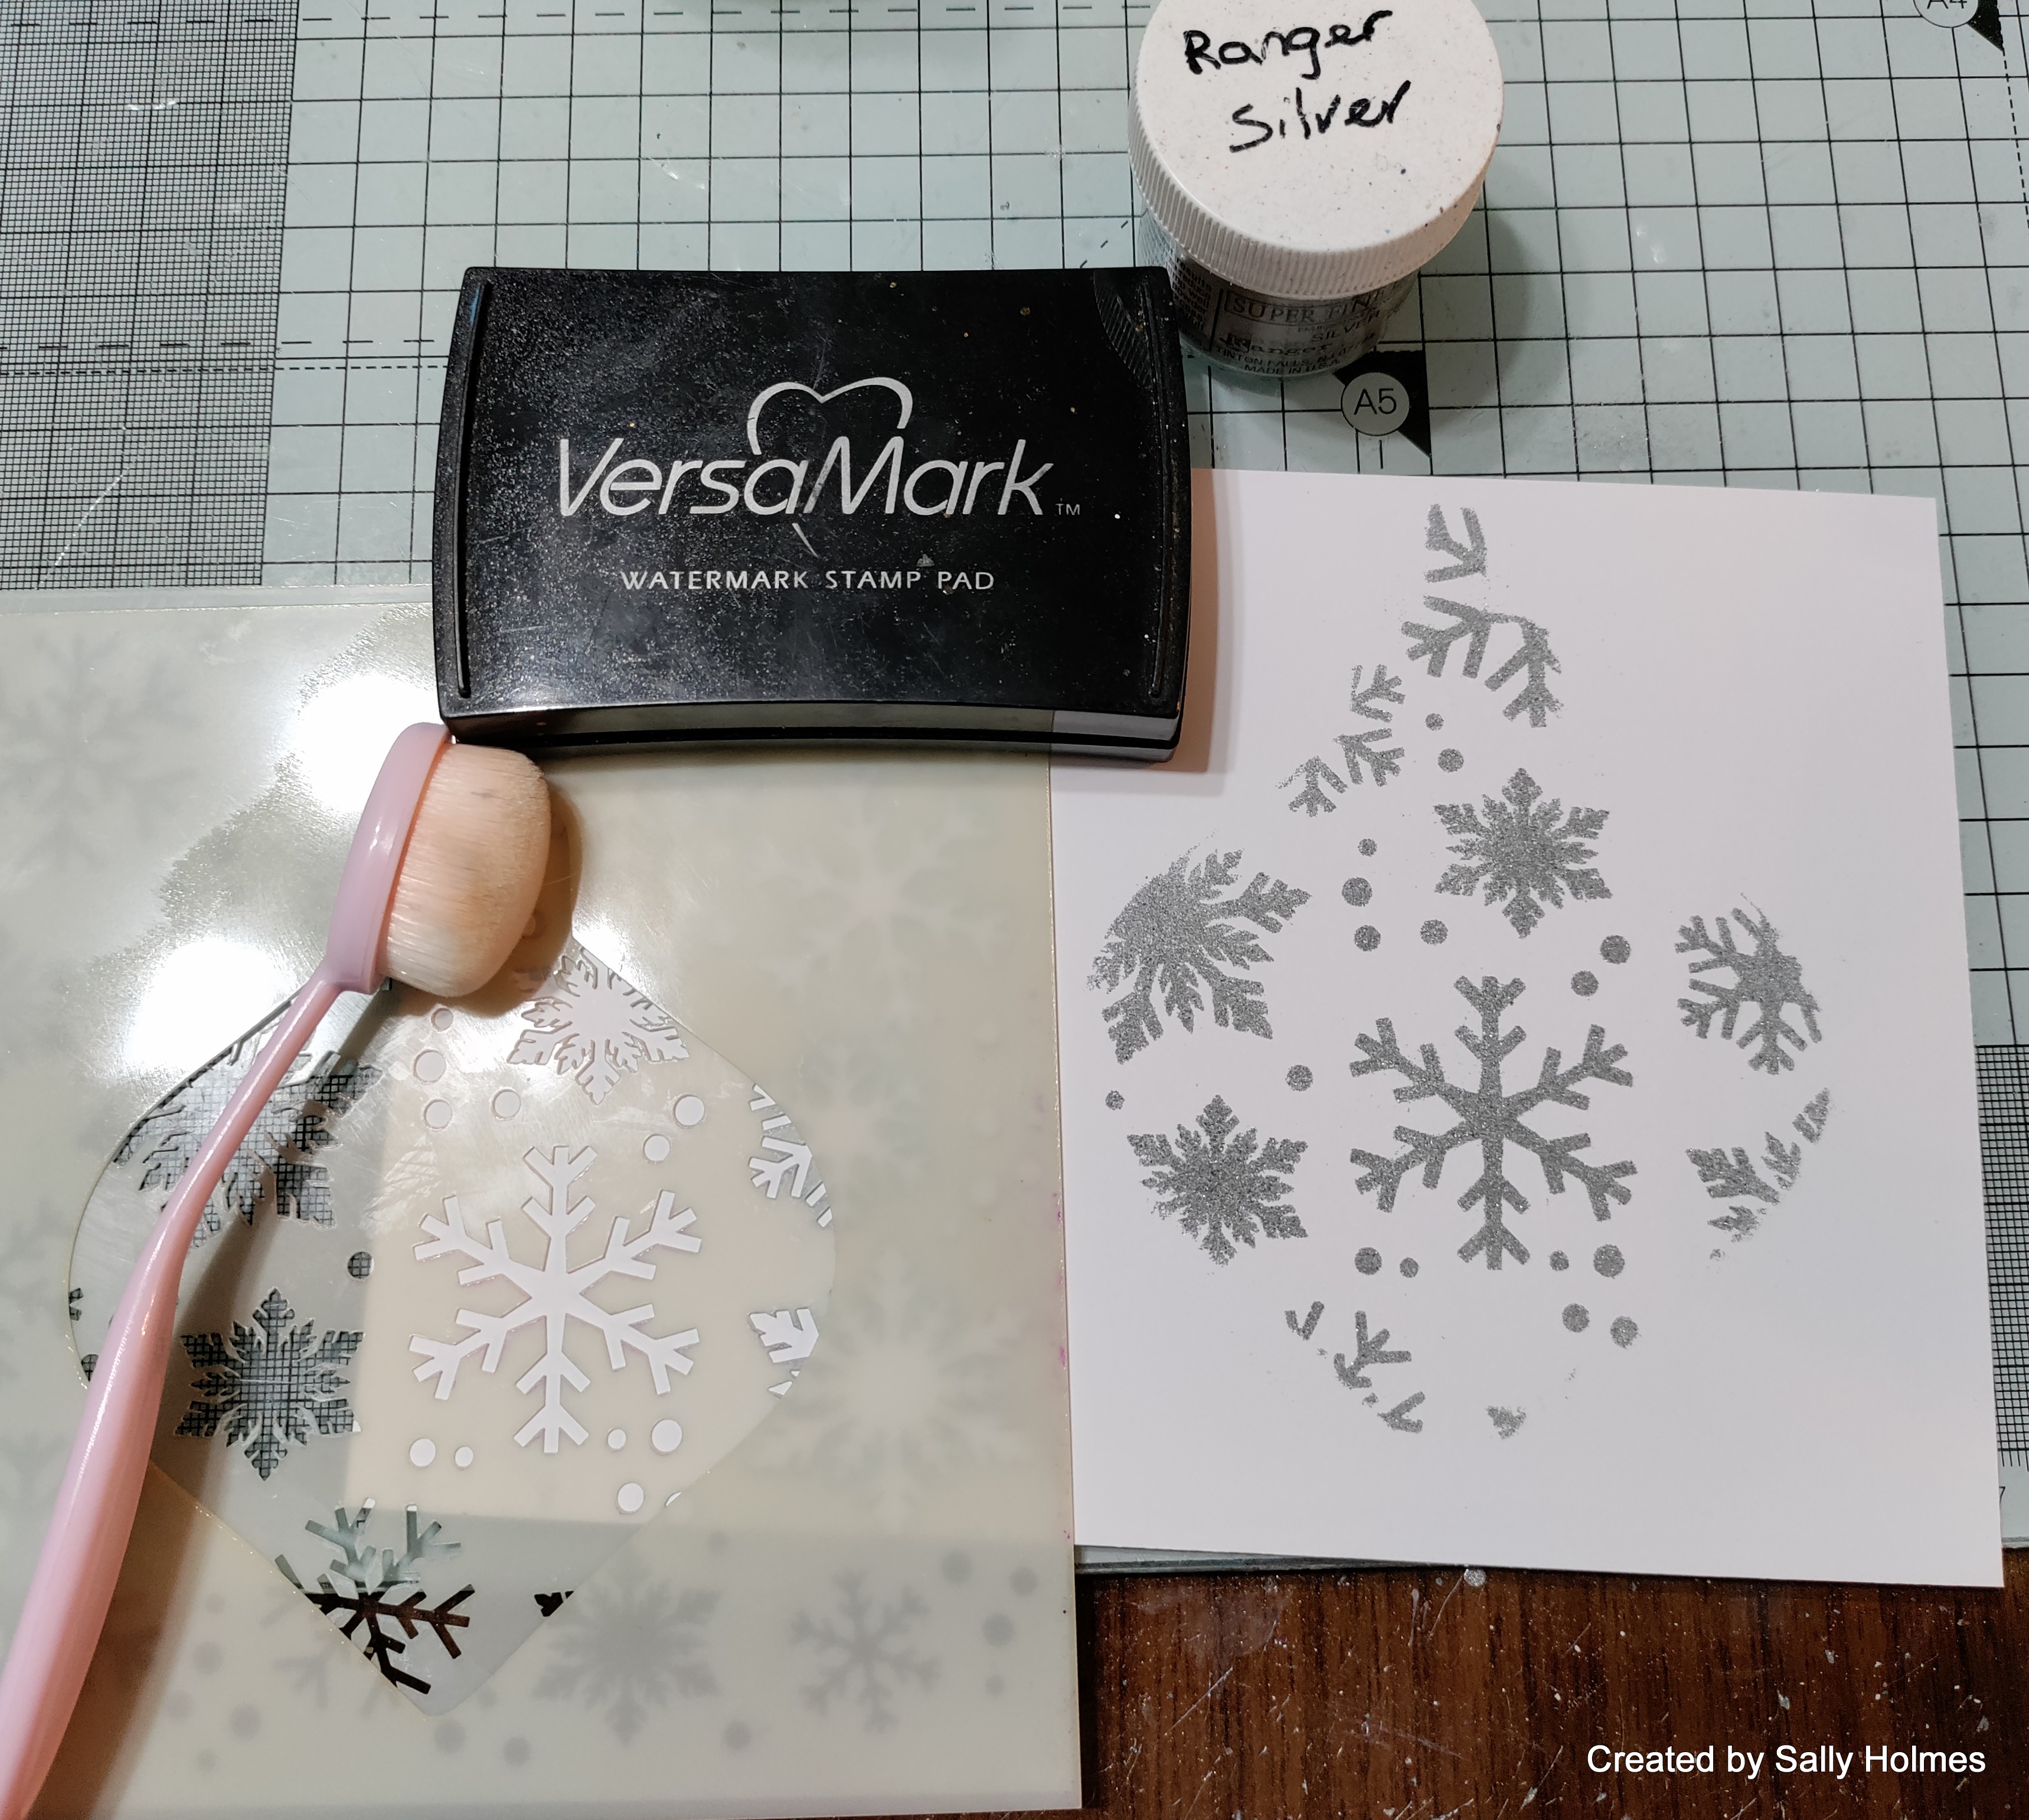
I began by blending versamark ink through the multi snowflake inkable and the large bauble #1 easy frame. Then I heat embossed it with ranger silver embossing powder.
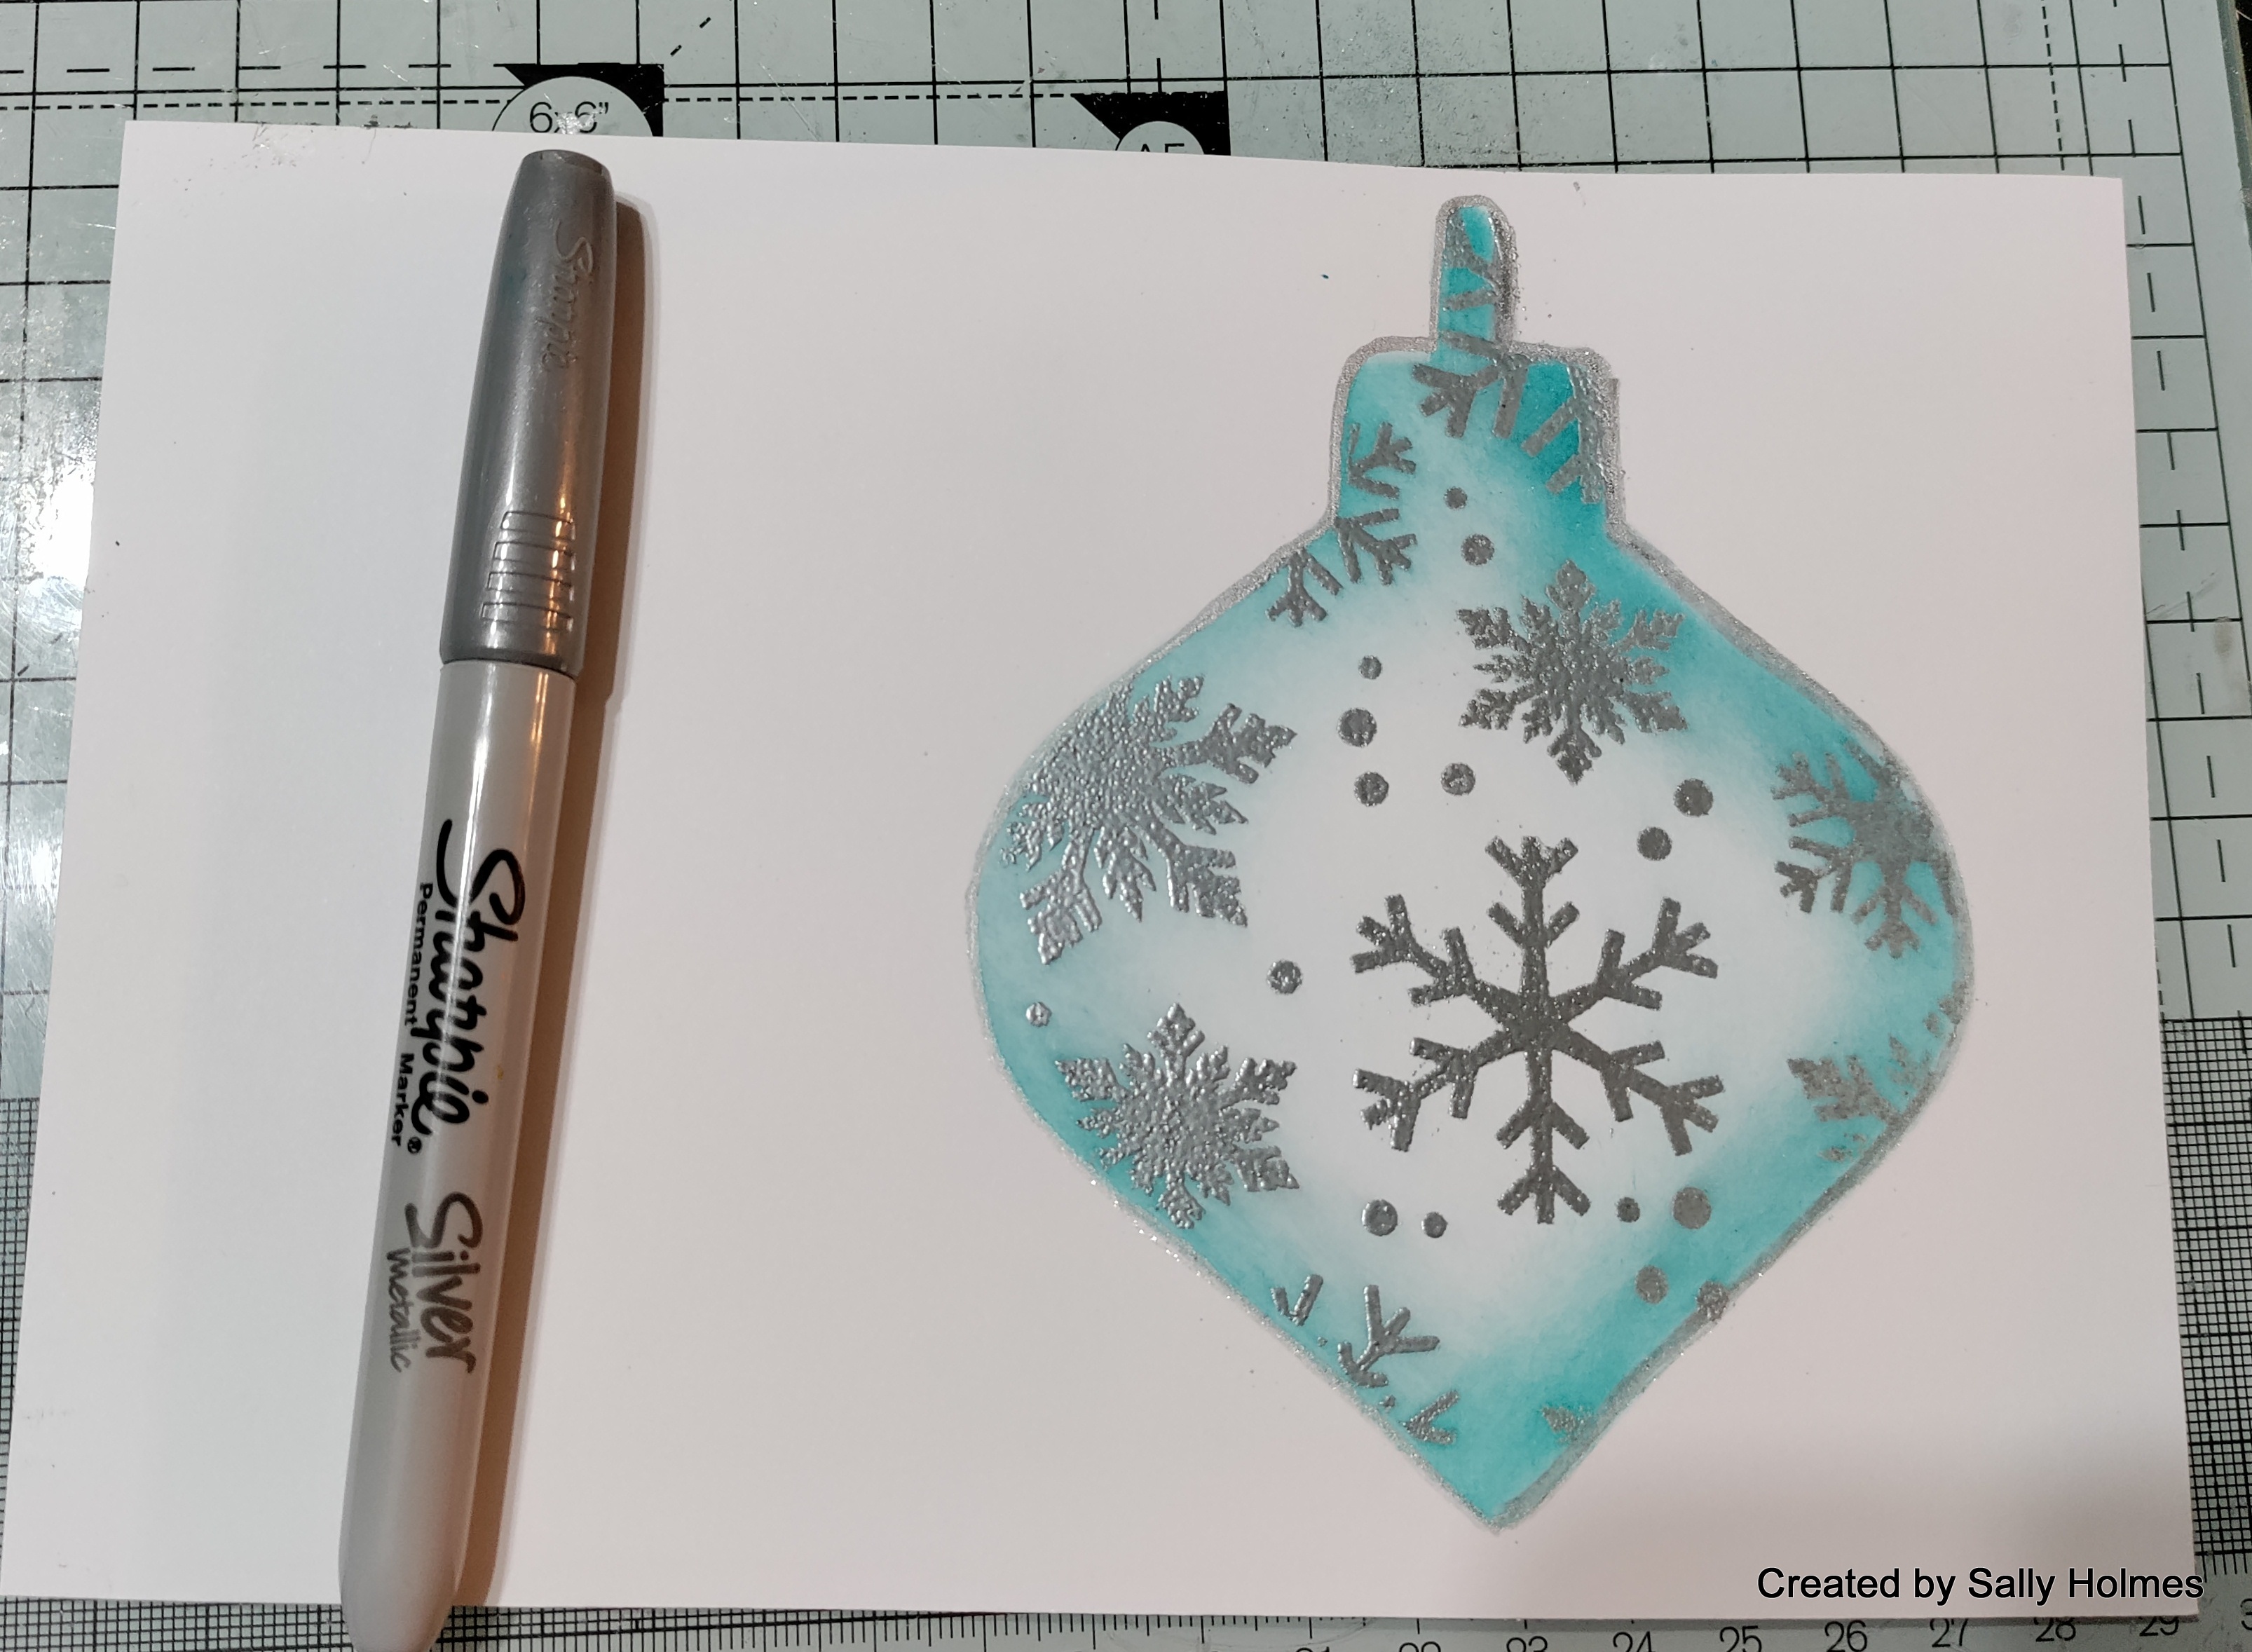
Next I placed the bauble easy frame over the embossing and blended some peacock feathers distress ink around it, making it darker at the edges and paler in the middle.                                                            
I used a silver sharpie pen to outline the bauble.
Next I placed the innie from the inkable over the bauble and lightly blended some black ink around it to create a shadow.
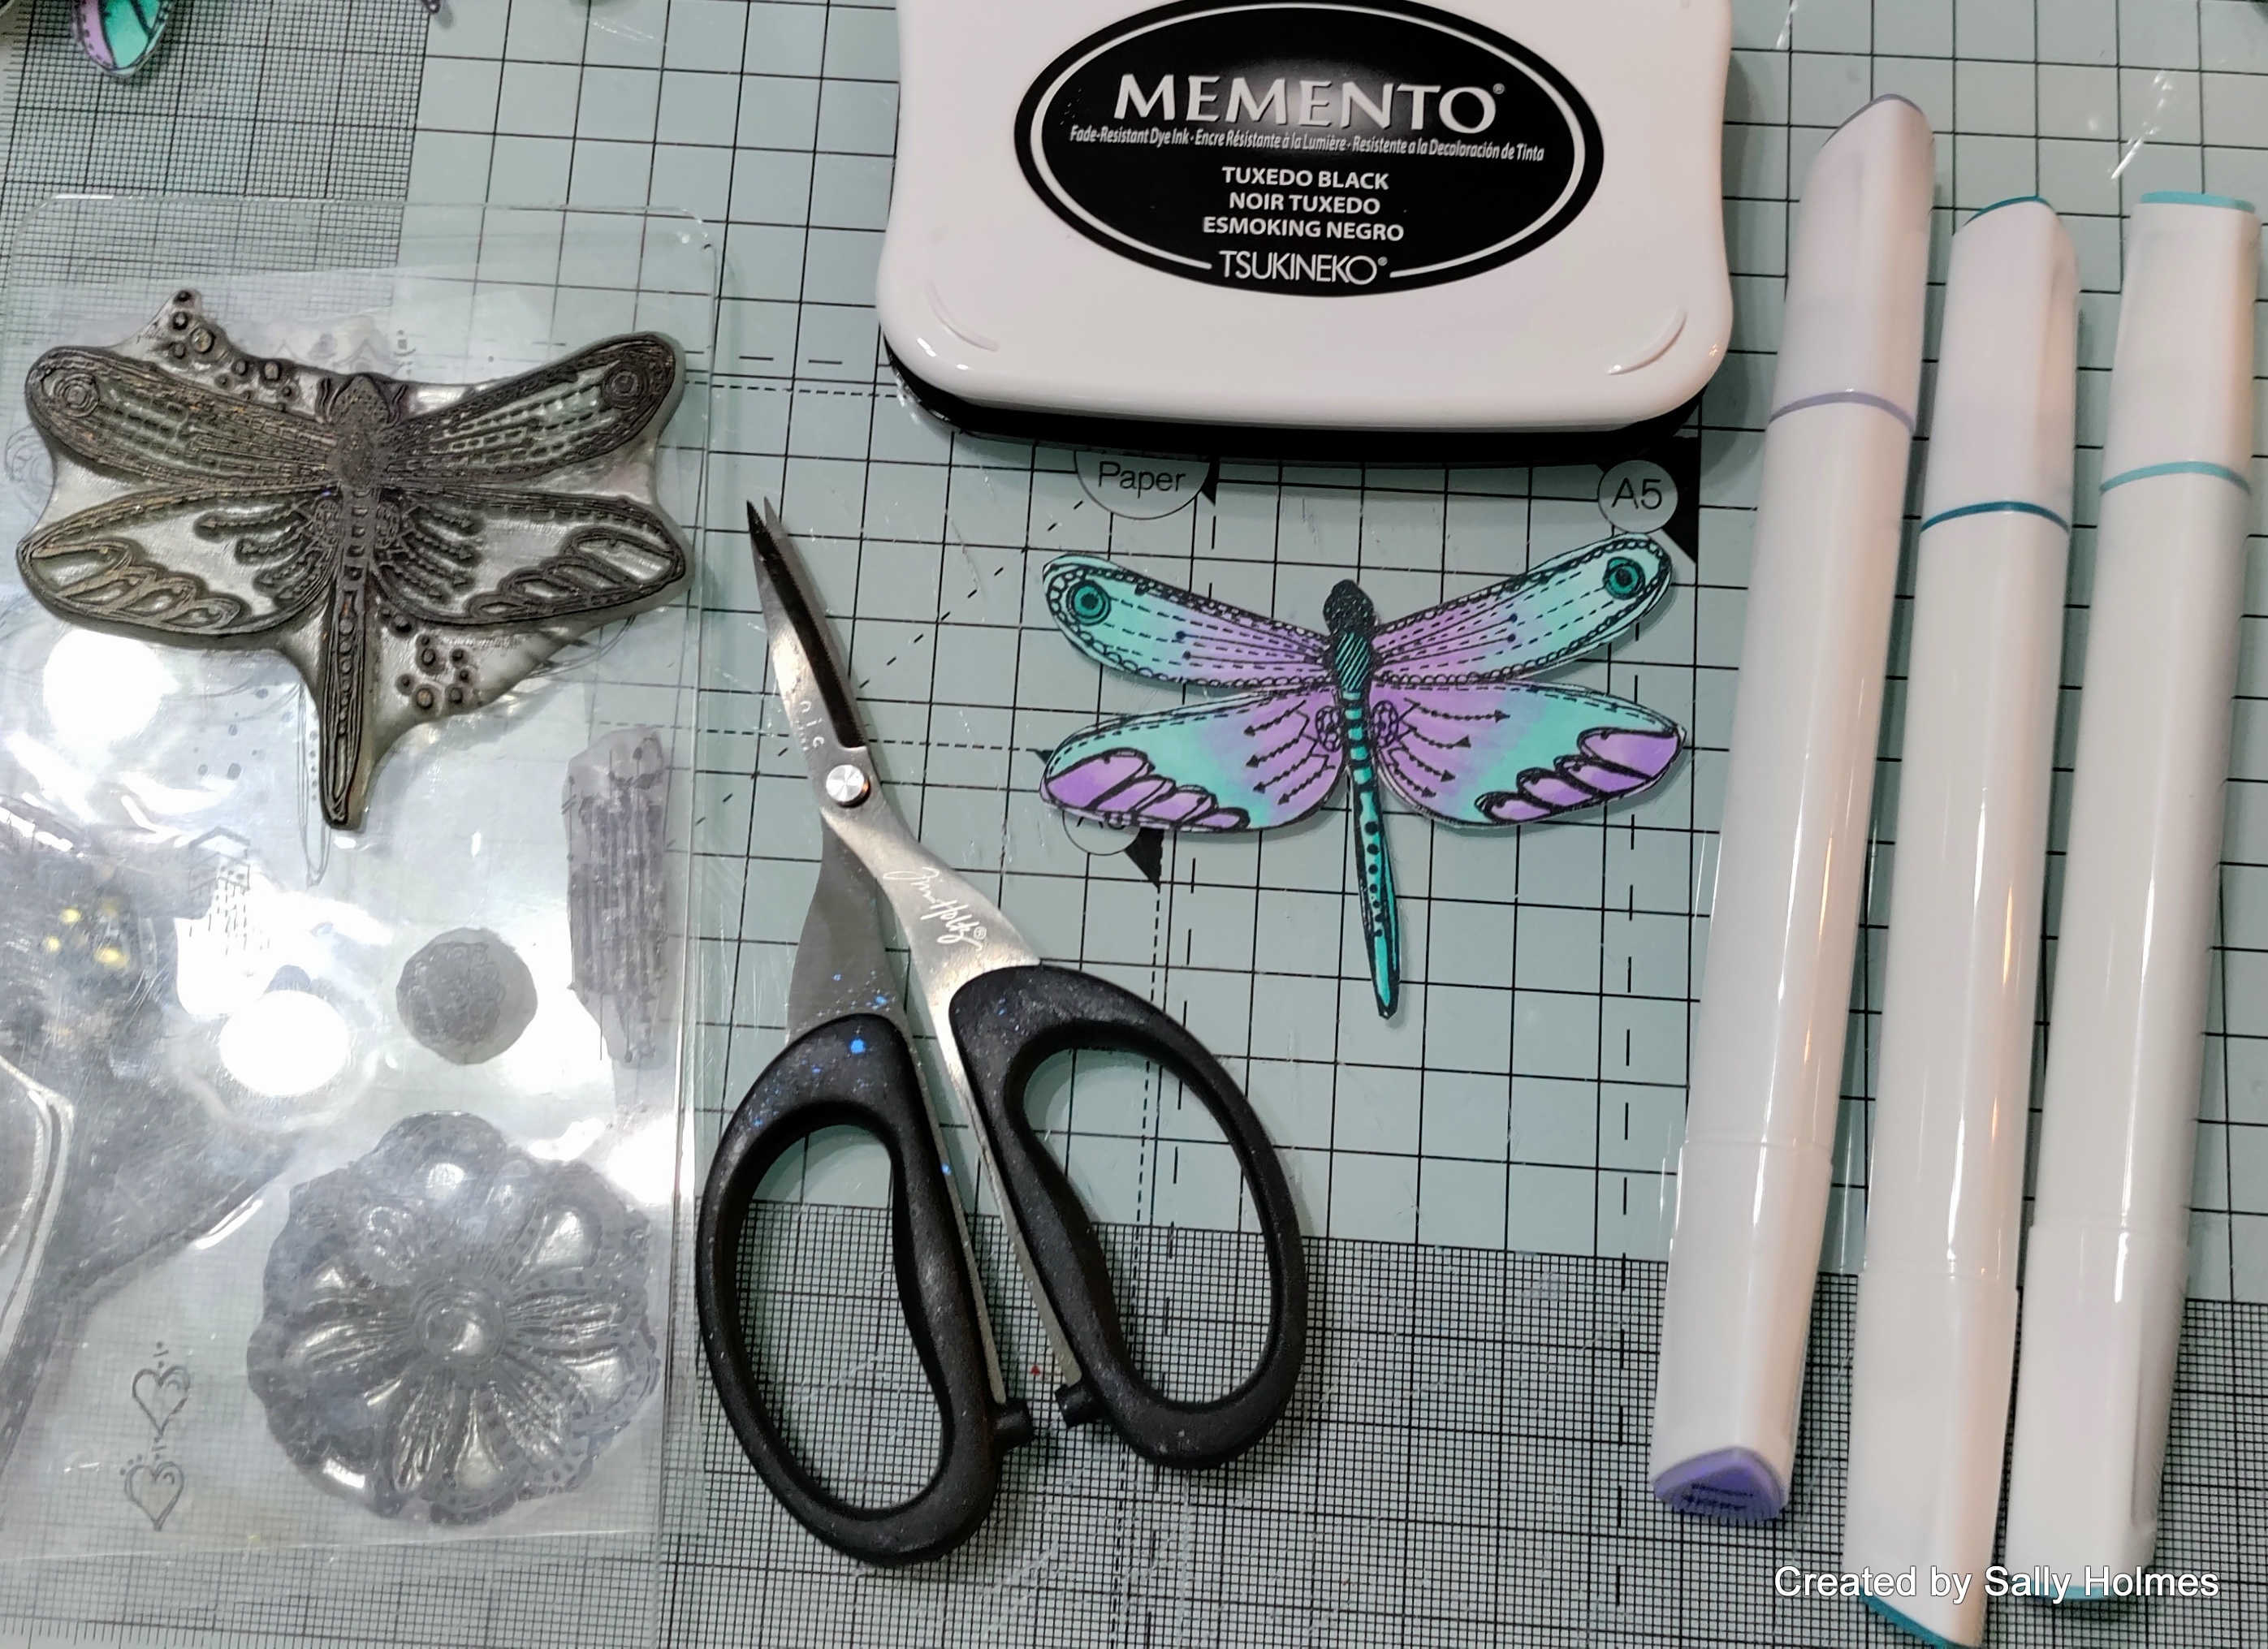
I stamped and coloured the medium robin and some foliage from the new stamp set. I cut it out and added some glossy accents. 
Whilst this dried, I trimmed down the card that the bauble was on, Stamped and embossed the Believe sentiment and splattered with turquoise and silver sprays.

when it was dry I mounted it onto a blank card and added the robin and foliage using ultra thick gel medium
Here is the finished card again. 
I used:
Robins Art stamps set
Embossing ink
memento black ink
alcohol markers

I hope you can join us for the Launch over on the Bee Crafty Facebook page tomorrow! 
Whilst I am here, here's a few photos from the Nationals on Saturday! 


We had an absolutely amazing day and I managed to get a bronze for Kata in a group of 7 qualifiers for my age group, so I am delighted! 

Thanks for looking! 

Saturday, 12 November 2022

Gallivanting...

Hi there! 
Not my usual post today as I am on my way to Sheffield to take part in the GKR National Tournament! You may remember I entered the qualifiers back in September, not expecting to get through, but I managed to get a bronze medal for both Kata and team Kata. As you read this I will be bowing in with my fellow competitors and no doubt be feeling very nervous. As they say, though, if you don't try, you will never know. I see it as much of a learning journey on what tournaments are about as anything else.
Probably the best part is being part of the team. My karate family are just awesome.
I will also be helping out as an official again as it helps to keep me from getting too nervous.
Our students are amazing and wonderful people. I really hope they do well again. I am so proud of them for getting this far. 
I will be here on Monday with a sneaky peek and a step by step using brand new stamps out on Tuesday by Bee Crafty, which I absolutely love 😘
Thanks for looking x

Saturday, 5 November 2022

A quick and simple Christmas card


Hi There! Are you beginning to panic a bit about Christmas yet? I have made very few cards so far this year and need to get a move on! Here is a very simple one to get me started. 

I began by placing the circle from the 4" easy frame in the centre of a 13cm square card, Then placing the snowflakes multi inkable over the top, taping them down at the corners. 
I used salvaged patina distress ink to blend through the stencil taking care to keep the circle central
I removed the snowflakes inkable and added more ink around the edge of the card and the edge of the circle.
I stamped the sentiment in the centre of the circle with versamark ink and heat embossed it with gold powder.
I stamped the poinsettia in black ink onto a scrap of card and coloured it using ecoline pens
I attached it to the card with ultra thick gel medium. 
Finally I added the liquid pearls around the circle 
Here is the finished card again.
I used 
13cm square white card
Poinsettia Regular stamp set (discontinued but the XL one is here)
Versamark ink
On Wednesday I did a facebook live and created these cards. 

You can find the live here if you haven't seen it yet.

Thanks for looking! 

Saturday, 29 October 2022

Moonlight and snowflakes


Good Morning! I am here with a step by step tutorial for this card. 

I began by stamping the moon in shaded lilac distress ink onto a 14cm square of white card.
Next I blended distress inks around the moon getting gradually darker.
I added some ground with a skylines inkable in the foreground using black soot distress ink. I also sponged a little around the edge. I gave this background a light spray with water and dried it thoroughly
Next I used an anti static cloth across the card. I then stamped and embossed in white randomly around the page using the snowflake from winter journaling girl Cosy
I stamped Cosy onto the background where I wanted her and also onto a piece of white card.
I coloured her with ecoline pens and cut her out.
After sticking her to the panel over the stamped image with matte medium, I added a few white pen highlights.
I stamped the spots from the same stamp set in spun sugar and shaded lilac around the edge of a 15cm square card
I attached the panel to the card and added a sentiment from winter small words using white ink and embossing powder. I added a few smaller snowflakes from the small words stamp set in just white ink too
 
Here is the finished card again.
I used:
Birds and Moons stamp set ( there is a moon on the conch shell set too)
Distress inks in Shaded Lilac, Spun Sugar, Wilted violet and Black soot
Versamark ink

Thanks for looking! 

Saturday, 22 October 2022

A quick and simple dragonfly card

Hi there! Thought I would show you how I made this very quick and simple card today.


I began by blending a little salvaged patina distress ink through the Pebble pavement big one inkable onto a 6x6" white card. As this is a clean and simple card I used stencil tape to ensure I didn't go over the edge. I left a diagonal band without any blending.

I removed the big one and positioned the outie from the 4" circle easy frame inkable centrally on the card. I blended some villainous potion ink into the circle. 
I used some of the worker stamps in opposite corners to stamp in the salvaged patina distress ink. 


Next I stamped the dragonfly in memento ink on to a scrap of white card and coloured it with alcohol based markers. I cut it out, cutting off the legs.


I also stamped the dragonfly in memento ink directly onto the purple circle in the position I wanted it.

I used matte medium to attach the coloured one onto the front of the card, lifting the wings a little. 
I added a little glossy accents to the body and parts of the wings.

Finally I added a sentiment.
Here is the finished card again


I used
Distress ink in Salvaged Patina and Villainous Potion
Alcohol markers
Black Memento ink 

Did you see the facebook lives from Thursday's MDF day? They were amazing! You can catch up with Sam and Bev's on the Bee Crafty Facebook page, and Ann's is over in the Bee Crafty Stamps facebook group.

Thanks for looking!