Monday 29 November 2021

November Rudolf Days

Hi There! 

We got back from a little holiday in the Fens today so I wasn't sure I would manage to make the Rudolf days Challenge. We managed a lovely week away with Meg and her partner and were mostly lucky with the weather, although Storm Arwen brought enough wind, rain and sleet to make up for it!  Luckily I had made some cards before I went during a facebook live so here they are as my entry this month. 


These first two were made with Bee Crafty Botanical sprigs stamps, with some additional snowflakes and sentiments from the yuletide XL Robin set.


The next three were made with the Bee Crafty snow border, flakes and words. I managed to make all 5 in an hour too. If you want to see how the video is here 
Do pop over to Mo's blog and leave some love!  
Thanks for looking! 

Chocolate and cash!


Sometimes we want to give a small gift to someone either as a thank you or for a special occasion. Sometimes this might be a little something to accompany a gift card or some cash. My friend Valerie came up with this lovely idea which I have adapted slightly, and could be adapted for a  gift card too. 

I began with an A4 sheet of  200gsm kraft card, which I measured and scored as follows:

In landscape I scored down at 8cm, 9.5cm, 17.5cm,19cm and 27cm. I also scored along the top and bottom 1.5cms from the edges. 
I cut off the remaining piece of card to the right, along with the 9.5 cm strip along the top and bottom edge from the right hand end. This is what I was left with.
I rounded the corners of the flap and cut from the edge to the first fold top and bottom.
Next I randomly stamped snowflakes in white and chianti ink all over the card.
I used pva glue to attach the small flap to the inside-front of the box then stuck the sides together, making a 3d envelope. 
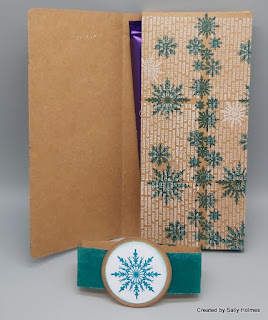
I used another piece of Kraft card, measuring 16x7.5cm to make a separate pocket, using a circle punch to make a semi-circular indent on one edge.

 I stamped this with snowflakes too, rounding the corners and adding a little brown ink along the edges.
Using double sided narrow tape around three edges I attached it to the front of the inner box.
I added the bar of chocolate and the cash into the pocket. If I was giving a gift card I would make a pocket smaller to fit it.

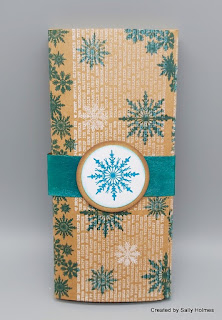
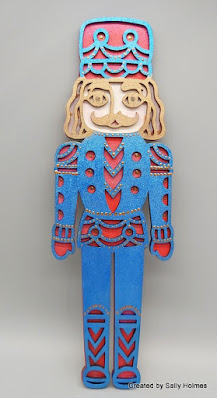
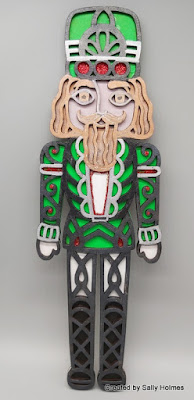
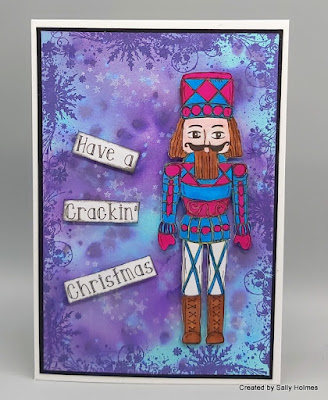
I created a belly band for it's closure using a ribbon, measured to be the correct length (approximately 22cm allowing for overlap) and secured with Gel medium. To cover the join in the middle I added the smaller nutcracker which had been stamped and coloured whilst I was making samples. 
Here is the finished gift.
This was made to fit a 110g bar of Cadbury's Dairy Milk and cash but could easily be adapted to fit other brands and, if needed, a gift card. I am sure it would be useful for gifts at other times of the year too. 
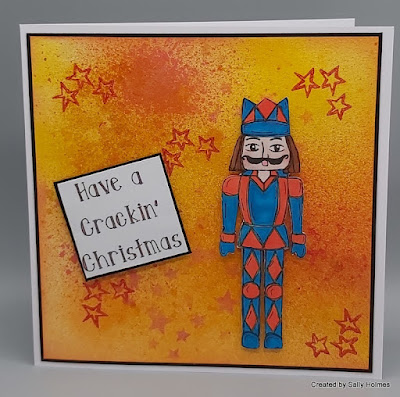
Here is another without the money wallet and just using the snowflake border set. 

For this one I used the strip of card from the end of the A4 sheet, painted with Polished Jade Dylusions shimmer paint for the belly band. The inks were Versafine Clair Warm Breeze and the Hero Arts unicorn white.
For the first I used:
One and a half sheets of A4 200gsm Kraft card
Versafine Clair Chianti
Hero Hues Unicorn white ink
Approximately 22cm of coordinating Ribbon 
Coloured pencils
gel medium

Thanks for looking! 

Monday 22 November 2021

Bold Colours!

Hi There! I have been enjoying getting inky and combining some different colours into a simple card where the sentiment is the focus. Here is how I made it.

I began by blending seedless preserves and faded lilac distress oxide inks onto a 14cm square of mixed media paper. 
I then placed over the mandala 4 inkable and blended prize ribbon ink through it 
Next I splattered it with water...
...and some Pretty Gets Gritty Artemis Explosion powder mixed with water. I set it aside to dry. 

I stamped the sentiment in versamark ink and embossed with gold embossing powder before matting and layering it to the card on sticky pads.
Here is a closer look at the finished card. It makes me think of batik fabric. 
I used 
6 x6" blank card
Black card
Mixed media card
Sticky pads or 3d gel for attaching the sentiment
Before I go here are my Nutcracker samples for the Craft Store show last week
I decorated 4 of the regular sized mdf nutcrackers


For this one I used alcohol pens on parchment paper stuck behind the front piece
This was the same nutcracker but not backlit
I also made a couple of cards combining the stamps with some older stamps over inky backgrounds...


Next week's project may well involve a nutcracker too! 

Thanks for looking and I hope you can join in the challenge over in the Bee Crafty Facebook group where the theme is Stay subtle or Be Bold with your colours! 


Monday 15 November 2021

Using Masking to make a Festive Card

Hi There! Last Tuesday I shared some ideas for single layer festive cards on the Bee Crafty Facebook page. Here is another idea that is quick and easy to do.

I used a 15cm card blank and stuck a 7.5cm sticky note to the centre.
Next I blended Broken China distress ink through the snowflake inkable on to the area around the sticky note.
I removed the larger note then placed a 5cm square sticky not in the centre and blended a little more ink around it.
I stamped the Holly and mistletoe in black ink and the snowflakes in broken china ink onto the card. 
Next I stamped the sentiment into the central square and coloured the leaves with ecoline pens.
A few drops of liquid pearls and glitter glue finished it off.
Here is another look at the finished card. 
I used:
15x15cm blank card
7.5 and 5cm square sticky notes
Liquid pearls and glitter glue
blending brush

Thanks for looking! 


Monday 8 November 2021

Warm Winter Woollies Tag

 Hi There! I am here with a step by step for this tag and a bit of bold colour to liven up Monday morning!

Here is how I made it. 
I took a size 10 Dina Wakely tag and painted it with Dylusions paint in patches of fresh lime, periwinkle blue and blue lagoon. I then realised it would be slightly too long to fit on the journal page in my Dylusions mini journal, so I trimmed 2 cm from the bottom edge. 

Next I used the texture border stamps to add some black ink around the edges.
I added some texture circles in unicorn white and twisted citron ink. 
I stamped the Warm winter journaling girl onto a scrap of watercolour card and onto the tag. By doing this you can cut off the fiddly bits but still have them on the background. In this case the beautiful curly locks.
I used ecoline pens to colour my girl and cut her out.
I stuck her onto the tag over the stamped image with matte medium.
Next I chose two sentiments from the winter small words set, stamped in versafine onto black card and embossed with fine detail white embossing powder.
I added these to the tag with matte medium too. 
Here is the finished tag stuck to a page in my journal....
and here is the double page spread showing the bold background from this week in contrast to the subtle one from last week. Both of these would be great entries into our facebook challenge over in the Bee Crafty Stamps Facebook group, where the theme this month is Stay Subtle or Bee bold, and you can enter up to 3 times! 
I used:
Versamark ink
For those of you on Facebook, I will be doing a facebook live tomorrow at 8pm over on the Bee Crafty page making some festive cards, so please do come and join us for a crafty natter and another view of my messy desk, lol! 
Thanks for looking!