Showing posts with label bauble. Show all posts

Monday, 14 November 2022

A sneaky peek step by step!

 
Hi there! I thought I would show you a step by step using the brand new stamps out tomorrow from Bee Crafty! The new Robin stamps are absolutely gorgeous and I can't stop making with them!  Here's what I did...

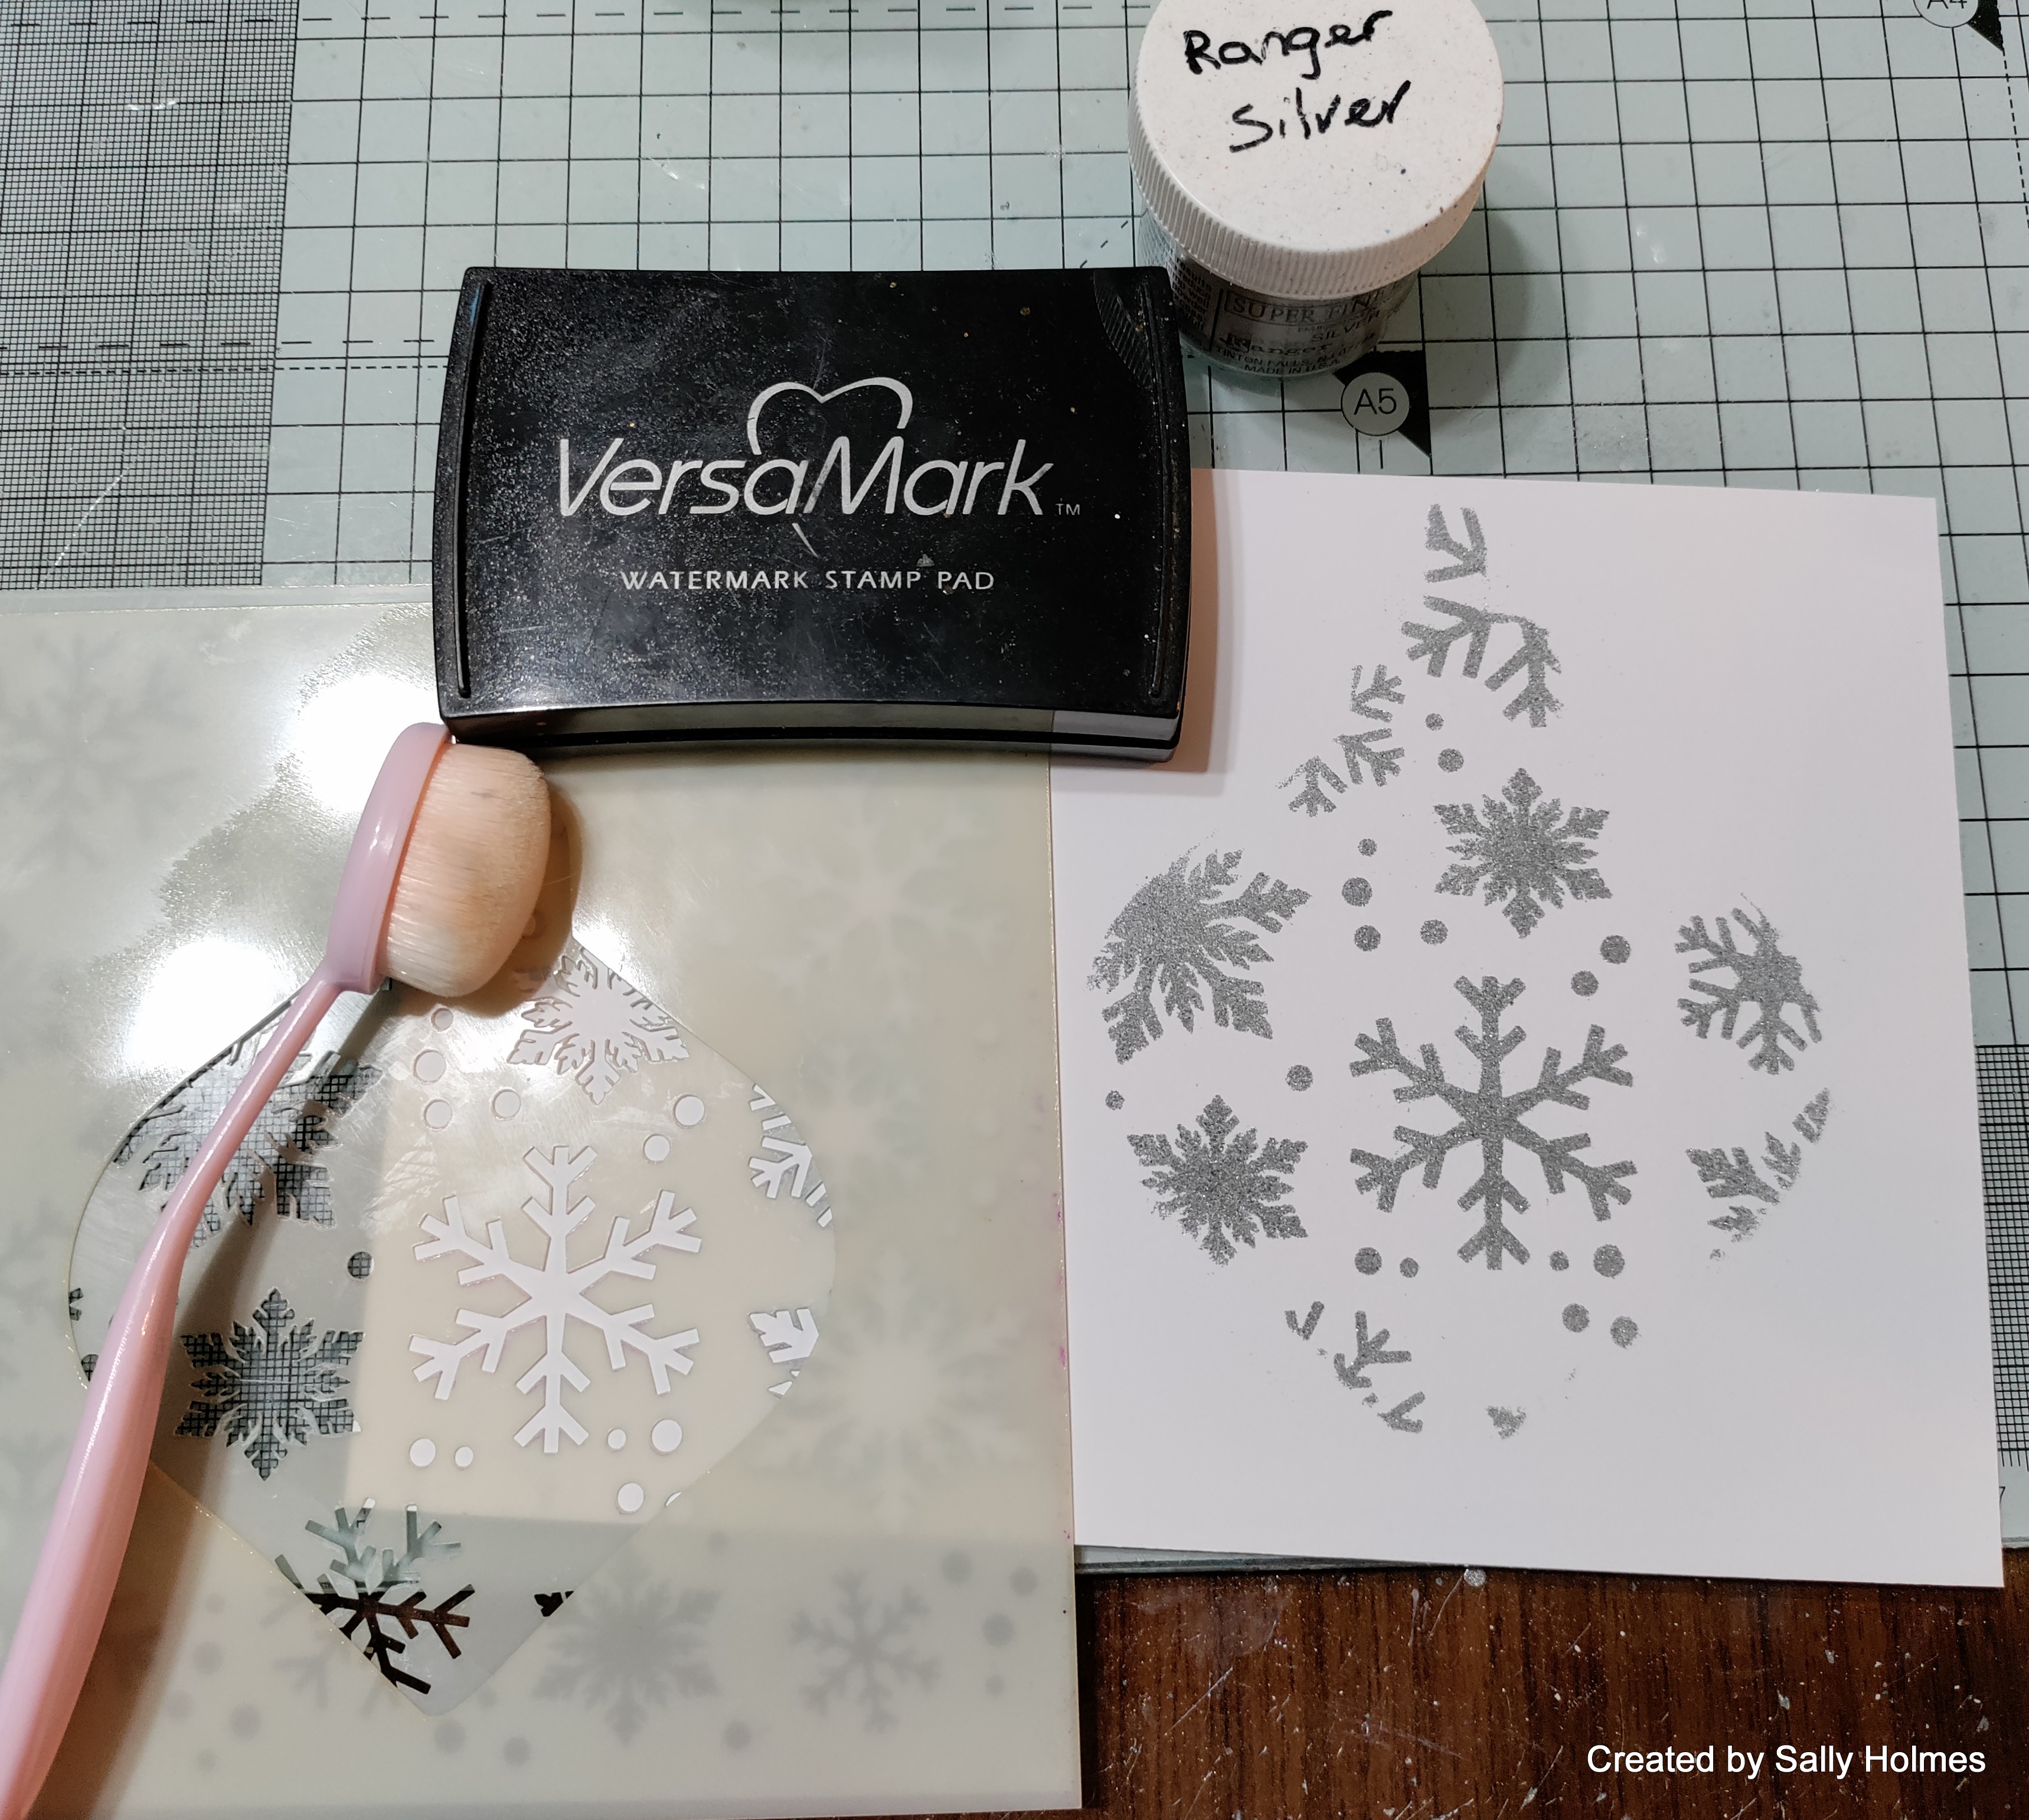
I began by blending versamark ink through the multi snowflake inkable and the large bauble #1 easy frame. Then I heat embossed it with ranger silver embossing powder.
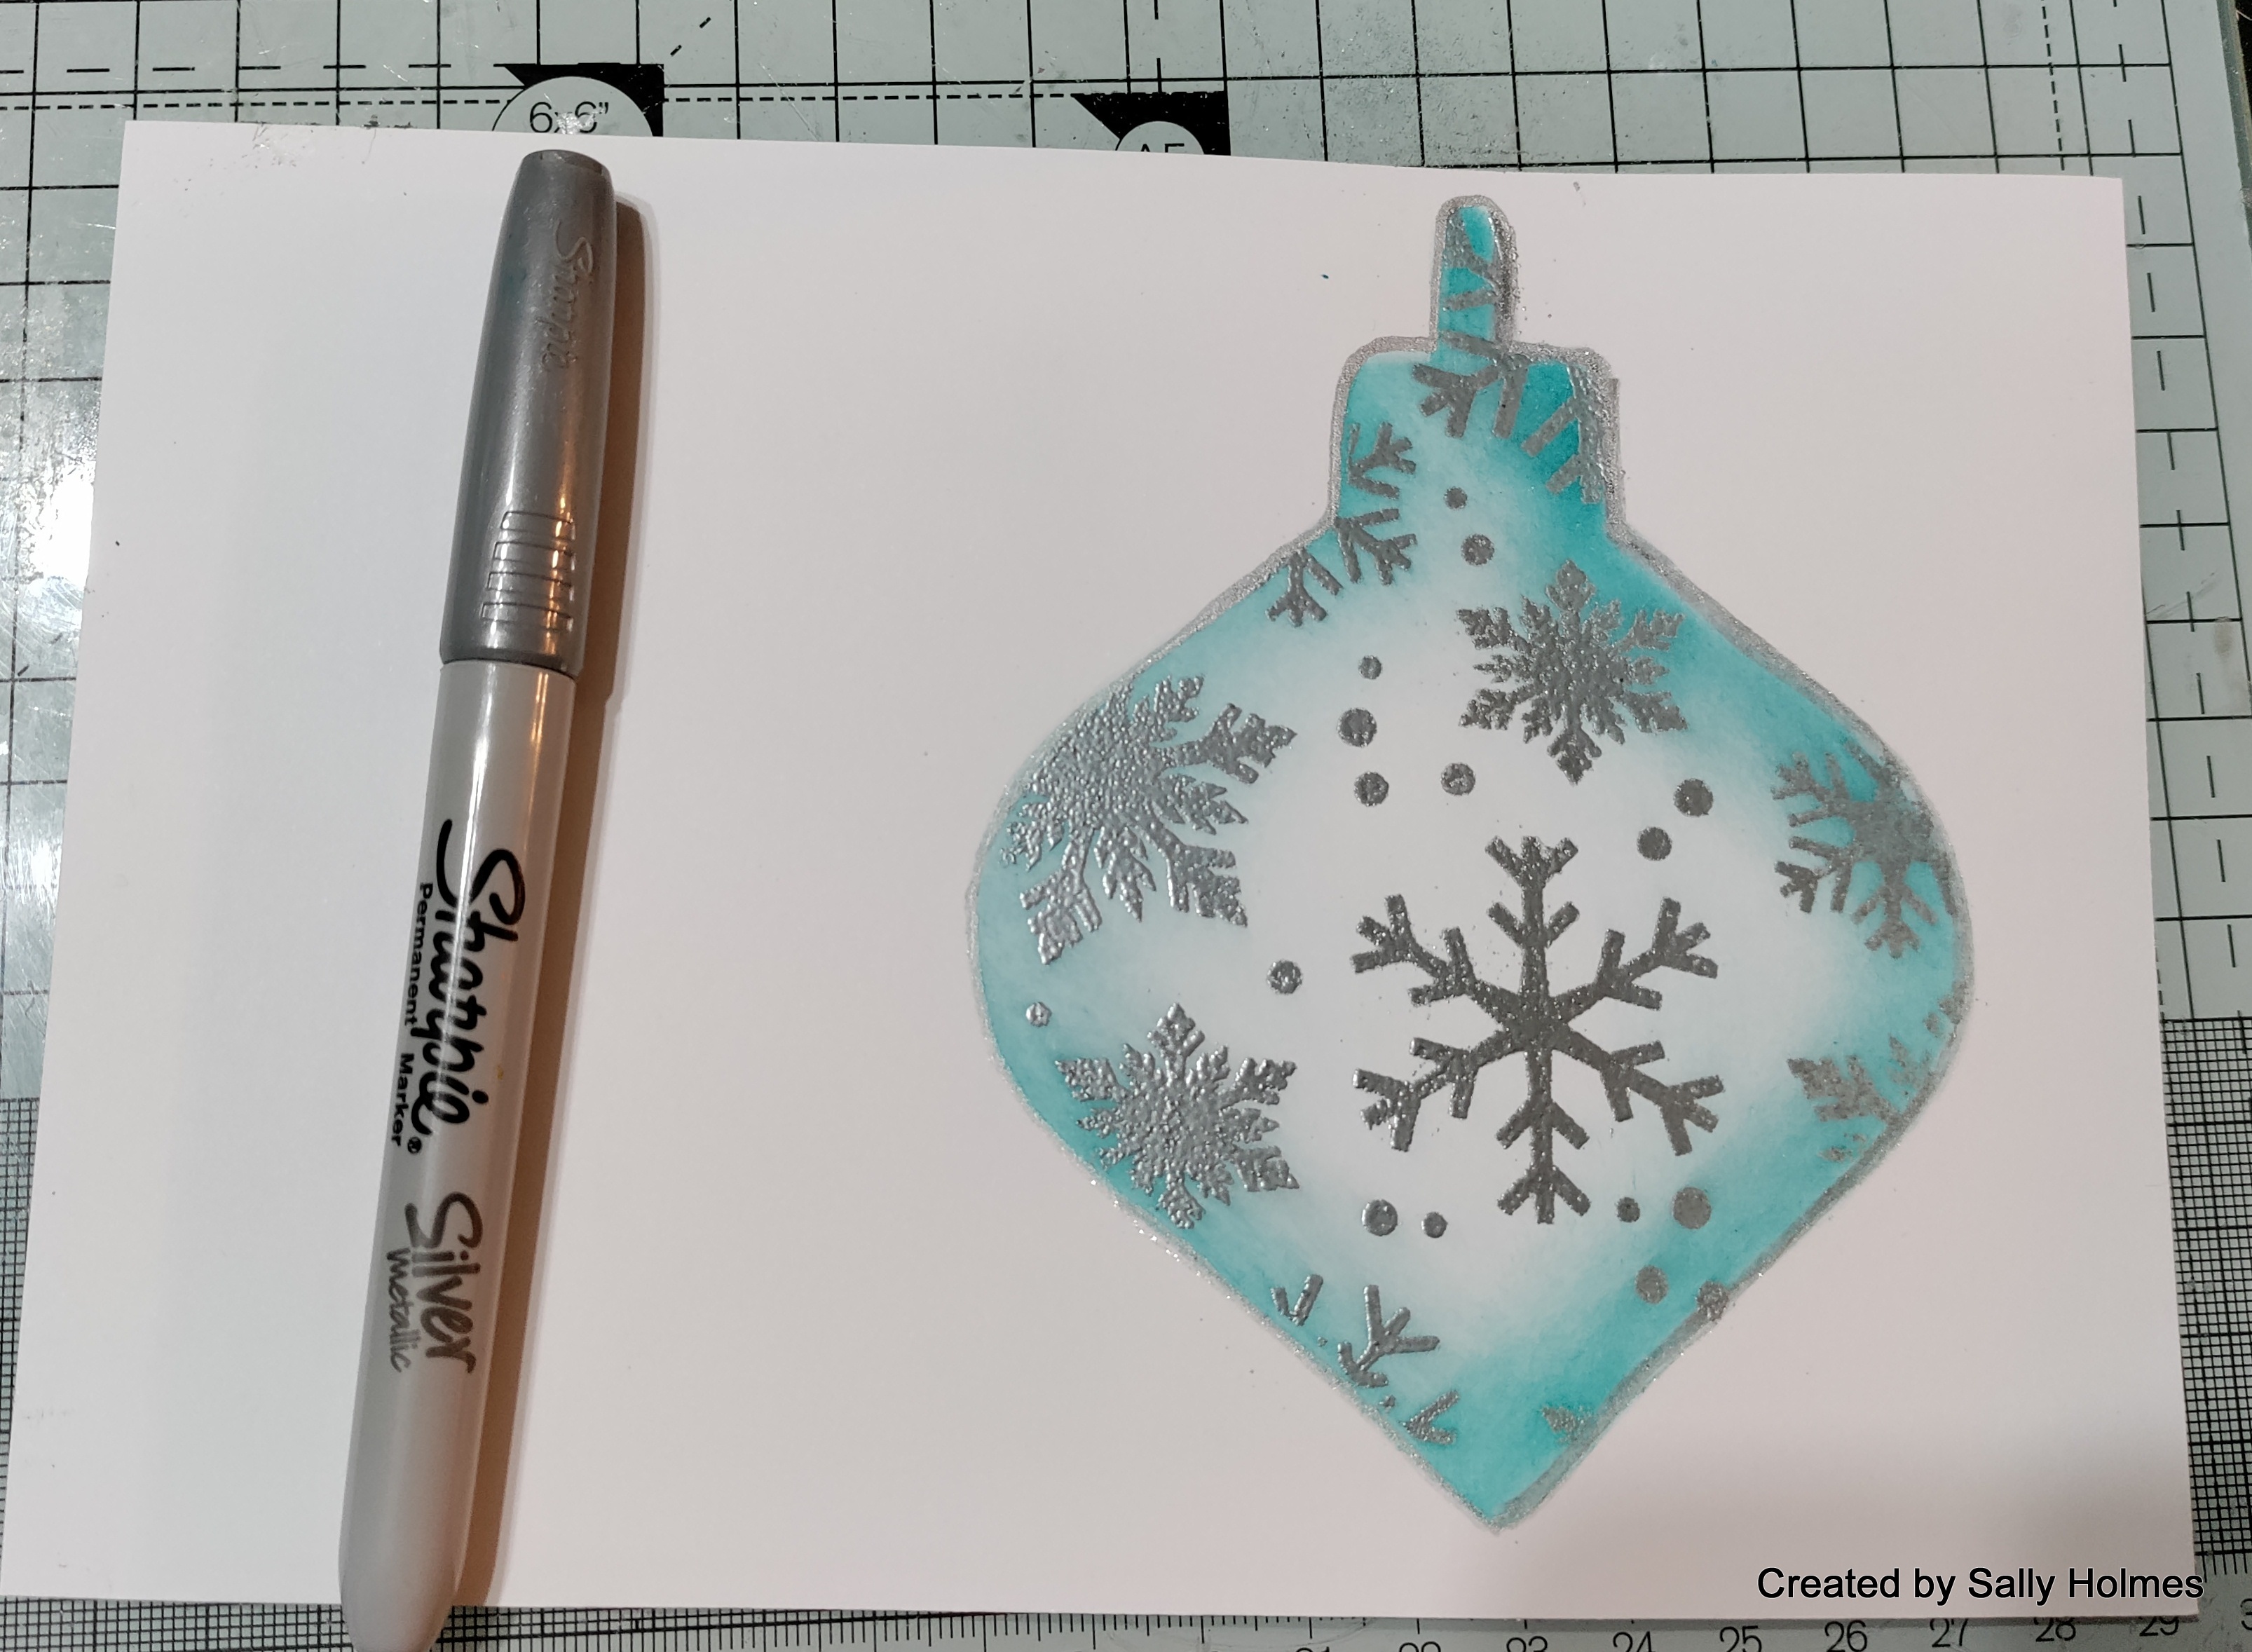
Next I placed the bauble easy frame over the embossing and blended some peacock feathers distress ink around it, making it darker at the edges and paler in the middle.                                                            
I used a silver sharpie pen to outline the bauble.
Next I placed the innie from the inkable over the bauble and lightly blended some black ink around it to create a shadow.
I stamped and coloured the medium robin and some foliage from the new stamp set. I cut it out and added some glossy accents. 
Whilst this dried, I trimmed down the card that the bauble was on, Stamped and embossed the Believe sentiment and splattered with turquoise and silver sprays.

when it was dry I mounted it onto a blank card and added the robin and foliage using ultra thick gel medium
Here is the finished card again. 
I used:
Robins Art stamps set
Embossing ink
memento black ink
alcohol markers

I hope you can join us for the Launch over on the Bee Crafty Facebook page tomorrow! 
Whilst I am here, here's a few photos from the Nationals on Saturday! 


We had an absolutely amazing day and I managed to get a bronze for Kata in a group of 7 qualifiers for my age group, so I am delighted! 

Thanks for looking! 

Monday, 7 December 2020

A Snowflake bauble for Bee Crafty

                  
Hello there! It is Monday and time for another DT share for Bee Crafty. Today I made a Doodle Art Snowflake Bauble. 
I used:
 A clear bauble (available from various craft shops like Hobbycraft, The Range and The Works)
Ribbon

Here is what I did:
 
I stamped the snowflake 3 times in versafine clair ink. You could use any ink that isn't water- based.
Next I coloured the snowflakes with the ecoline pens and cut them out.
I gently folded each of the snowflakes down the centre line and stuck the three together by two tips on each side.
If you want to go sparkly at this stage add glitter, glitter glue or use a sparkly pen. 
Once dry, place the snowflakes inside the bauble and put the two halves together. 
Add a bow and dangle from your Christmas tree! 
I do hope you like it! 
Thanks for looking and I hope your preparations for Christmas are going well!

Sunday, 1 December 2019

December at Stamping Sensations

 It is the first Sunday of the month and time for our December challenge at Stamping Sensations. This month we have a lovely easy theme, perfect for this time of year....
****Anything Goes****
My cards this month were made with a woodware stamp. I stamped and paper-pieced them all. The first and second were made with a cheap and cheerful paper Addicts pad called Yuletide Wishes that I picked up in 'The Works'. 
For my third card, I embossed the base card and added a die cut snowflake border, also from The Works. The blue and gold paper was left over from an inky mica spray session a while ago.
   

Please can I remind you we are a stamping challenge so must see a stamped image which reflects the theme as the focal element of your artwork , this means:
Stamping must be the central point of attention and interest

Our prize this month is A £25 voucher to spend at Be Creative!   Do pop over to the challenge blog and take a look at the fabulous creations from my talented team mates and more details of that great prize! Thanks for looking!  
About an hour after this post goes live I will be setting up for our local craft fair (just round the corner) and hoping to sell lots of cards, candles and MDF. If you are near Nottingham, I will be at Woodthorpe Park Plant Shop in the green houses from 10 am to 4pm today. Pop and see me and say hello!