Showing posts with label single layer. Show all posts

Wednesday, 4 October 2023

Ode to a tree


Hi There! With Autumn approaching fast, I thought I would get out the sycamore leaf easy frame and make an autumnal card this week. Here is how I did it.

I began by blending fossilized Amber and Crushed olive distress oxide inks through the outie of the inkable, onto a 5" square ivory card.
Next I added more leaves, offset form the first ones in Ripe Persimmon, crackling campfire and vintage photo distress oxide
I inked up the crackle stamp with tea dye distress ink and stamped it in patches over the inked background. I also sponged some around the edges of the card
Next, I randomly stamped one of the mandala stamps from set 1 over the background in Vintage photo Distress ink. 
On a scrap of ivory card I stamped the sentiment from Wordage Ticker Tape set 1 in Pinecone Versafine Clair ink and cut it out.
Using sticky pads and some matte medium I added the sentiment and some coordinating sequins to the leafy background. 
Here is the finished card again. 
I used:
5" square ivory card base
Distress oxide inks in Crushed olive, fossilized amber, Ripe Persimmon, Cracking Campfire and Vintage Photo
Distress inks in Vintage photo and Tea Dye
Sticky pads 
Sequins
ivory card snippet

I'm dedicating this one to the wonderful Sycamore Gap tree that is sadly no more. I really hope it regrows or another solution is found. Thanks for looking! 

Wednesday, 27 September 2023

Bee-lieve

Hi There! For my step by step this week I have another layered ink card for you. Here's how I made it.
 
I began by masking a border with stencil tape and blending a mixture of mustard seed and Lumberjack Plaid Distress ink onto a 5x5" card base. 

I then stamped the so Square background stamp in Mustard seed distress oxide over the top before removing the stencil tape. 
I used one of the borders from Freehand borders #1 in lumberjack plaid around the square, masking off the corners with a post it note.
I neatened up any missed sections with a red fineliner pen. 
Next I stamped the largest bee from the BEE mine set onto a scrap of card in black Versafine Clair ink. I also stamped some of the honeycomb outlines in the lumberjack plaid ink over the background.
I smooshed the bee with the same inks and then cut it out.
Finally I added the bee to the background using 3d foam pads and added a sentiment from the same stamp set. I used two colours so this would be perfect for the Bee Crafty Stamps Facebook  group Challenge, which you still have a few days to enter.
I used:
5x5" card blank
Distress inks in Mustard Seed and Lumberjack Plaid 
Distress oxide ink in Mustard Seed
3d foam pads

Thanks for looking! If you have booked to do my workshop on Saturday, I will look forward to seeing you in the group. 

Saturday, 21 January 2023

Layers of ink Bee Card

Hi there! I have been busy making samples for the relaunch of Bee Crafty's Bee Monarchy stamp set on Tuesday. I thought I would whet your appetite with a sneaky peek step by step. 
 

I began by putting masking tape around a 5x5" square ivory card. As you can see I overlapped the edge by about 3mm to give a slightly narrower border.
I blended distress ink in Wild Honey and Tea Dye over the centre, making it a shade darker at the edge
Next I used the Honeycombe full inkable to add a little stencilling top left and bottom right.
I inked up the crackle background stamp with vintage photo distress ink and stamped it lightly over the card
Using Versafine Clair black ink I stamped the largest bee in the middle of the card.
I used Ecolines to colour it in.
I stamped a few of the honeycomb stamps from the Bee monarchy set in wild honey ink before removing the tape and stamping the sentiment from the small words set. I also added a tiny bit of white pen to the eyes and tail of the bee. 
Here is the finished card again. 
I used:
5x5" ivory card blank
Masking tape or Stamp and Stencil tape
Distress inks in Wild Honey, Tea Dye and Vintage Photo
Bee Monarchy stamp set (it will be there on Tuesday!)

The re-launch of this fantastic set of stamps will be over on the Bee Crafty Facebook page from 10am on Tuesday. There will be lives and lots more! See you there!

Saturday, 3 December 2022

Keeping it simple

Hi there! 
I am trying to get as many Christmas cards made as possible over the next few days now postage dates have changed. Here's a step by step for a quick clean and simple card.
 
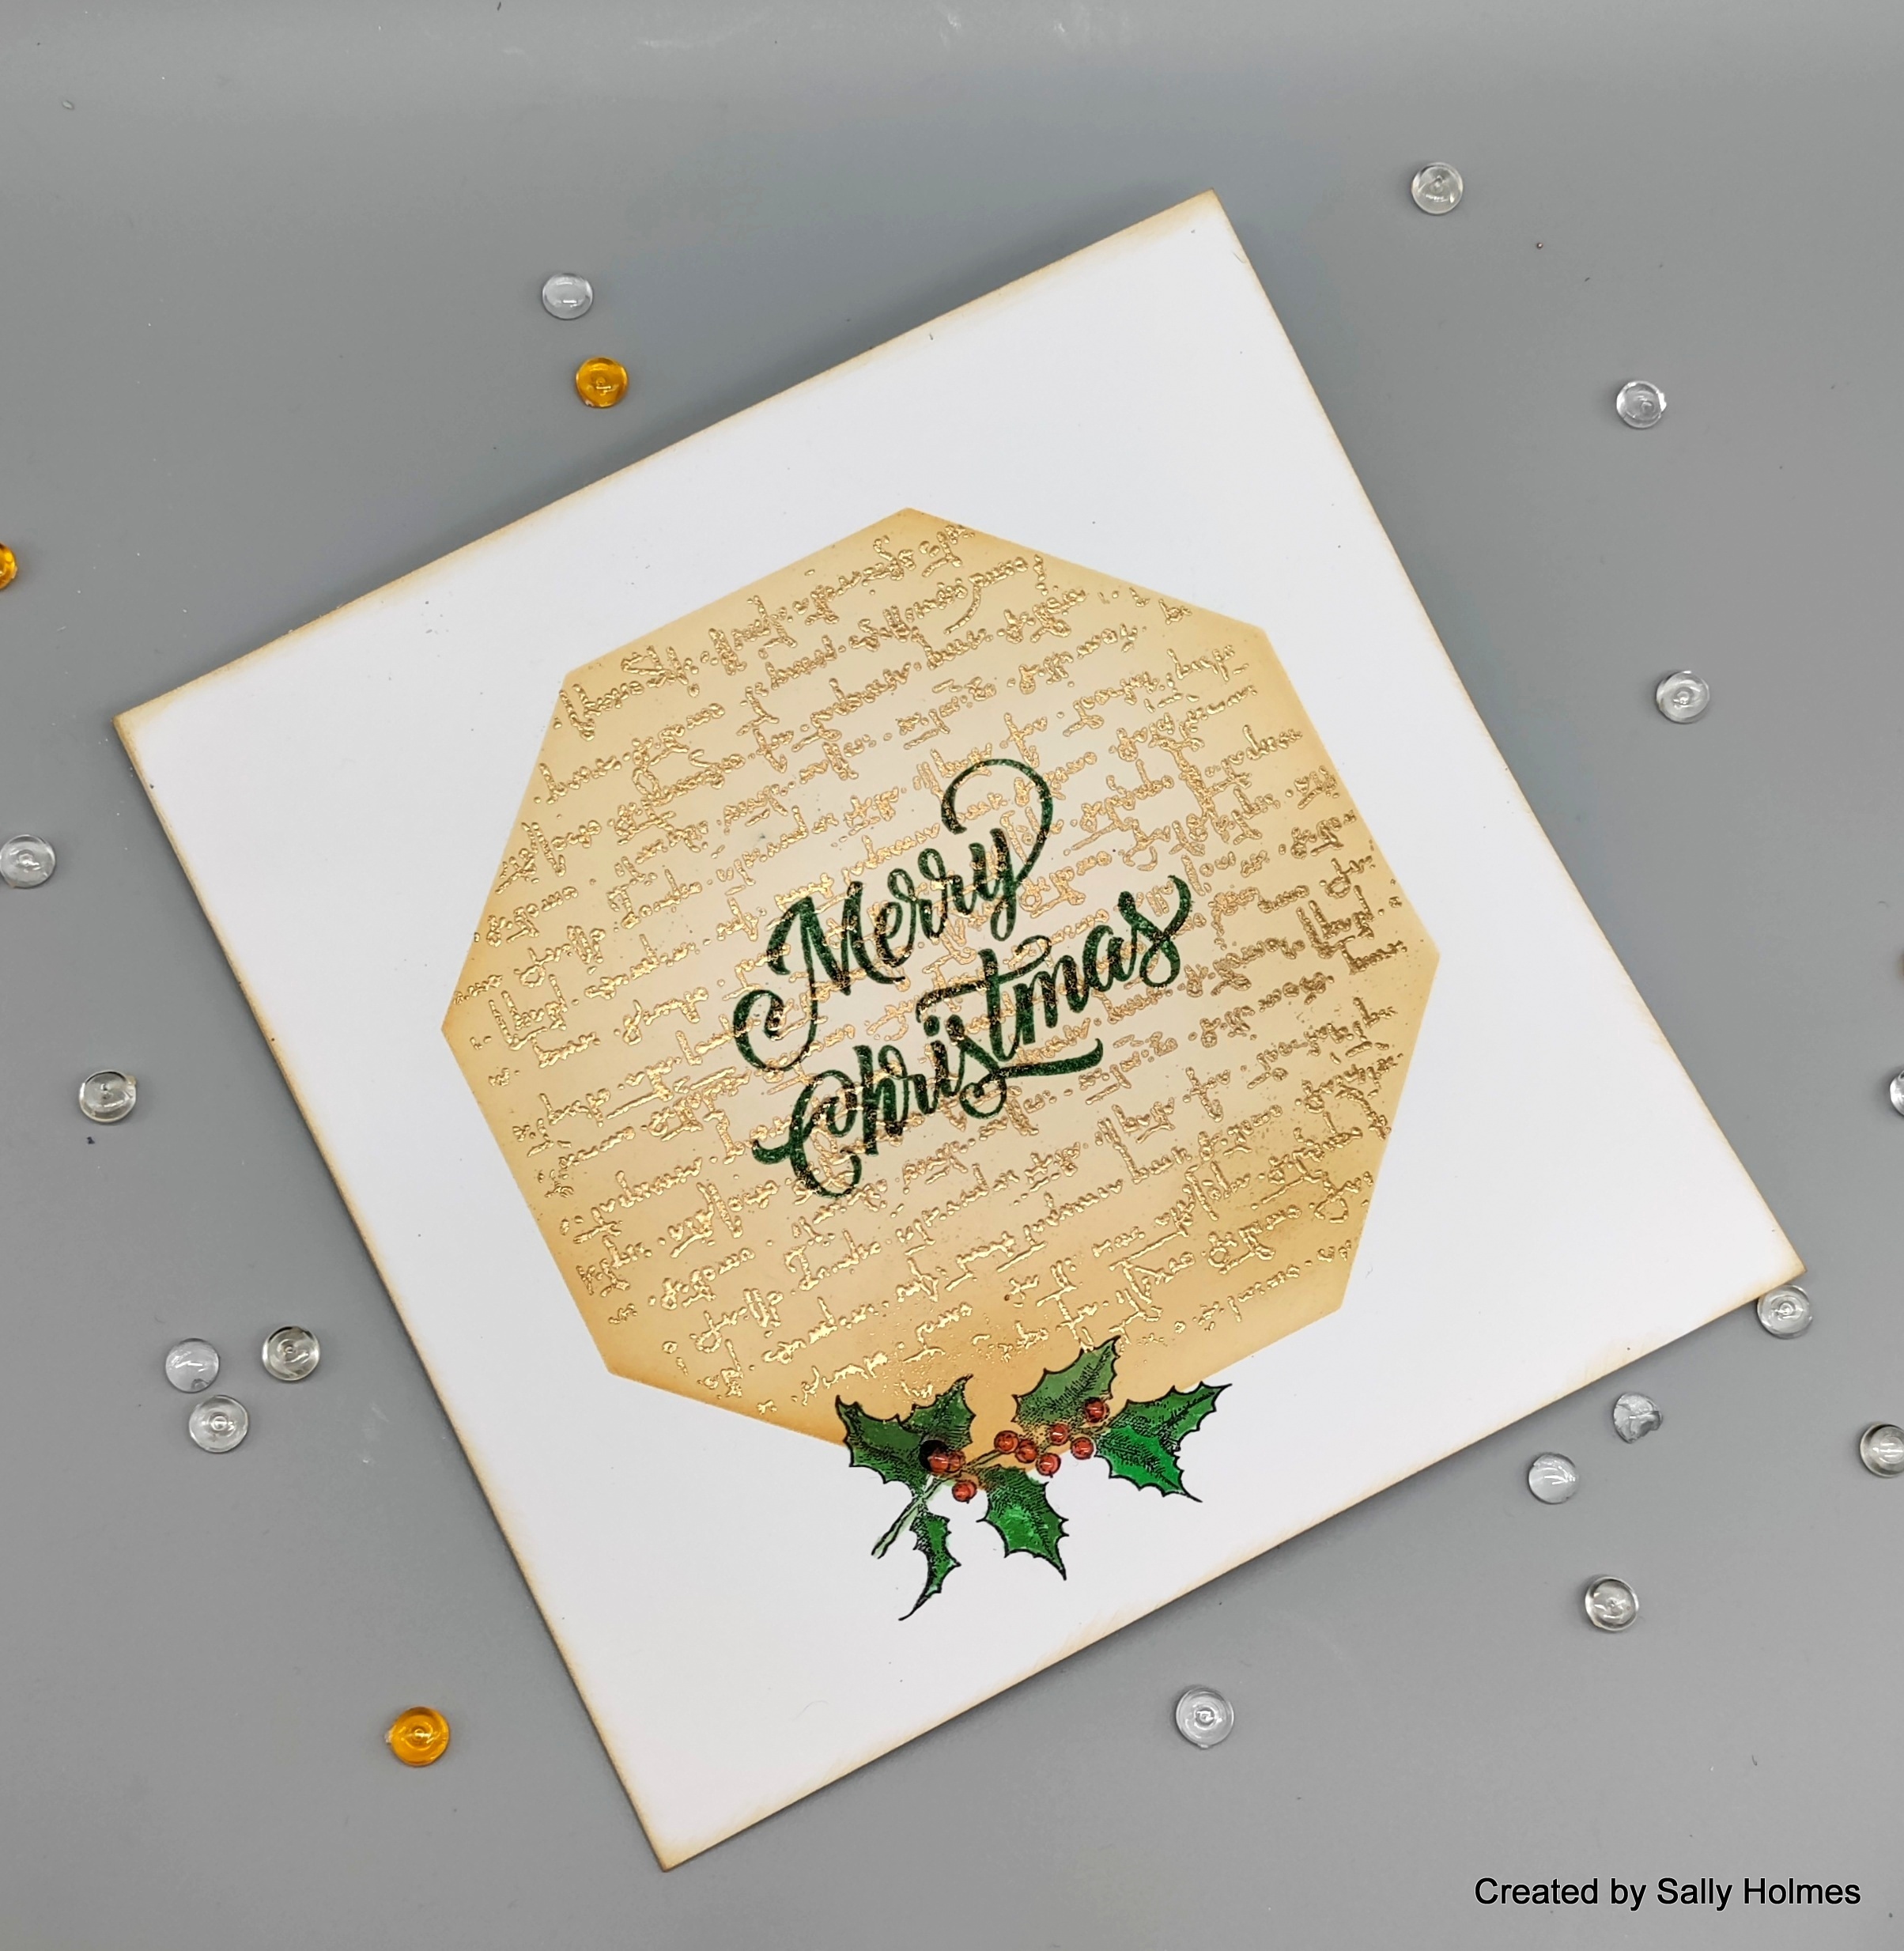
I began by taping the 6x6 octagon easy frame to the front of a 6x6 white card and blended tea dye and vintage photo distress ink into it.

Once this was dry I gave it a quick wipe with an anti static cloth then stamped the script stamp in versamark with the easy frame inkable still in place. I removed the inkable, sprinkled with embossing powder and heat set.
There was a small area bottom left where the embossing ink hadn't reached, so I stamped the Holly stamp from the robin set and coloured using ecolines and a damp paintbrush. 
Next I stamped the Merry Christmas stamp (from the wreath set) in Versamark in the centre of the card. I sprinkled over rustic wilderness embossing glaze and heat set it. I also added glossy accents to the berries on the Holly.
Here's a close up. As you can see the gold is still visible through the embossing glaze. 
I sponged a little vintage photo distress ink around the edges to finish it off. 
I used: 
Versamark ink
Before I go, I did a live on Wednesday over on the Bee Crafty Facebook page and made 3 baubles using the MDF baubles and a variety of stamps. I used red green and gold, which is the new theme for the challenge over in the Bee Crafty stamps group. Here are the baubles 
Thanks for looking! 

Saturday, 10 September 2022

A quick and simple card

 I don't know about you, but it is all feeling a bit strange at the moment, but sometimes, losing yourself in a bit of crafting is a good tonic. Thought I would share a simple card that I made before the news broke on Thursday evening. Here it is.

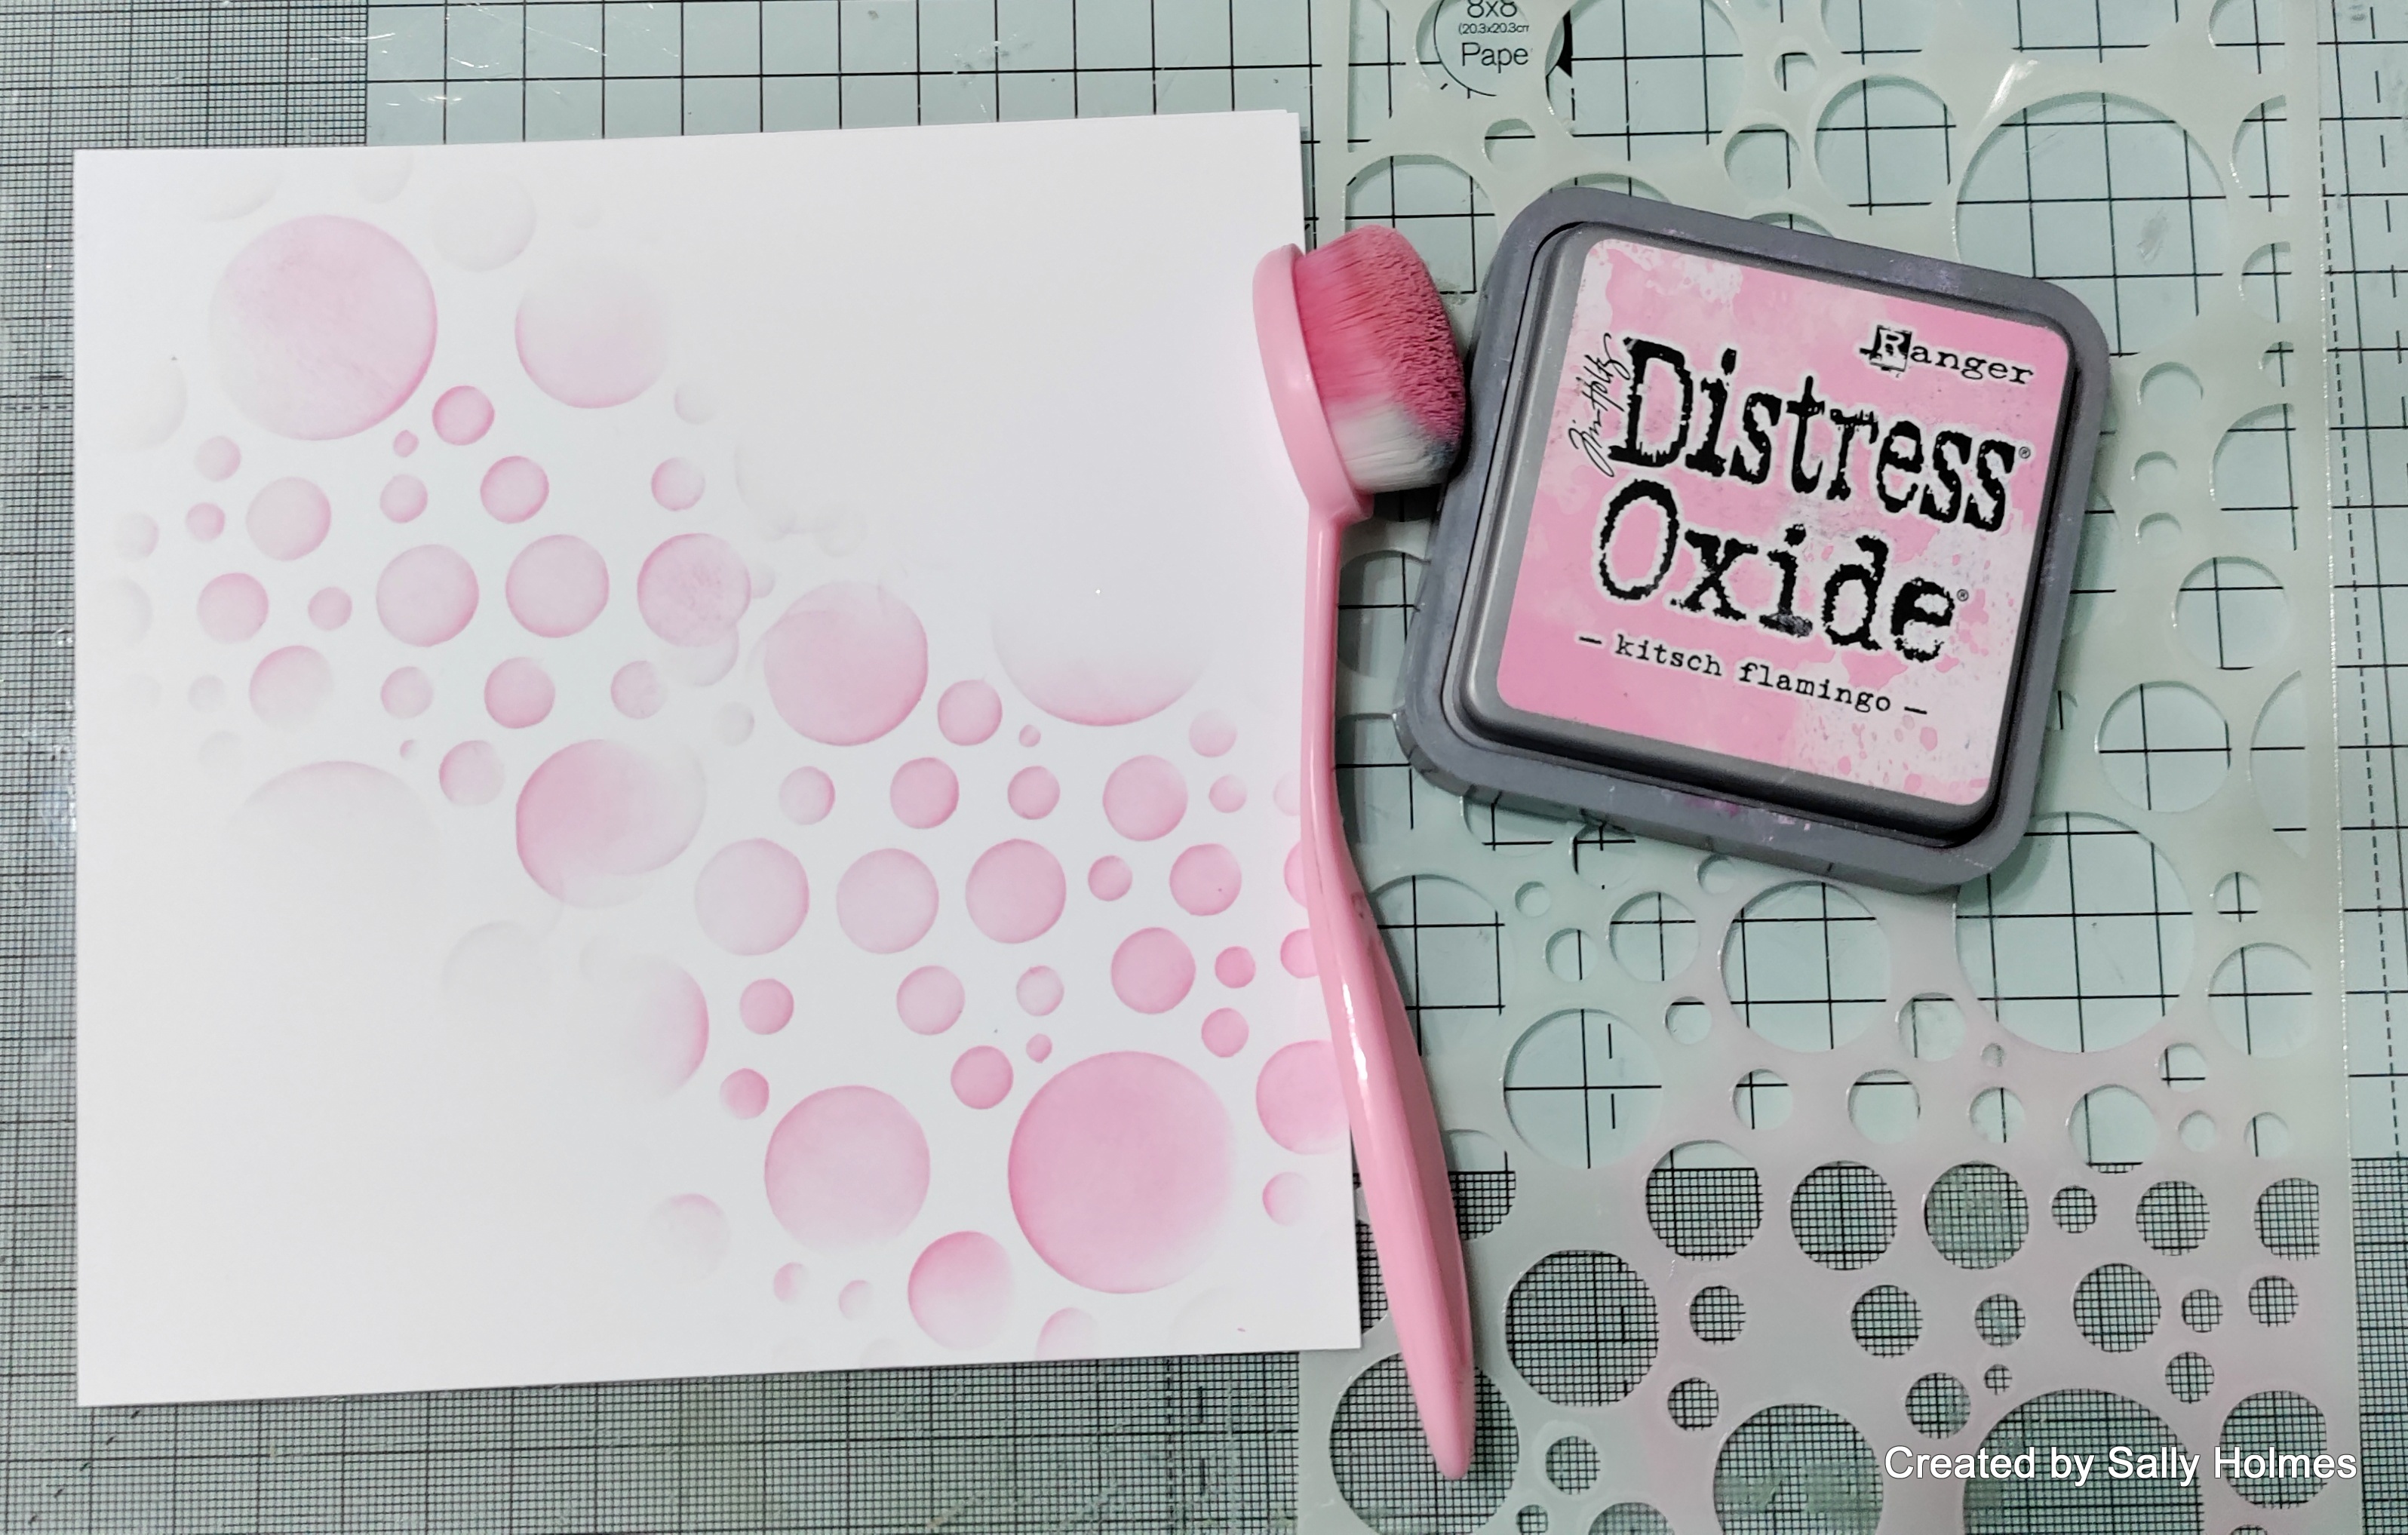
I began by adding some kitsch flamingo distress oxide ink through the Circles 1 big one inkable directly onto a white 6x6" card blank.
Next I placed the 4"butterfly easy frame in the centre and blended over some wilted violet distress oxide ink. 

I then placed the 'innie' from the 6" butterfly easy frame over the top and blended a little prize ribbon distress oxide around the edge.

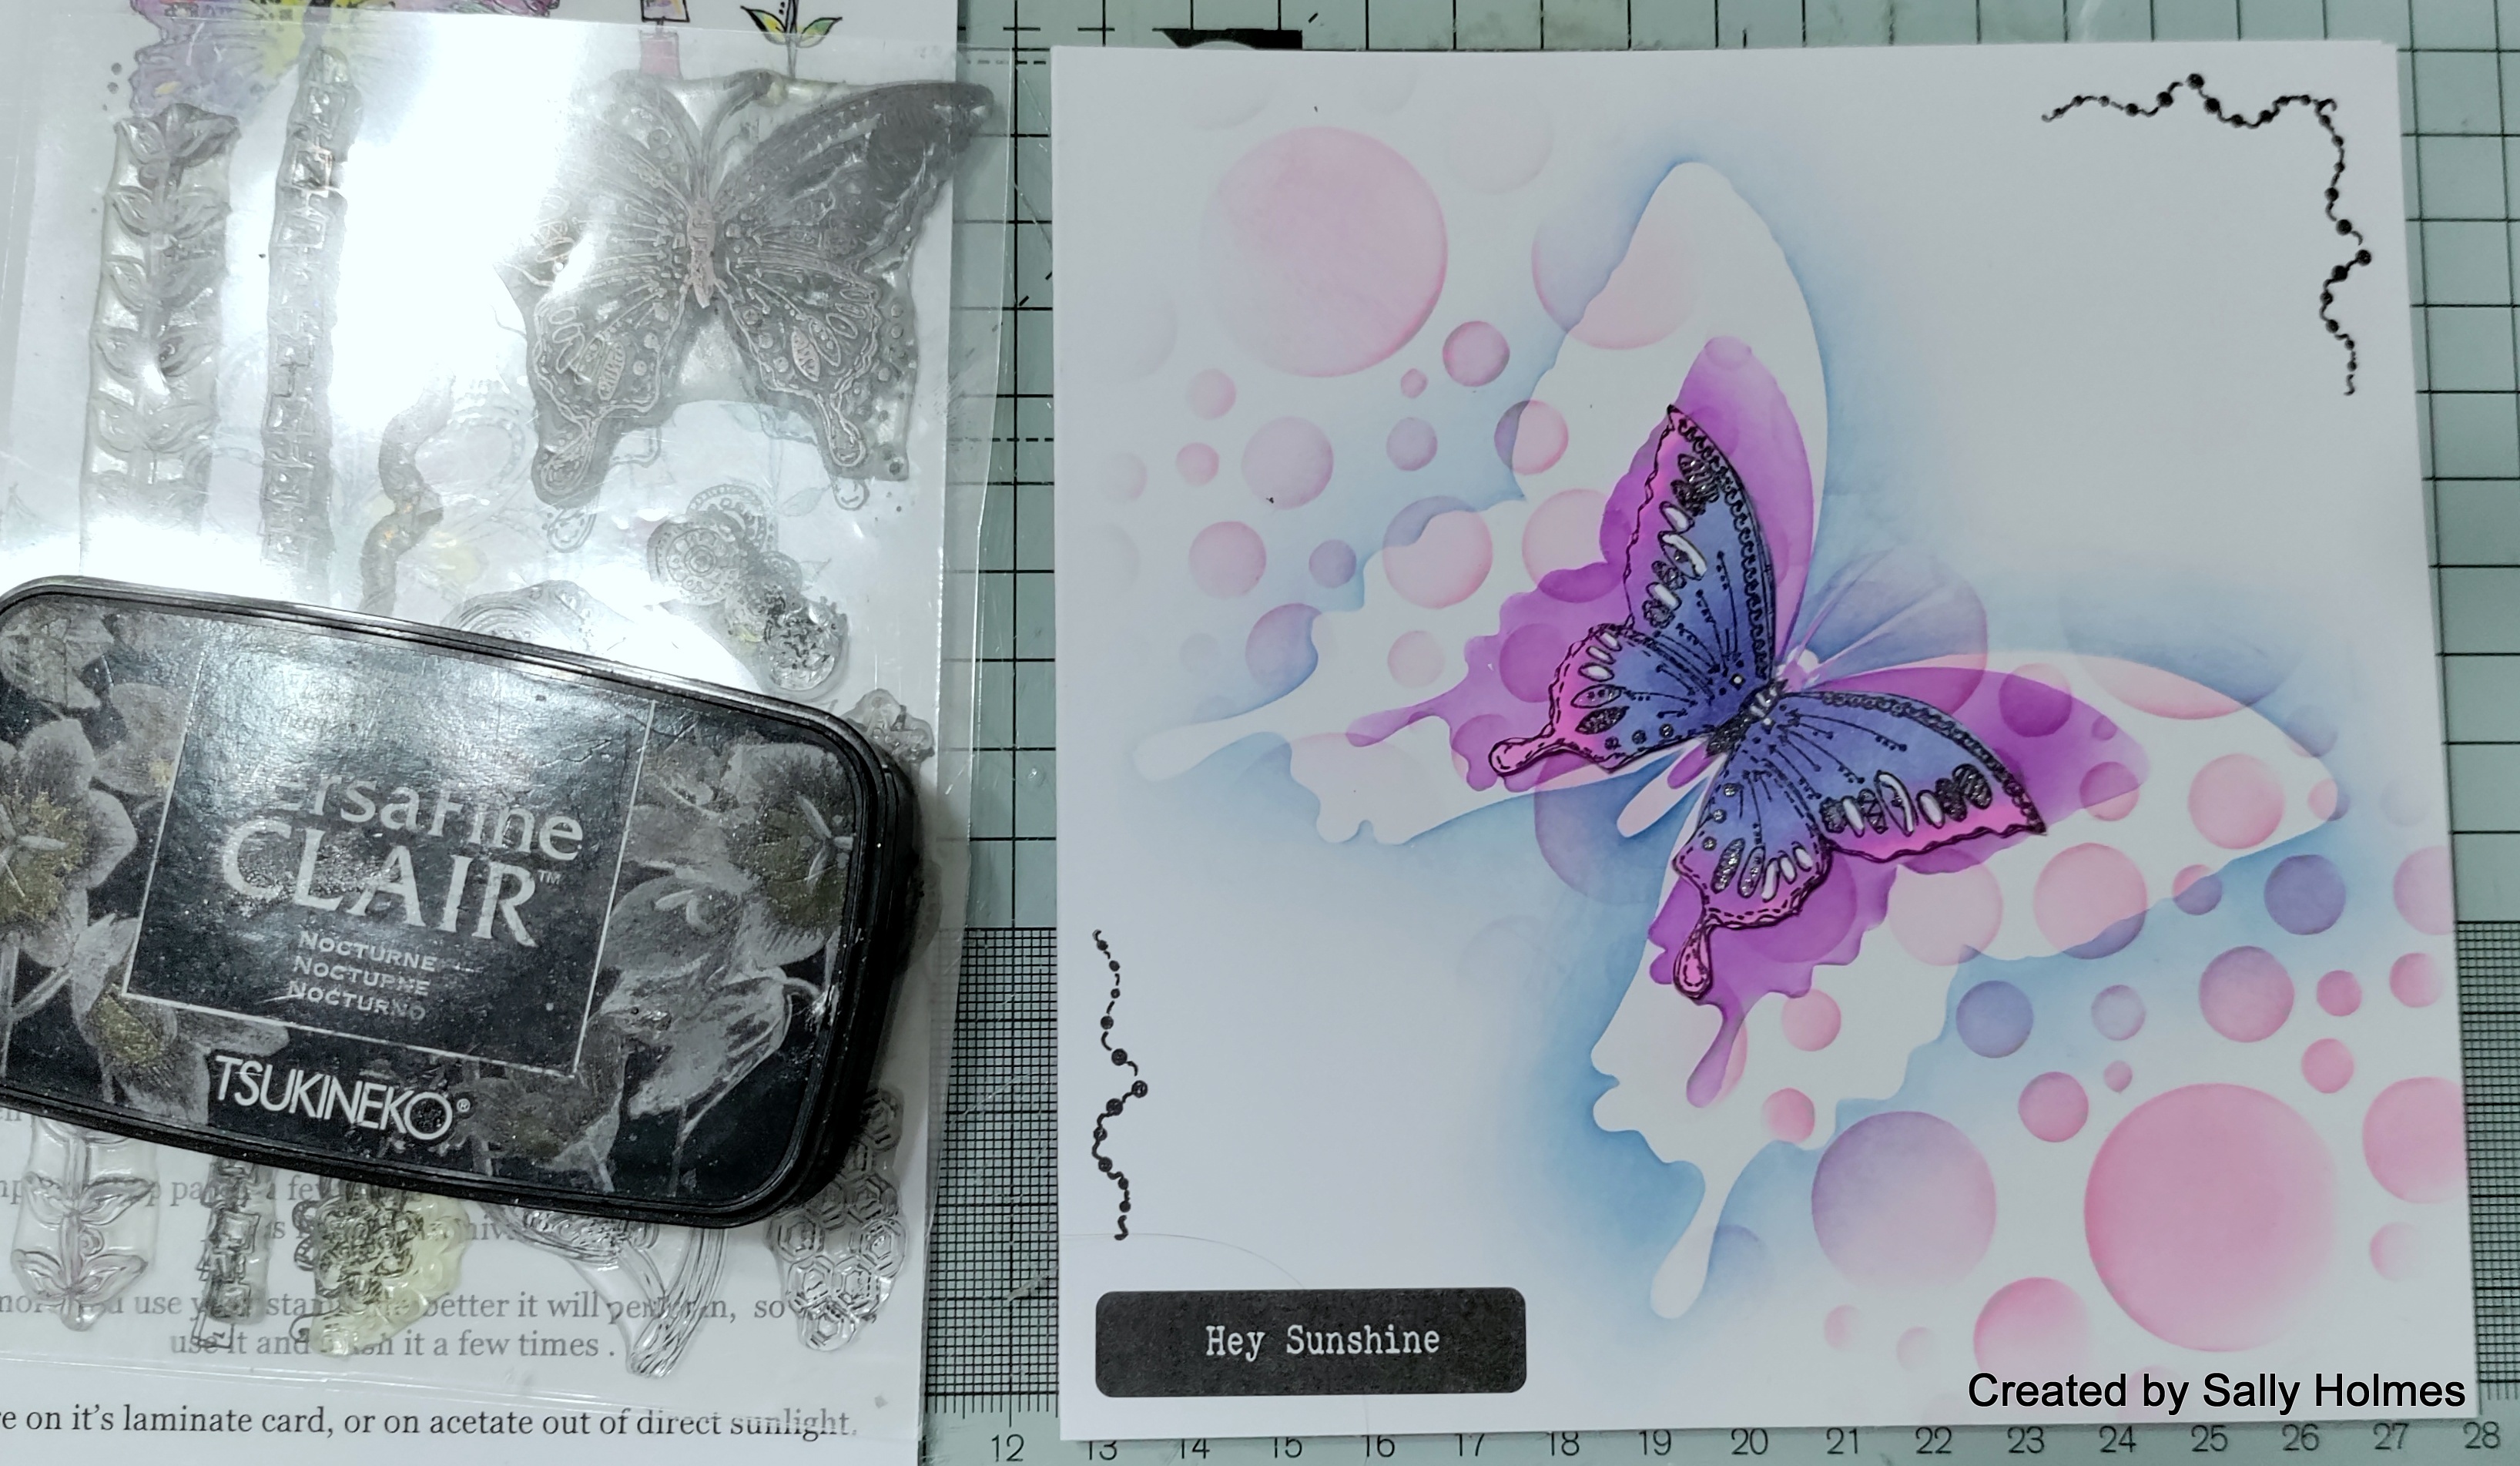
Setting aside the base card I stamped the regular doodle art butterfly on a scrap of watercolour paper, coloured it with ecoline pens and cut it out. 
I added some highlights with white and sparkle gelly roll moonlight pens and attached the butterfly to the main card using ultra thick gel medium. 
Finally I added a sentiment from the new Bee Crafty stickers and a bit of stamping in the white space corners.
Here is the finished card again. 
Here's a list of what I used:
6" square card

If you prefer your butterflies more realistic and your backgrounds more grungy, here is the card I made during my Facebook live on Wednesday evening which you can find here.
 
Thanks for looking! 

Monday, 14 February 2022

Love you to the moon and back!

Hi There! Thought I would show you how I made this card. 

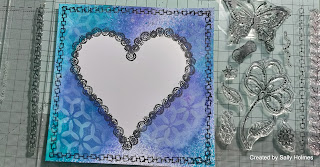
I began by placing the easy frame inkable heart onto a blank card and spraying it with Dylusions and Pretty Amazing spray (Distress oxide spray would also work). I took the photo once it was dry and after cleaning the inkable so you could see it better.
Next I used the tag inkables and white ink to add some stencilling over the sprays.
Using some of the worker stamps from the Dodle Art butterflies set, I created a border around the heart and a border around the card.
Next I stamped the sentiment in black ink in the middle of the heart aperture. 
Finally I used distress oxide inks in peacock feathers and villainous potion to add a selection of stars from the Star textures set in the white space.

Here is the finished card once more.
I used:
6x6" card
If you aren't already aware there is a Bee Crafty Stamps launch on Facebook tomorrow starting at 10am
 with brand new mandala stamps! Here's a sneaky peek...
and here is a schedule for the day. 

Thanks for looking!