Tuesday 27 April 2021

A digi from Dora and a walk in the woods

A couple of years ago Dora drew this digi (Flower 7) from one of my photos, after a walk to look at the bluebells in Ploughman's Wood.  We had a lovely walk there again on Friday and so I thought I would use this digi for my DT card for her this month. I printed the digi onto Kraft and coloured it with my Arteza pencils. I'm quite happy with how it turned out. I teamed it up with some crafty individuals paper and then stencilled the base card with distress inks through a Bee Crafty D'inkable. The sentiment is from Hobby Art, and I added a few drops of liquid pearls. You can find Dora's digis here.
Here are a few of the photos I took in Ploughman's Wood on Friday, featuring the beautiful Wood Anemones, including a few pink ones. 


And of course a few bluebells too...


Beautiful nature, beautiful weather and the signs of spring definitely put a spring in my step! 
Thanks for looking! 

Monday 26 April 2021

A shiny sunflower tag and a sneaky peek!


Hi There! Like many of you I loved the look of the dylusions shimmer paints that Bev and Sam showcased in their facebook lives this week and had to have them! Mine arrived on Friday, so I decided I would use them on a tag for this week's blog post. 
This is what I used:
Dylusions shimmer paints in Calypso Teal, Pure Sunshine and Fresh Lime
Archival black ink (You could use memento black)
Versafine black ink 
Memento ink (I used olive grove and bahama blue)
Versamark ink
white embossing powder
black card

Here is how I made it. First I painted the tag using the shimmer paint. I mopped up the paint on my glass mat with another piece of card that will make a great background for another card too. 
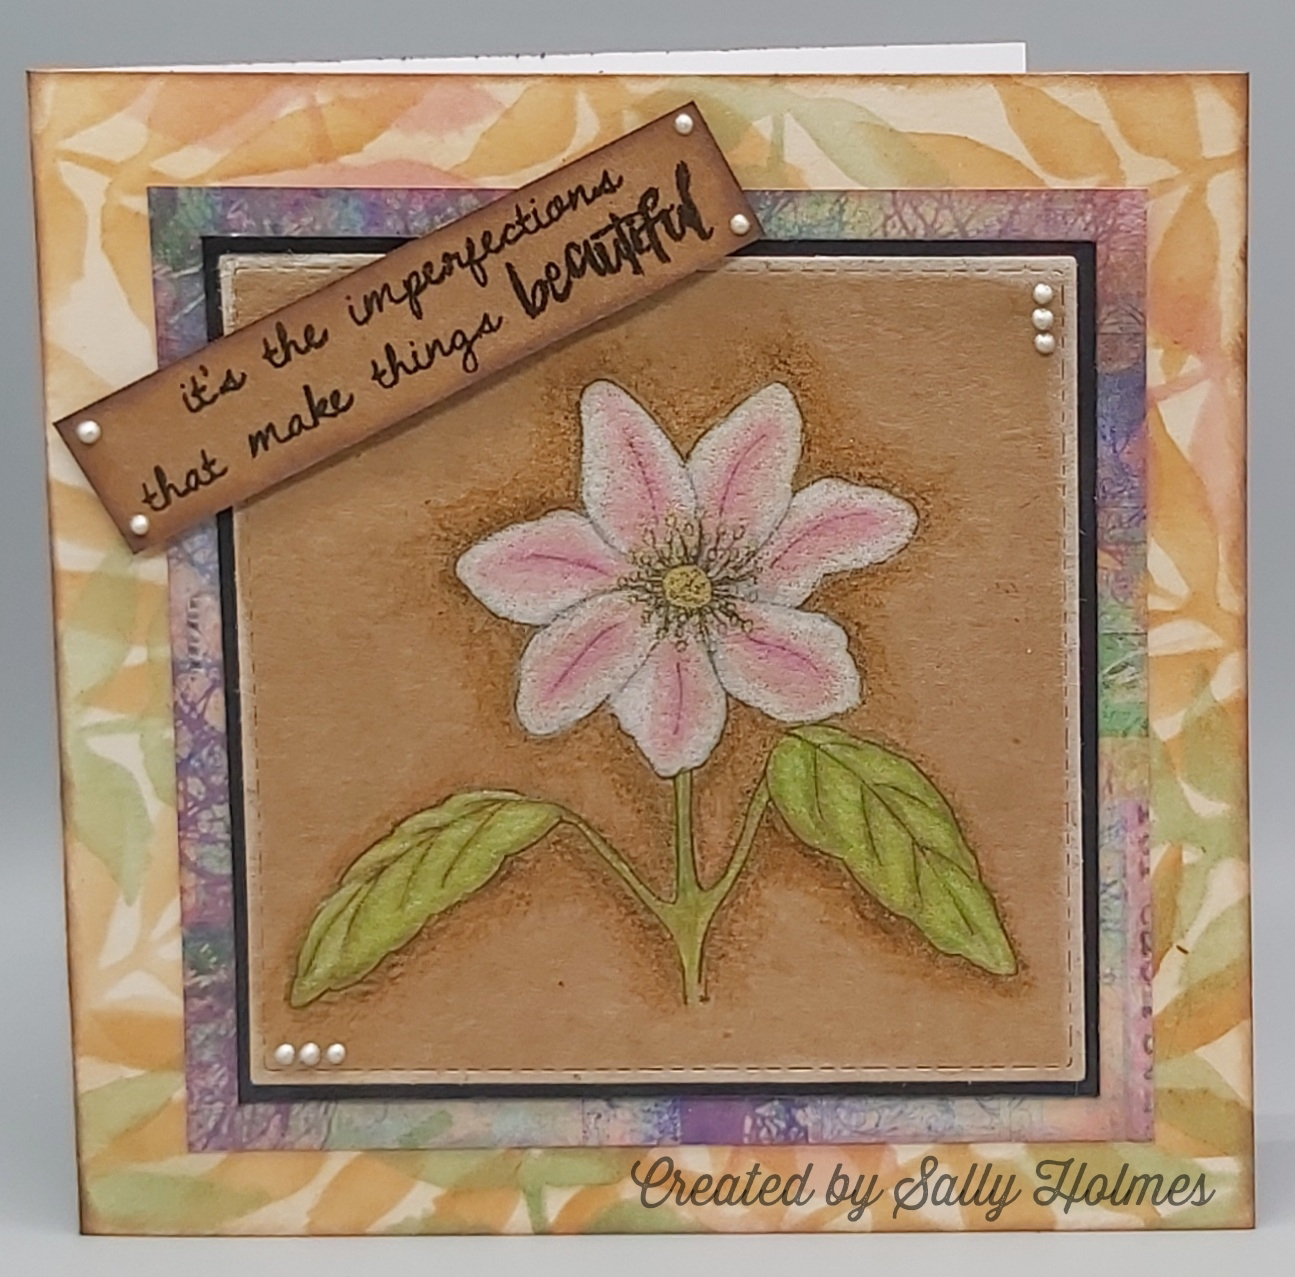
Once the paint was dry, I stamped the sunflower in Archival ink  (I could have used memento) onto the painted surface, then stamped the sunflower again onto the watercolour card. Both archival and Versafine would be fine for the watercolour card.

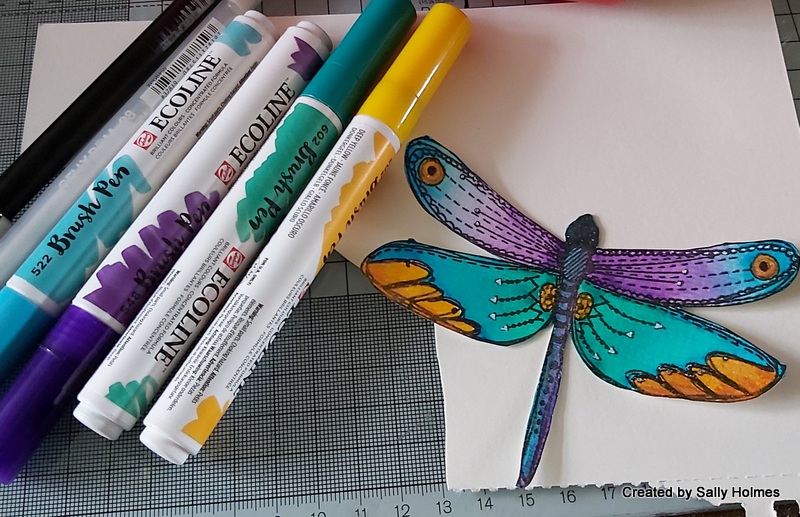
I coloured the sunflower on the watercolour card with my ecoline pens.
Next I used memento ink to stamp a border and some spots around the sunflower on the painted tag. 
I cut out the coloured sunflower and stuck it to the painted tag using collage medium.
Next I added a few extra highlights with gelly roll pens and a white pen. I also stamped the little leaf 4 times in black where the border  joins were, and coloured with the green gelly roll pen.
I added some spots of glossy accents on the centre of the sunflower. 
Whilst this dried, I stamped the sentiment in versamark ink, then heat embossed in white onto a scrap of black card.
Finally I added the sentiment and some matching braid to the tag, matting it onto more black card. 
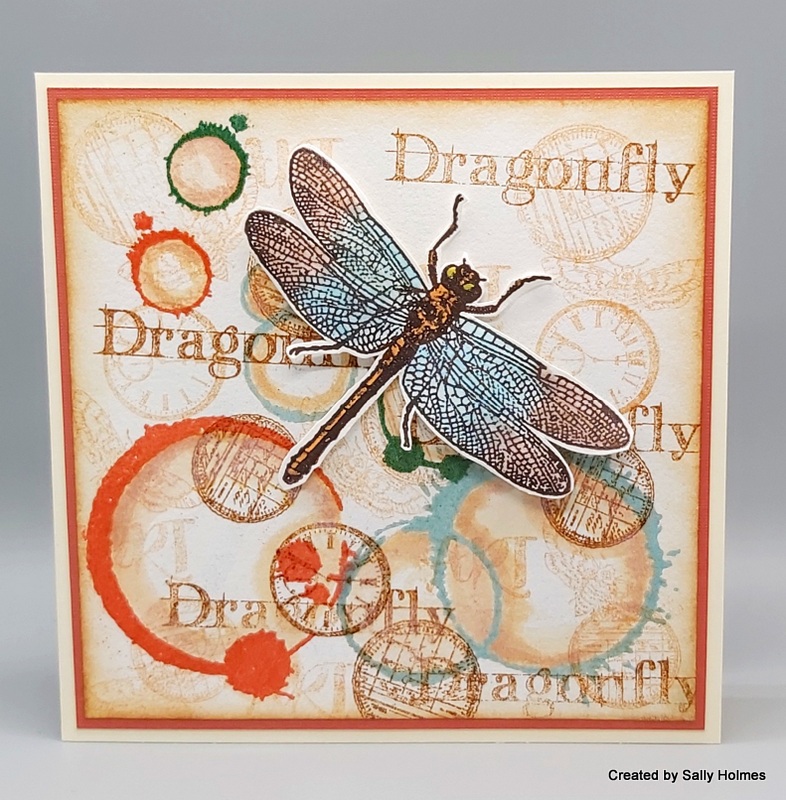
I hope you will be able to tune in to The Craft Store tomorrow at 1pm as Bev and Sam will be there with some brand new stamps, dies and inkables, as well as fab mdf basics and popouts. Here is a little sneaky peek at one of my samples! I will be sharing them all next week.

Thanks for looking! I will be back tomorrow with my Digi from Dora and some photos x


Monday 19 April 2021

A Sunflower Tote Bag

Did you know that there are several colouring mediums that we use that can be heat set onto fabric? Inktense blocks and inktense pencils are the ones I tend to reach for when crafting with fabric and  decorating items like bags. I made myself a bag recently using some supermarket fat quarters and added a sunflower pocket. 

Here is what I used:

XL Doodle Art sunflower stamp

Versafine Clair ink

Calico 

Inktense blocks

Embroidery thread

5 coordinating fat quarters (Mine were from Aldi)

Braid

Material for straps and lining (I used a pillowcase) 


First I stamped the sunflower using the Versafine Clair ink onto the calico. I find this easiest to do using a stamp press as the magnets secure the cloth at the right tension. Versafine Clair isn't advertised as an ink to use on fabric, but having dropped a stamp inked with it on my jeans, it hasn't washed out after 3 washes, so it is fine to use! 😂 Then I painted the sunflower with the inktense blocks and a water brush (inktense pencils would work equally well). Once this is complete, iron it to heat set it. 


Next I cut 4 different strips from the fat quarters each 55cm x 10cm and sewed these together. I added a 10 cm strip at the top and bottom too, adding some braid over the seam. 


I attached the sunflower panel to a 17 x 25cm rectangle of the fat quarter using blanket stitch and made a pocket on the front of the bag, before sewing up the side seams.

Finally I made straps and a lining from a pillowcase and attached around the top. 

Here is the finished bag.


I fancy making a few more of these - I'm thinking a seaside themed one next! 
Thanks for looking! 

Friday 16 April 2021

Our Robin and a few other visitors

 I've seen quite a few robins around blog land on cards at the moment, so I thought I would tell you about ours. we call him Spot because he has a white fluffy spot on his back about where his tail starts. He comes and sits on top of the hook that holds our window feeder and sings to us (or his own reflection). He is never aggressive towards his reflection, as I have heard stories of birds trying to fight their reflections thinking it is a rival. He will often sing whilst the female watches then nip to one of the other feeders, peck out a fat pellet and feed it to her. 

Anyway, I've been trying for a couple of weeks to get a bit of decent footage on my camera and finally managed it!  (You will need to crank up the volume to hear him)


We have been watching the birds a little more closely during lockdown and had some fabulous winter visitors. There was a little flock of longtailed tits,


and a small group of bramblings. 


These seem to have moved on this month but we have our first lesser redpolls now!  

I'm afraid my photos aren't great because they are of the feeders at the bottom of the garden through the windows. 
Thanks for looking! 


Tuesday 13 April 2021

Introducing Luigi the Llama, Frank and Betty (Seagulls of Seaton Carew)

 Here are my DT makes using Luigi the Llama, designed by Sharron Bates and turned into a fabulous stamp by Crafty Individuals.

First up is a shrink plastic version, coloured with pencils and attached to a wood slice key ring.

For this card I used background papers designed by Flo Langley and coloured Luigi with ecoline pens on watercolour card. 

Frank and Betty are a pair of seagulls from Seaton Carew, wrapped up against the cold. I get the impression that Betty is an avid knitter or crocheter and has been busy all through lockdown making scarves ready for the next football season. I used Crafty Individuals stamping card for this one, and coloured them with Ecoline pens, teaming them up with some papers from 'Wonderfully weathered 1'. By all accounts, you can get wonderfully weathered most of the time in Seaton Carew! 😂

You can find all of the new stamps here on the website!

Monday 12 April 2021

Dragonfly Plaque


Hi there! 

There have been some amazing facebook lives and demos recently, so taking inspiration from Bev, Jane and Lynette Jasper I thought I would have a go too.

I used:

XL Doodle Art Dragonfly stamp

Versafine Clair Nocturne ink

Gel medium

Ranger Grit paste

Bakewell Inkable Big ones 

 a scrap of corrugated card

Black gesso

White gesso

Pretty Gets Gritty Explosion powders (I used Elf, Atlas, Neptune, Mermaid and Unicorn)

clock face MDF

lolly sticks/ waxing sticks (these are 15cm long and almost 2cm wide)

Watercolour card

Ecoline pens


First I stuck 2 lolly sticks across 8 laid in a square with gel medium. 

When it was dry I turned it over and applied some grit paste through the Bakewell inkable.

Next I stuck the torn piece of corrugated card to the centre of the plaque with gel medium and left it to dry. 


I stuck the clock face over the corrugated card, 


then painted the whole thing with black gesso.

Once it was dry I used a dry brush to brush some white gesso across it (horizontal and vertical light strokes on the textured areas)  


Once this was dry I sprinkled with the Explosion powders....

before misting with water....
At this point you will want to enjoy the magic. I got more colour variation when I didn't use a heat gun on it. You can go back in with the powders and mister as many times as you like until you are happy with the effect. 
Whilst this completely dried I stamped the XL doodle art dragonfly in black ink onto watercolour card and cut it out. 
I coloured it with coordinating ecolines and added a few highlights with white gel pen.

I stuck it to the centre of the plaque with gel medium and added some glossy accents on the yellow parts and the body

Here is  the finished plaque. Such a shame the shimmer doesn't show as well as it does in real life!

The challenge this month in the Bee Crafty Facebook Group is to recycle something. It could be a bit of packaging, a few buttons, a tin or anything that would go in the bin. Why not pop over and join in? Thanks for looking! 

Thursday 8 April 2021

Introducing Fluffy, George and the Burglar Cats!

 If you  managed to see last week's Crafty Individuals shows on the Craft Store, you will have met these colourful characters already, but if not, I will introduce you. They are designs from Collage artist Sharron Bates made into fabulous stamps!


First up are the Trilby Cats, also known as Fluffy and George. Here I watercoloured them with ecoline markers over a wash of tea dye distress ink. They were teamed up with some of Flo Langley's Mismesh papers. 


Next we have the Burglar cats, also known as Syd and Albert. They too were coloured with ecoline pens and teamed up with some black mulberry paper and a sheet of the wonderfully weathered 1 papers. I also added some dots of nuvo drops to Albert's spots.

Syd and Albert were also turned in to shrink plastic earrings too.


 I will be back with the other new characters and some old favourites too once the new stamps are on the website.

Thanks for looking! 

Monday 5 April 2021

A Shrink plastic key ring for Bee Crafty


 Hi there!

I thought I would share a bit of shrink plastic with you today. It is something that has been around for a long time, but it seems to be one of those things that you don't see much of it unless you seek it out. I thought I would show you how to make a simple key ring, and let you know a bit more about it. 

Shrink plastic comes in several different sorts. You can get clear, frosted, black and white. If you wish to colour on it you can sand it with some fine sandpaper, although some comes ready sanded. You will need to use a permanent ink  - one that dries on any surface - I use Archival or Brilliance. The ink will need to air dry for a good amount of time  (at least half an hour for Archival and overnight for brilliance)  The easiest way to colour your stamped images once dry is with coloured pencils. A sanded surface will help with this. Be aware that as the item shrinks the colour will intensify, so light shading with coloured pencils will give a better result.

I used: 

shrink plastic

XL Doodle Art dragonfly

archival ink

coloured pencils

corner rounder

hole punch 

heat gun

Key ring findings

First I sanded the surface of my shrink plastic

Then I stamped the dragonfly onto the sanded surface with black archival ink and left it to dry.

I rounded the corners with a punch....

and punched a hole in the corner (a regular hole punch could be used for this too)

Next I coloured the image with pencil crayons - remember paler and lighter is better as it intensifies when shrunk.
On a heatproof surface use your heat gun to start heating. It will curl and squirm, so keep some tweezers close by in case you wish to turn it over or reposition it. Occasionally it can stick to itself. Try and seperate it as quickly as possible if it does, but mind your fingers as it will be hot! 
Once it has finished shrinking, place an acrylic block (not a skinny one, but one with some weight) on top to make sure it is flat. 
Thread a jump ring through the hole and add the keyring. 
As you can see the colours are much deeper than before it was shrunk. I think I should probably have gone even paler! It really is huge fun to play with and a great hit with kids. there is something so magical about the shrink process. 
Thanks for looking!