Showing posts with label ink blending. Show all posts

Wednesday, 23 April 2025

Pretty Pastels


 Hi There! I've gone all pastel shades with this card for you today. Here's how I made it.
I began by stamping the script background around a panel of smooth white card measuring 4.5 x 6.5 inches using tumbled glass distress ink. 

Next I attached the circles big one inkable and used blending brushes to add more tumbled glass, Picked raspberry and Squeezed lemonade distress ink
On a separate piece of card I stamped the doodle art sunflower and coloured it with pastel ecoline pens before cutting it out. 
I stamped the sunflower onto the background in the position I wanted it and added the coloured cut out sunflower on top, using Matte Medium. 
On a scrap of white card I stamped the sentiment in Versafine clair ink and sponged a little blue ink around the edge. I added this to the card too. 
Here is the finished card once more. 
I used:
Big one inkable  - Circles 1
Distress inks - I used Tumbled Glass, Picked Raspberry and Squeezed Lemonade
Versafine Clair ink in Morning Mist
Ecoline Pens
Matte Medium
Smooth white card
5x7" blank card
Paper for matting and layering

Thanks for looking! 

Wednesday, 24 April 2024

Inky Layers


Hi There! Thought I would show you how I created this card today.

I began by blending Mermaid lagoon, Mustard Seed and Picked Raspberry distress oxide inks across some mixed media card. It doesn't need to be perfect, and the colours should overlap to get the green and orange tones. 
Next I sprayed a dinkable from set 11 with water and pressed it onto the inked card. I left it in place for a few seconds and rubbed over it with a dry cloth. When I lifted it off, I waited a few seconds then blotted it to lift the colour from the wet areas. 
Once this was dry, I used Doodle Art Mandalas and 3 shades of Versafine Clair ink to stamp over the inky background. I also sponged a little black ink around the edges. 
Next I added a line of faux stitching in white gel pen around the edge of the panel. 
On a scrap of mixed media card I stamped the rainbow bird in black versafine clair ink, painting it with Dina Wakley gloss drops. I set this aside to dry. 
I stamped the sentiment in VersaMark ink onto black card and embossed in white, cutting it out and matting and layering on a white piece of card. 
Finally, I added the background to a 5x5 white card, layering with some black paper, before adding the bird and the sentiment using foam pads. 
I used:
5x5 white card base
4.5" square of mixed media card
Distress oxide inks in Mustard Seed, Mermaid Lagoon and Picked Raspberry 
Versafine Clair ink in Warm Breeze, Charming Pink and Nocturne
White gel pen
Dina Wakley Gloss drops in Bodacious, Gnarly, Legit and Radical
Versamark ink

Thanks for looking! 

Wednesday, 31 January 2024

A Quick and Simple card


Hi There! I am here with a super quick and easy card for you today using today's and yesterday's January Savers. 

I began by placing the scales inkable over a 6x6 white card blank and blended teal, yellow and magenta ink through using blending brushes.
Next I stamped the larger flower from blooming blooms, and a smaller one either side of it, using Versafine Clair ink.
Using a 0.05 micron pen, I extended the stem to the bottom edge of the card.
I coloured the flowers using ecoline brush pens. 
I created a border around the card using the small squiggle from Blooming Blooms. 
Finally I stamped the sentiment from ticker tape 4 onto a scrap of card and cut it out, attaching it to the card using 3d foam pads.
Here is the finished card again.

I used:
6x6" card blank
water based dye ink in teal, yellow and magenta (Memento or Distress ink will both work)
Ecoline markers
3d foam pads

I do love a card that comes together as quickly as that did! Thanks for looking and don't forget to check out todays final January saver!

Tuesday, 4 July 2023

A Quick card


Hi There! thought I would show you how I made this quick card today! 

I began by taping the outie of Mandala inkable #4 to a 6x6 card, then blending distress ink into the centre. I used Twisted citron in the middle, then peacock feathers and wilted violet around the outside.
Next I popped the mandala in and blended black soot ink through it. 
I removed the inkable and stamped the bird and words from Sketchy Birds into the centre.
Using a grey pencil crayon I added a little shading around the bird.
Here is the finished card again. Perfect for a teacher at the end of term 😉
I used:
6x6 card blank
Distress inks in Twisted Citron, Peacock Feathers, Wilted Violet and Black Soot
Grey Colouring Pencil

Our Challenge over in the Bee Crafty Stamps Facebook Group is to make a quick card. I hope this inspires you to come over and join us and have a go! Thanks for looking! 

Tuesday, 27 June 2023

A hot dandedaisy


Hi There! Has it been warm enough for you?! I have to admit I have wilted a bit over the weekend. With the end of the month a few days away, I thought I would show you how I made this card with it's hot colours (Just like the Bee Crafty Facebook Group challenge theme!). 

I began by blending Wilted Violet, Picked Raspberry, and Mustard Seed distress ink over some smooth white card. 
Next, I stamped the 'rainbows' and the circles from Journaling Essentials #1 in Versafine Clair Black ink. 
I added some more Picked Raspberry ink through the dinkable over the background and set aside.
On a scrap of mixed media paper I stamped the largest Dandedaisy in black ink and cut it out. 
I smooshed the flower with the purple and pink ink, then added a few spots of Mustard Seed to the centre using a paint brush
I matted and layered the background onto a 6x6 card blank, adding the flower using foam pads and a wordy sticker for a sentiment
Here is the finished card again. 
I used:
Distress inks in Picked Raspberry, Mustard seed and Wilted Violet
6x6 blank card
Black paper for matting and layering
Smooth white card stock

The blending brushes I used for this are new ones. I have to say I am very impressed with them so far. Thanks for looking! 

Monday, 14 November 2022

A sneaky peek step by step!

 
Hi there! I thought I would show you a step by step using the brand new stamps out tomorrow from Bee Crafty! The new Robin stamps are absolutely gorgeous and I can't stop making with them!  Here's what I did...

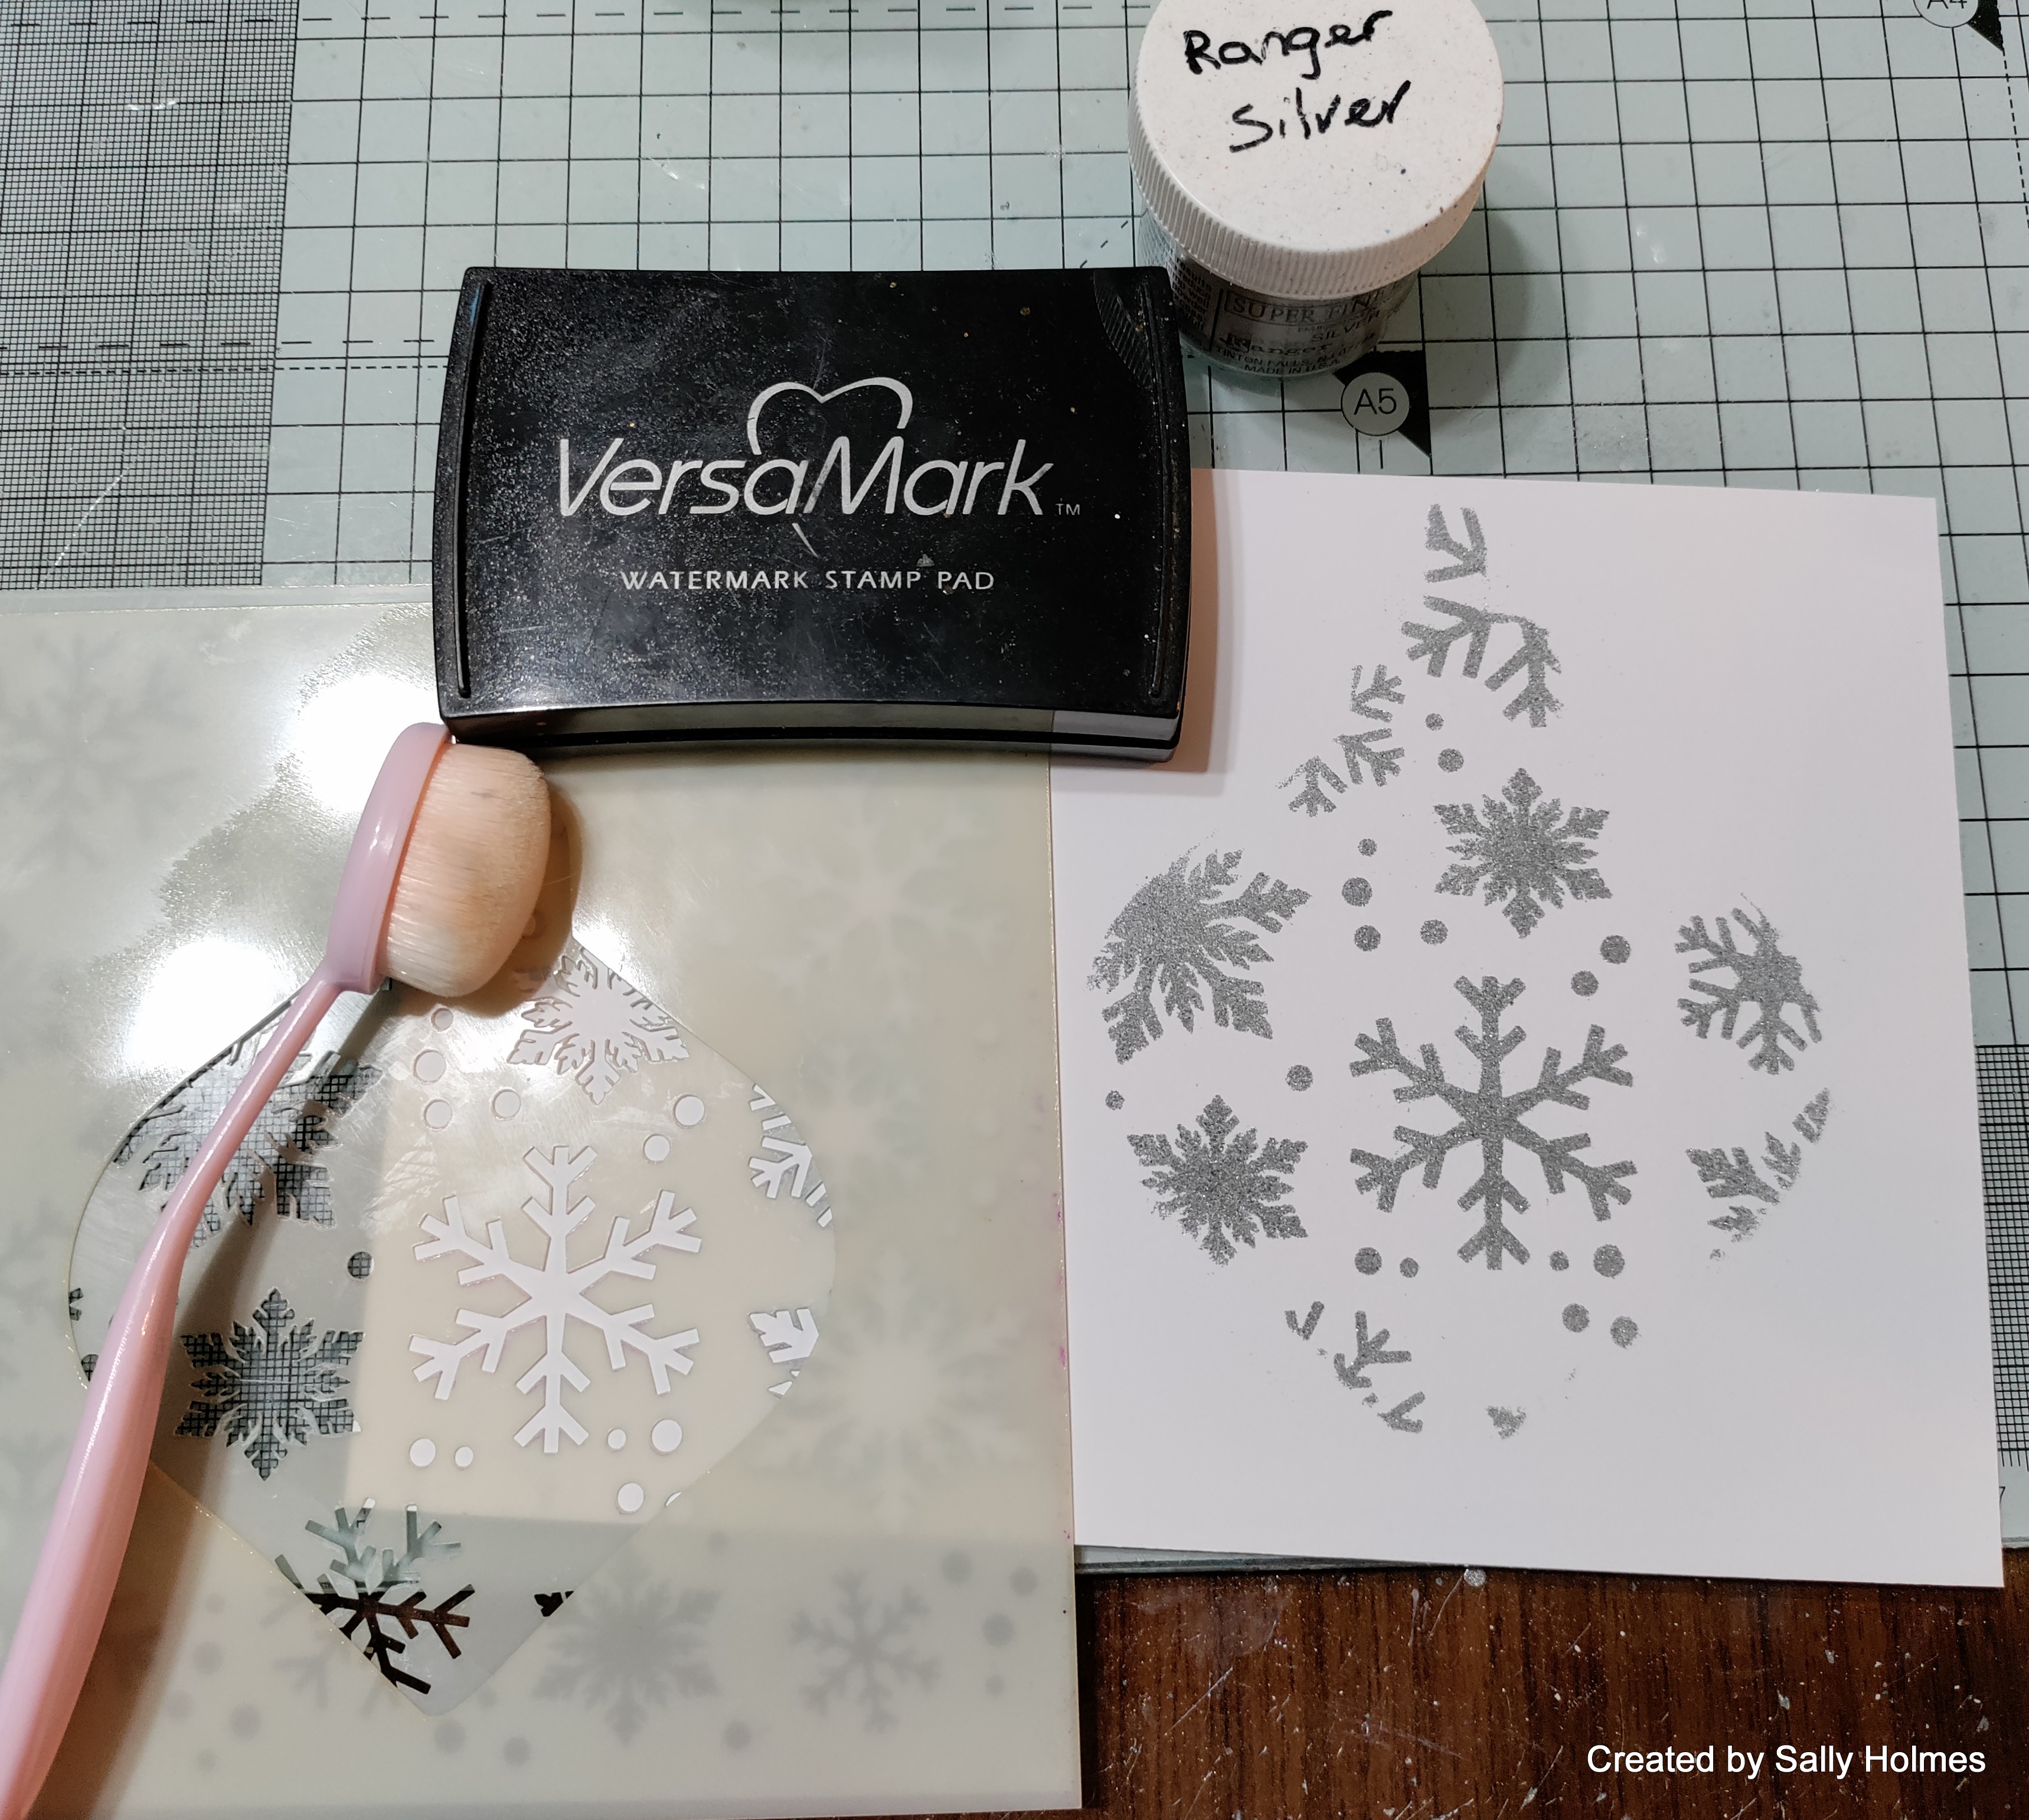
I began by blending versamark ink through the multi snowflake inkable and the large bauble #1 easy frame. Then I heat embossed it with ranger silver embossing powder.
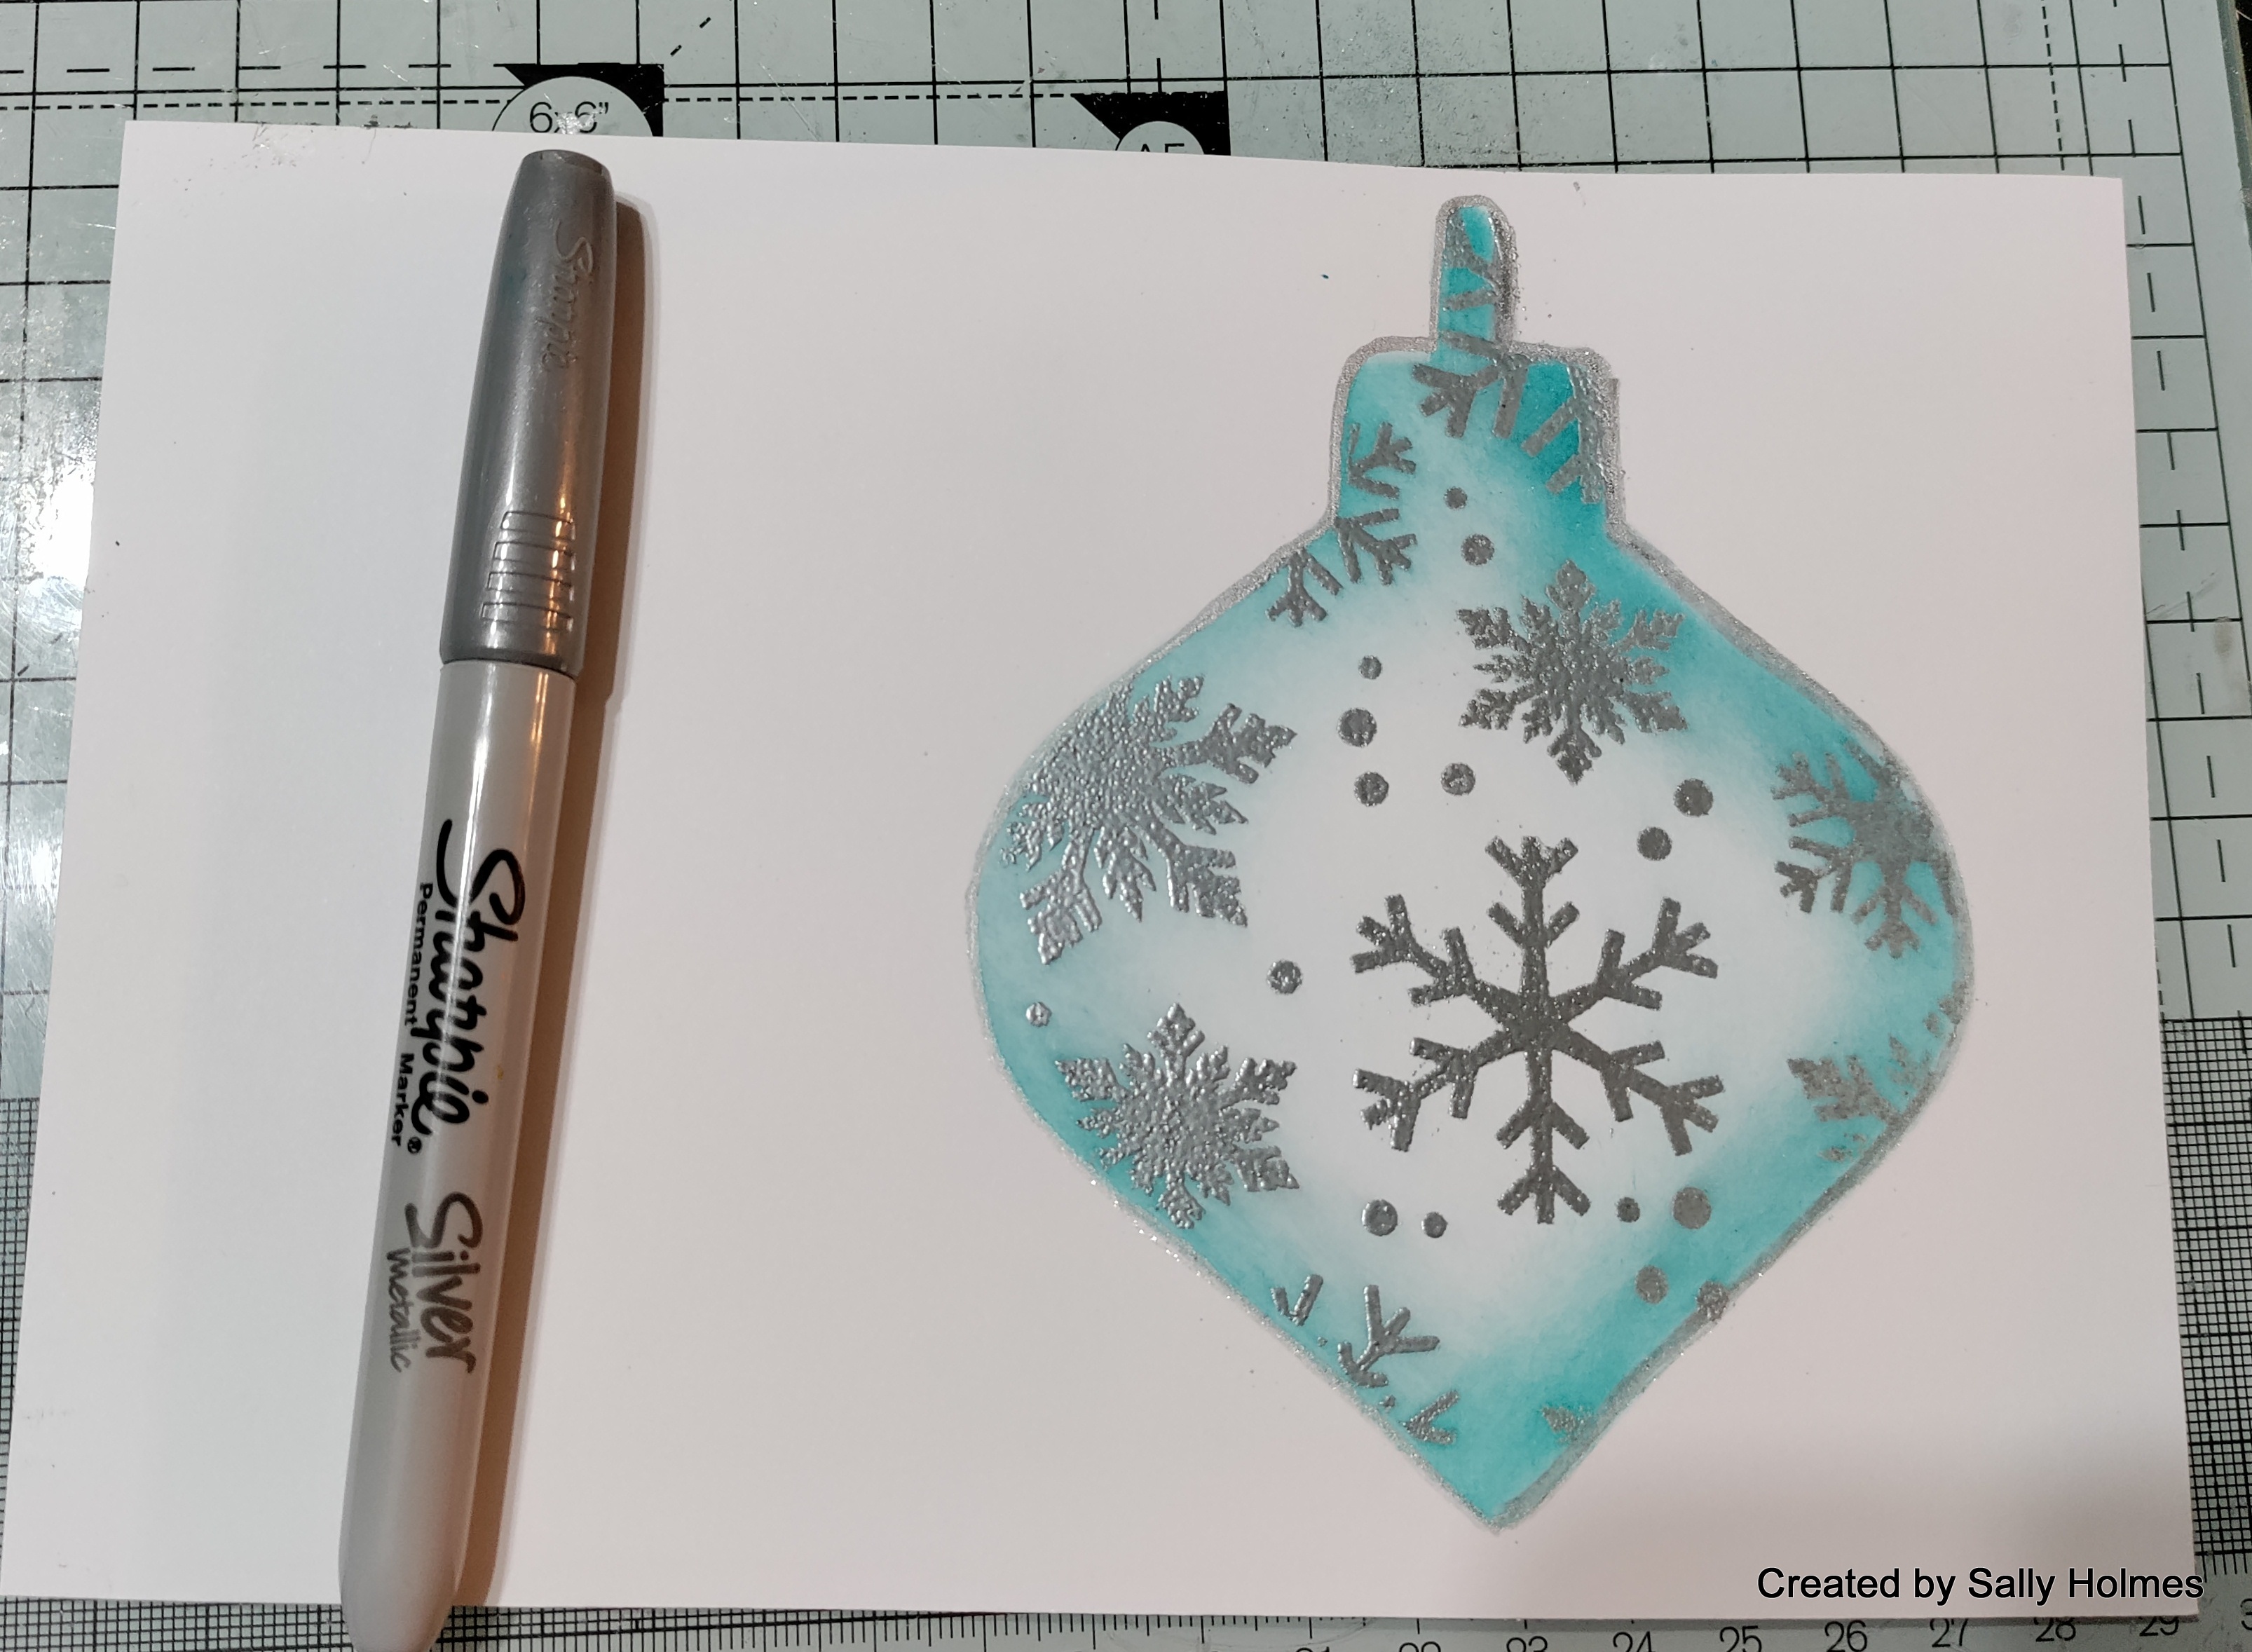
Next I placed the bauble easy frame over the embossing and blended some peacock feathers distress ink around it, making it darker at the edges and paler in the middle.                                                            
I used a silver sharpie pen to outline the bauble.
Next I placed the innie from the inkable over the bauble and lightly blended some black ink around it to create a shadow.
I stamped and coloured the medium robin and some foliage from the new stamp set. I cut it out and added some glossy accents. 
Whilst this dried, I trimmed down the card that the bauble was on, Stamped and embossed the Believe sentiment and splattered with turquoise and silver sprays.

when it was dry I mounted it onto a blank card and added the robin and foliage using ultra thick gel medium
Here is the finished card again. 
I used:
Robins Art stamps set
Embossing ink
memento black ink
alcohol markers

I hope you can join us for the Launch over on the Bee Crafty Facebook page tomorrow! 
Whilst I am here, here's a few photos from the Nationals on Saturday! 


We had an absolutely amazing day and I managed to get a bronze for Kata in a group of 7 qualifiers for my age group, so I am delighted! 

Thanks for looking!