Showing posts with label embossing. Show all posts

Saturday, 3 December 2022

Keeping it simple

Hi there! 
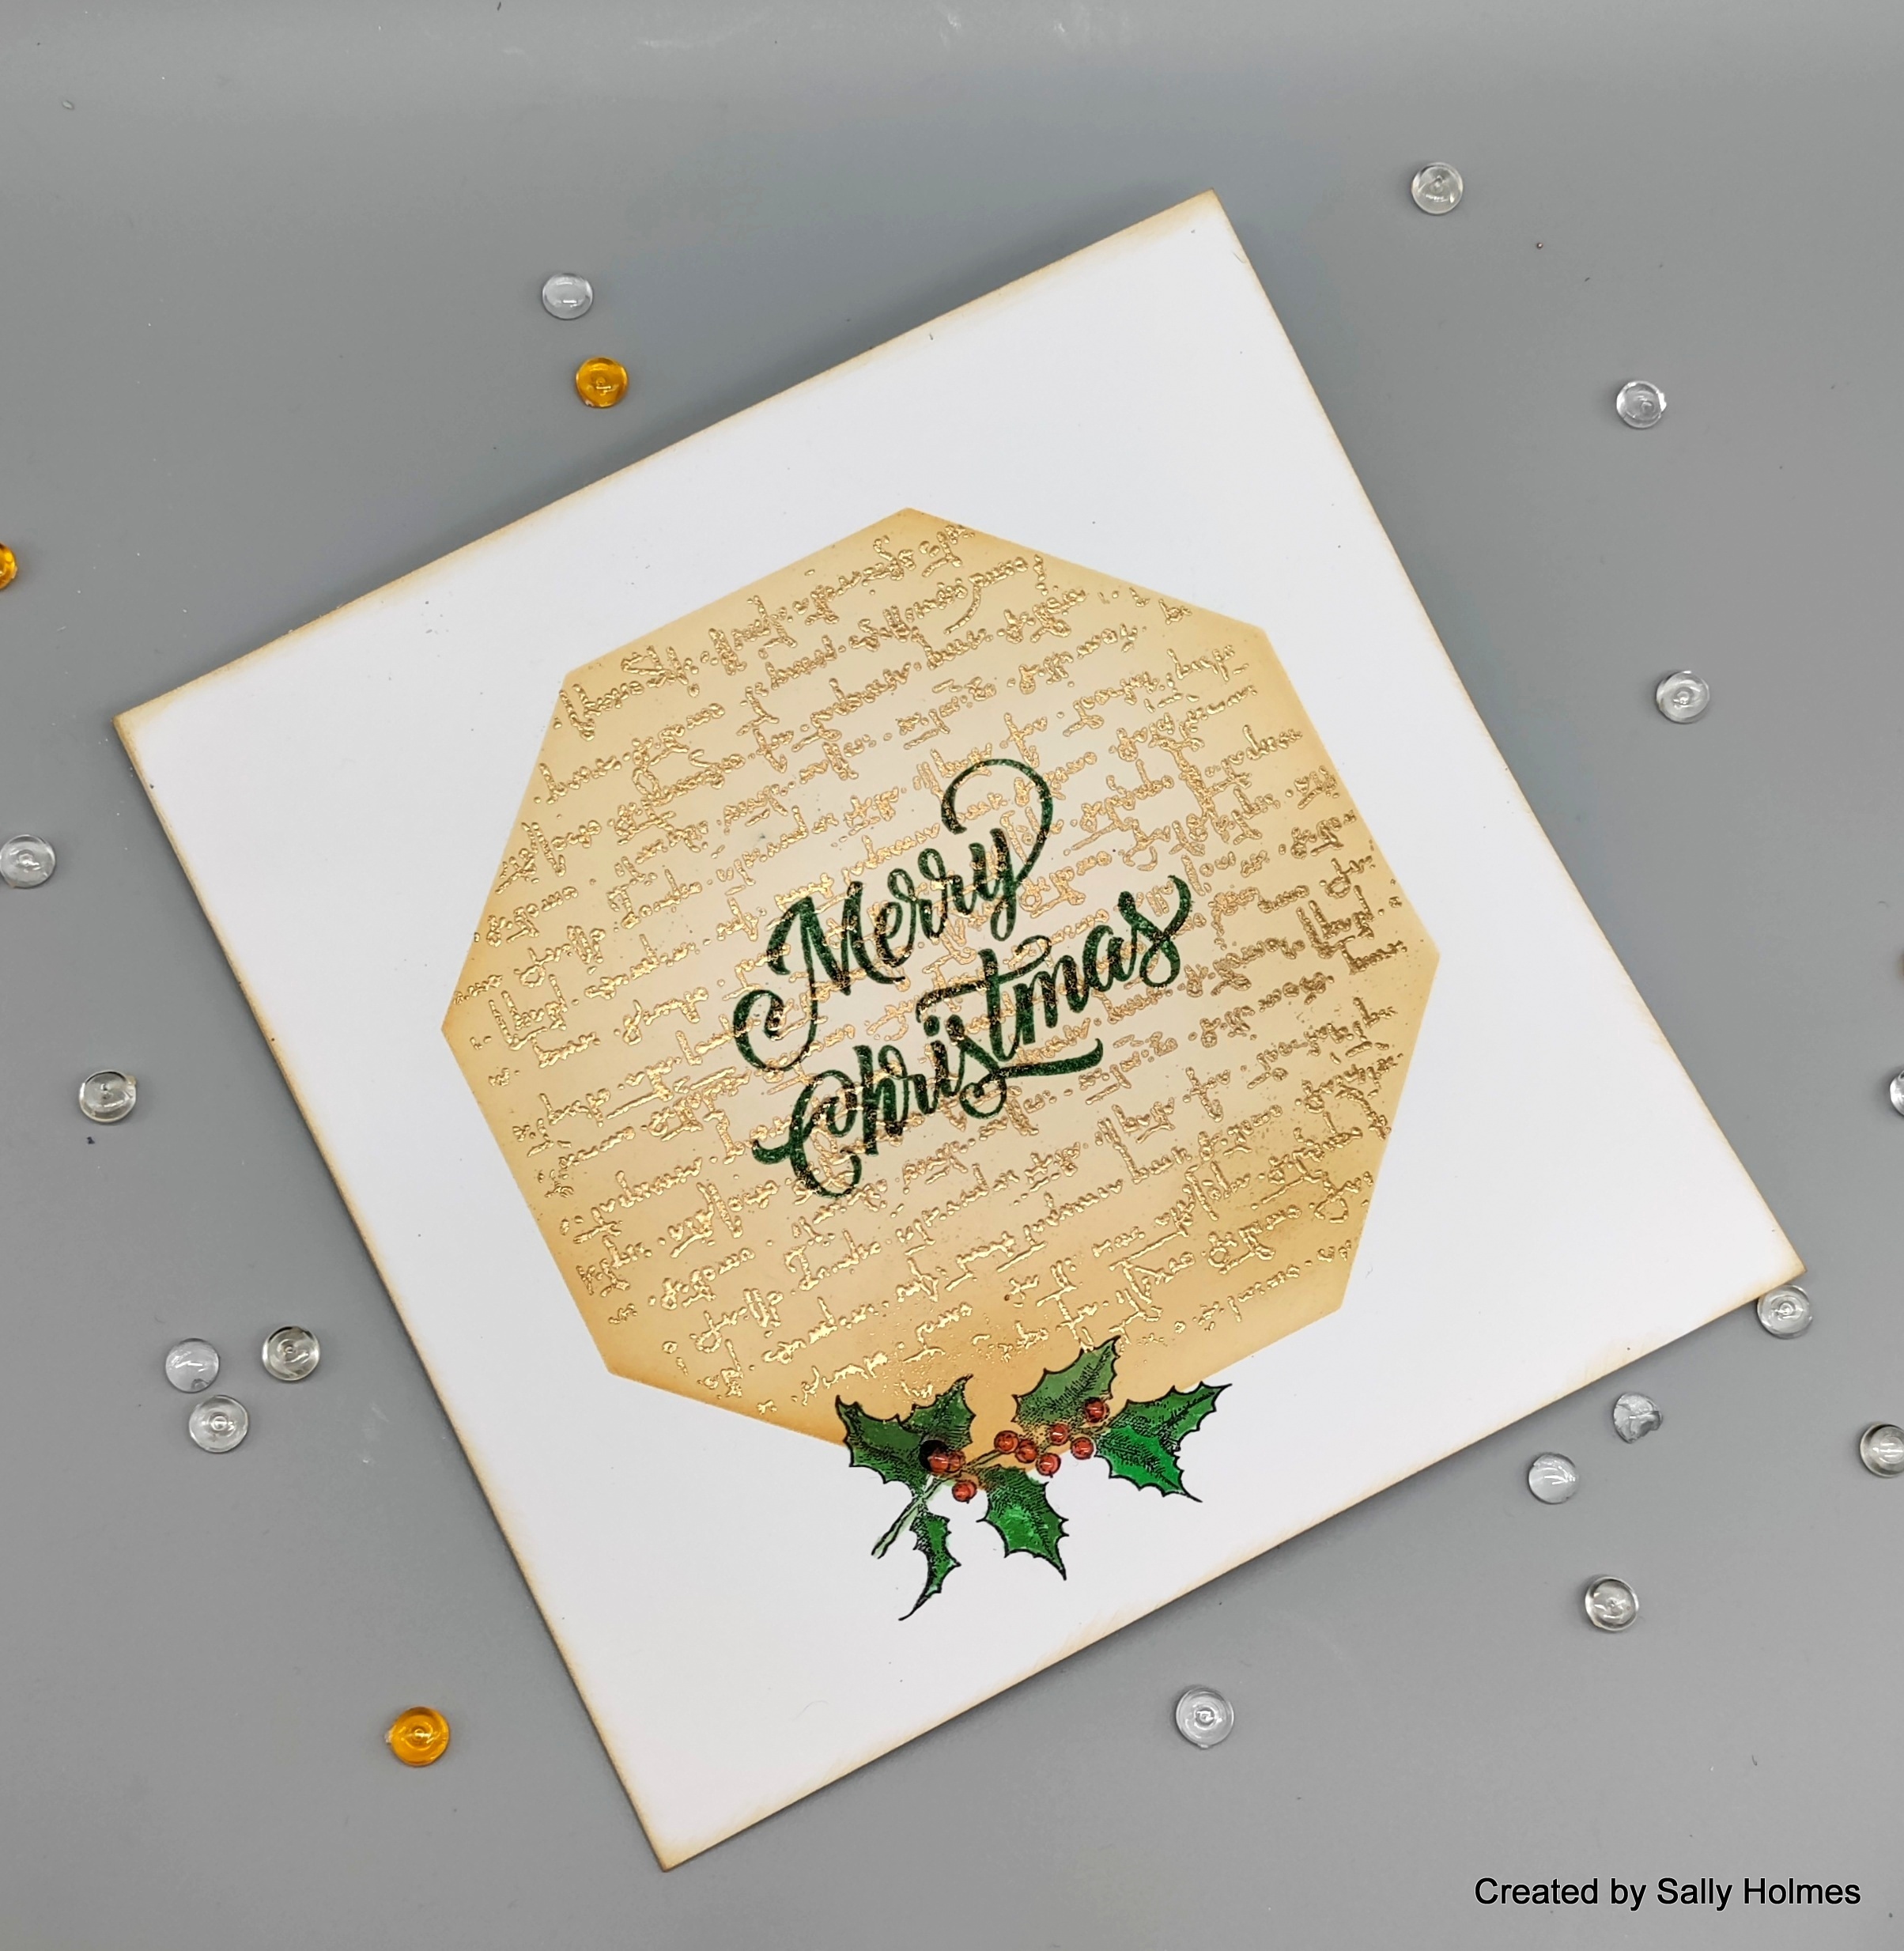
I am trying to get as many Christmas cards made as possible over the next few days now postage dates have changed. Here's a step by step for a quick clean and simple card.
 
I began by taping the 6x6 octagon easy frame to the front of a 6x6 white card and blended tea dye and vintage photo distress ink into it.

Once this was dry I gave it a quick wipe with an anti static cloth then stamped the script stamp in versamark with the easy frame inkable still in place. I removed the inkable, sprinkled with embossing powder and heat set.
There was a small area bottom left where the embossing ink hadn't reached, so I stamped the Holly stamp from the robin set and coloured using ecolines and a damp paintbrush. 
Next I stamped the Merry Christmas stamp (from the wreath set) in Versamark in the centre of the card. I sprinkled over rustic wilderness embossing glaze and heat set it. I also added glossy accents to the berries on the Holly.
Here's a close up. As you can see the gold is still visible through the embossing glaze. 
I sponged a little vintage photo distress ink around the edges to finish it off. 
I used: 
Versamark ink
Before I go, I did a live on Wednesday over on the Bee Crafty Facebook page and made 3 baubles using the MDF baubles and a variety of stamps. I used red green and gold, which is the new theme for the challenge over in the Bee Crafty stamps group. Here are the baubles 
Thanks for looking! 

Saturday, 28 May 2022

A Dreamy tag

 Hi There! Thought I would show you how I made this mixed media tag today. 

I began by Gessoing an MDF tag.

Next I added some Distress matte texture paste through a texture disc. Alongside I smoothed on a thin layer of the crackle texture paste too.
Once this was dry I sprinkled liberally with Atlas and Elf explosion powder and spritzed with water, before setting it aside to dry.
On a piece of mixed media card I stamped and gold embossed the mandala 3 times, cutting out layers on each one. 
I used ecolines and a waterbrush to colour the layers
Once these were dry I layered them with ultra thick gel medium onto the tag.
I brushed a little Gilt paint around the edge of the tag and added a ribbon, a gem in the centre of the mandala and a sentiment. 

And here is a close up of that texture! 
I used:
Thanks for looking! 

Monday, 6 December 2021

A Crackin' Christmas

 Hi There! I've been enjoying playing with the fabulous Nutcracker stamps from Bee Crafty this week. Here is how I made my card

I began by wiping distress ink onto a super skinny slim, giving it a spray of water and then pressing it onto a 14cm square of mixed media card. I dried it between each colour. 

Next I sprinkled a little explosion powder in coordinating colours on to the background and sprayed it with a mister.

Once this was dry I stamped it with the bauble stamp in blueprint sketch ink. 
On a piece of watercolour card, I stamped and embossed the smaller nutcracker and coloured him with a combination of distress ink and ecolines. I cut him out leaving a narrow border.

I stamped the sentiment in blueprint sketch ink and added a few highlights in silver. 
Finally I matted and layered the background, sentiment and Nutcracker onto the 15x15cm card. I used 3d gel medium for the sentiment and nutcracker. 
Here are links to the products I used:
Versamark ink
Silver gelly roll pen

Thanks for looking and I hope your festive preparations are going well x

Monday, 20 September 2021

A pot for my blending brushes


Hi There! I have been meaning to make a pot for my blending brushes, so, as the theme on the Bee Crafty Facebook challenge is to make something for yourself, I decided to have a go. 

Here is what I did:


I used a can from some pineapple slices that had a ring pull, so to make it safe, I squeezed the top edge with pliers to remove the sharp edge.


I measured the depth of the can and cut a piece of 180gsm Kraft card to fit with a small overlap (8.5cm x 29cm)

I used spots of shimmer paint to cover the card in vertical stripes, blending the colours together at the edges.
Once this was dry I wiped it with an anti static cloth, then stamped a selection of flowers in versamark, before heat embossing with fine detail white powder.

I then stamped a selection of the arrows, question marks and exclamation marks using black archival in the spaces.

I added a few highlights and a scribbled border using both gelly roll and posca white pens.
To attach the card to the can, I used double sided tape to attach it to the tin. I then used both tape and glue to secure the end of the band. 

I used:
A can from some pineapple slices
1 A4 sheet of 180gsm kraft card
Versamark ink

Here are a couple of views of the pot from different sides, which really don't do justice to the shimmery paints! 
I do hope you will have a go and share in the Bee Crafty facebook group. Don't forget to enter your projects on the September challenge album too! 
Our lovely Bev and Sam are on the Craft Store with oodles of amazing bargains in a Bee Crafty Happy Hour at 1pm tomorrow! Don't miss it! 
Thanks for looking! 

Monday, 13 September 2021

Do-you-think-he-saurus?

Hi There! I am here with a step by step for this T-Rex card today. With several dinosaur fans in the family I had to get this stamp set!  
I began by smooshing a background of Crackling Campfire, Peeled Paint and Rustic Wilderness Distress oxide inks on to mixed media paper. I made sure this is completely dry before stamping on it.

Next I used rustic Wilderness and Vintage photo Distress oxide inks to stamp the smaller worker stamps over the smooshed background. 
I cut two tags from watercolour paper using the middle sized die from the tags and banners die set. I stamped the text stamp onto the tag with Vintage photo distress oxide and sponged a little around the edge of the tag too. 
I used Versamark ink to stamp the smaller dinosaur skull on to a scrap of gold card and embossed with fine detail white embossing powder. 
After cutting out the skull, I stamped the remaining tag with the leaf stamp in Tea Dye distress ink.
Next I assembled the card, sticking the background to an A5 white blank card. I added some string to the tags and attached them to the front of the card with 3d glue. I used the same glue to add the skull to the 2nd tag. It would be easy to personalise it by adding a name to the second tag too.
Here is another look at the finished card, along with links to the products in the Bee Crafty store:
A5 card blank
A small snippet of gold coloured card or kraft card
Versamark ink 
3d glue

For those of you that saw my post about Karate grading a few weeks back, I have now received my belt. In our club, once you reach the Dan grades you do not have a new belt again, so each one is created for each individual student. One end is embroidered with the name of our club in Japanese...
The other end has my name translated into Japanese...
It is going to take a while, and plenty of tying, for it to soften up and hang well, but I love it. Here is the certificate that I received on the day.

Thanks for looking and Happy Crafting! 

Monday, 8 March 2021

Mother's day inspiration


Hi There! Several people asked me how I made the background for the first of my samples that I shared last week, so I thought I would do a step by step. This time though I thought it could be a little inspiration for Mother's Day as it is on Sunday here in the UK.

I used Distress inks in spiced marmalade, mustard seed, festive berries, picked raspberry, wilted violet, citrus twist, mermaid lagoon, blueprint sketch and black soot.

The stamps I used were Typewriter Alpha, Ledger and Jane's Flowers and Leaves 1

6" Heart Easy Frame inkable 

Something to splatter - Water or something containing mica powders (I used some very old sprays)

Versafine Clair black ink and versamark ink

Clear and white embossing powder

Here is how I made it:

First I applied the distress inks in patches around the edge of a 13cm square of card with make-up blender brushes. I swiped the pink and the purple lightly across the middle, but left it lighter than around the edge.

Next I stamped over the inked card with the ledger stamp and the versafine clair ink. 

I put the heart inkable 'innie' in the middle of the card and brushed the black ink around it and around the edge of the panel.

I then used the water and mica sprays to add a few splatters and set aside to dry.

Once it was dry I matted and layered it onto black paper and a white 15cm square card.

Next I stamped three flowers in black ink on to white card and clear embossed them.

Once they had cooled, I cut them out and shaped a little with a ball tool.

I Stamped 'Mum' using Versamark ink and white embossed onto a scrap of black card.

Finally I added them to the card using 3d glue gel. Hope you like it!

Hope all the Mums out there have a good Mother's day despite Lockdown. Lets hope we can celebrate properly later in the year.

Thanks for looking! 

                            Sally x