Monday, 28 December 2020

A step by step Birthday Tag book for Bee Crafty


Hello there! Hope you had a good Christmas despite all the Covid restrictions. It was extremely quiet here, but we enjoyed the food and seeing our loved ones very briefly. 

Do you remember the Birthday tag book from my Hochanda samples last week? Well, I promised a couple of people that I would do a step by step to make one and here it is. You might want to get yourself a cuppa first though, as it is a long one!

You will need:

Tags and Banners #1 cutting dies

3 A4 sheets of white/ pale card approximately 180-200gsm for the pages

1 A5 piece of heavier weight card for the cover

paper

PVA glue

Typewriter Alpha stamp set

masking tape

Queen Bee Months, Days, Dates stamps

Queen Bee Botanical Sprigs A6 stamps

inks to coordinate with your cover (I used versafine Clair, Brilliance and Distress oxide inks)

First I cut 14 white tags using the next to largest die (the largest tag with a hole in it), then 2 of the largest die (without a hole in it) from the coloured card.

I also cut the white paper into 12 2cm x 6.25cm wide strips, and a piece of the cover card measuring 5cm x 7.2 cm. I creased the paper strips in half lengthways, and scored and creased the cover card at 2cm and 3cm along the 5cm long edge to make a spine. Just incase that doesn't make sense, here is a picture!

 Now all the cutting was done I could start to piece it together. First I set aside one of the white tags for the cover. The remaining 13 tags I stuck together using the strips of folded paper. I applied the glue then layed the next tag on top, making sure they were straight each time.

here is another photo from the side. You can trim off any paper at the sides of the tags as you go along to make it neat.

When all 13 tags were stuck together I set them aside to complete the cover.
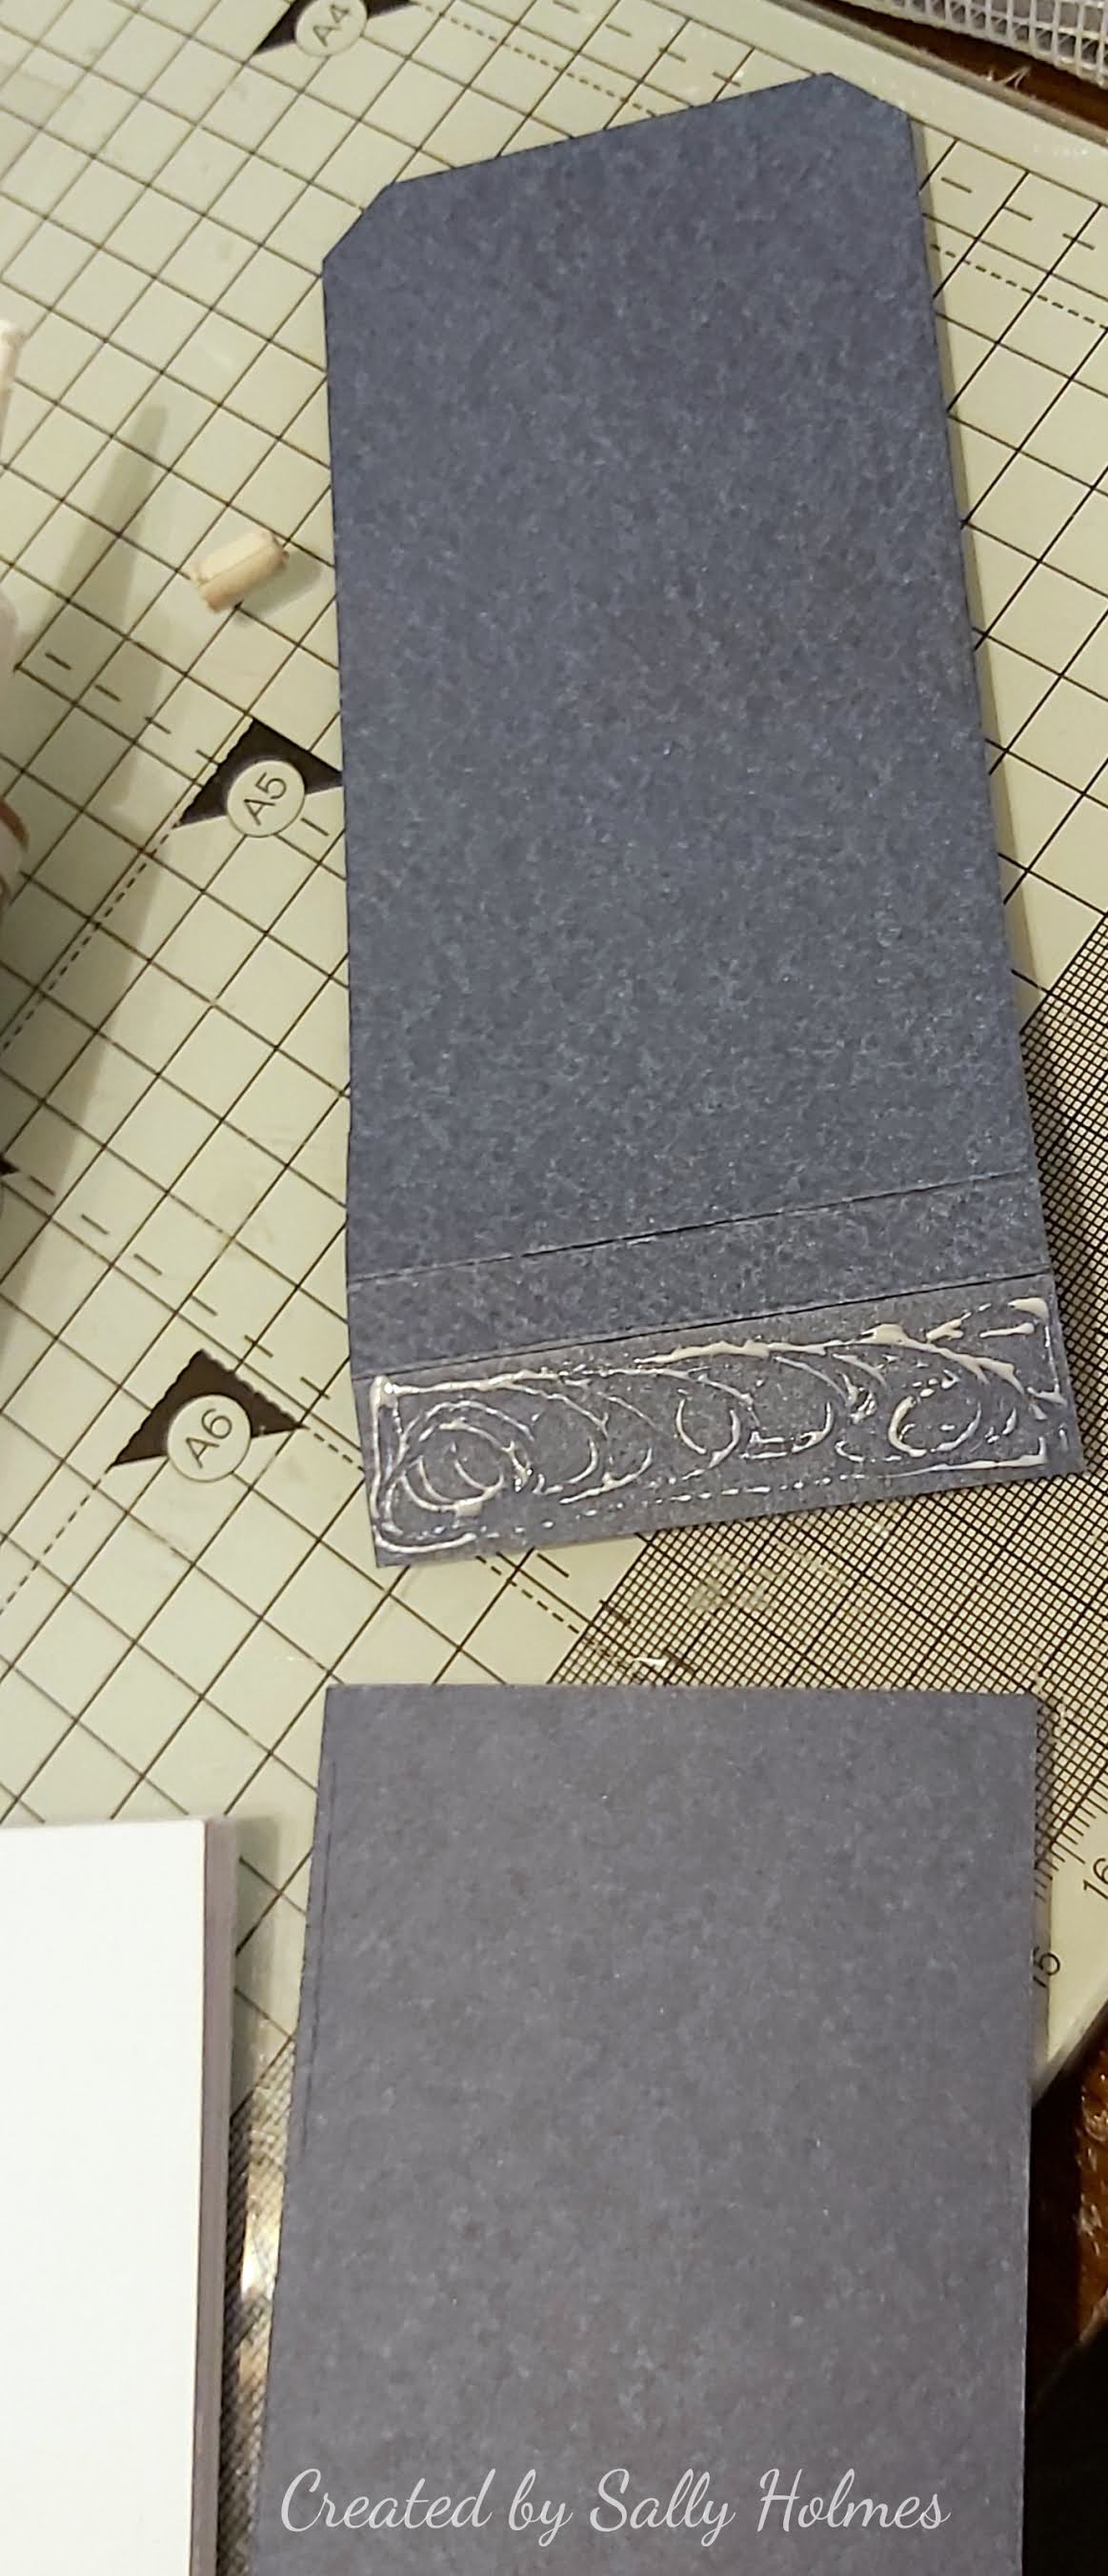
I glued the two larger tags to the spine making sure they didn't stop the folds from moving freely. The overlap is on the inside of the cover.


Then I stuck the back page of the white tags into the cover, again with the PVA.

Now for the fun part and you can decorate it however you want to. I started by placing a strip of masking tape across the remaining tag, brushed a little ink then stamped the botanical sprigs on either side.

Once I was happy I peeled off the masking tape and stamped Birthdays along the white strip. (NB make sure your tag has the hole at the bottom when you do this - You will notice this isn't the tag I ended up with, and I am not sure I am happy with the spacing of those letters either lol)

I stamped each page with the month names then stamped around the edge with different stamps from the set, colouring in a few as I went. Finally I drew lines on each page using the templates. I left the backs blank for now, as they might be needed for any particularly busy birthday months. Here are a few examples of the pages:


Hope that is clear and please ask if there is anything that doesn't make sense! 

Hope you like it and let me know if you have a go yourself.I'd love to see them over in the Bee Crafty Stamps Facebook group.

Thanks for looking!

Monday, 21 December 2020

A journey into Bullet Journaling for me

 Did you see Bev from Bee Crafty on Hochanda last Tuesday? The show had some fabulous stamps, templates, pens and journals, and creating my samples was my first real venture into bullet journaling.

I made quite a few samples, both journal spreads and cards, and I really enjoyed it, but have to admit I did a bit of a search for ideas on Pinterest first. I will definitely be having a journal rather than a diary from now on! 

Here are a few more ideas for journal pages...


Here are a few cards too...


I also used the stamps and tag dies to make a little birthday book.

here are a few of the pages...


 I will be back in the next couple of weeks with a little step by step to make one of these.

You can find the Queen Bee Journalling stamps and templates here.

The large numbers are here

Small words are here

Typewriter Alpha is here

Tag dies are here

I think you can probably see how much fun I've had and I've not really stopped since! 😁 I will share my 2021 journal progress with you in the new year.  

Thanks for looking!

Monday, 14 December 2020

An altered journal for Bee Crafty


As Bev from Bee Crafty is on Hochanda tomorrow with some really gorgeous Queen Bee Journaling stamps, I thought I would share this journal cover. I had bought a couple of small sketch books/ journals a while ago from a high street store, but they had the most ridiculous sticky labels on the front and by the time I had got them off, I had managed to damage the cover. This is what it looked like
Today I decided it was time to do something about it! I got the Bakewell Inkable big one and attached to the damaged cover with a pice of masking tape.

Next I applied some texture paste through the stencil with a palette knife. I washed my stencil and palette knife and left the paste to dry.
Once fully dry I painted over with black gesso and again left to dry thoroughly.
Next I rubbed a little gilding wax in 2 different colours over the textured surface.
I added a line with gold pen down the edge of where the stencil came to.
I used the larger of the banner dies from the Tag and Banner die set and cut one from some thick white card.
I used the Typewriter Alpha to stamp the word Journal across the die cut
A little black ink was sponged around the edge before attaching to the front of the journal with foam pads.
A couple of drops of liquid pearls finished it off.

Here is the finished journal. I am rather pleased with that rescue! I am going to do something similar with an A5 pad of mixed media paper for my bullet journal for next year. I am looking forward to improving my journaling skills using the templates and stamps on tomorrow's shows rather than buying a diary (My 2020 diary was a bit of a waste, lol).

I do hope you can join Bev (and Sam) on Hochanda at 1pm Tomorrow (Tuesday 15th December) 

Thanks for looking!

Thursday, 10 December 2020

Hochanda Samples for Crafty Individuals shows

 Did you see Jean on Hochanda on Saturday with the latest stamps from Crafty Individuals? There are 4 brand new stamps designed by Sharron Bates that you can find here on the crafty Individuals website, along with some other goodies. I had such fun making my samples! First is 'of the Sea' stamped onto an alcohol ink background

Next is the same stamp, watercoloured and teamed up with the Craft Individuals 'wonderfully weathered' papers

 And again with Wonderfully weathered 2 papers and splattered and painted with distress oxides


The second stamp 'The Street' looks great coloured with Speckled Egg and Crackling Campfire Distress oxide inks.

I also tried stamping it on a background sprayed with dylusion inks and highlighted with posca pens
My last sample using The Street was embossed in white over an inky background
I had great fun with 'Pablo the Penguin'

Not only does he look wonderful on card, but he also works brilliantly on shrink plastic as earrings...
and as a bauble

The final new stamp is the beautiful Cone flower or Echinachea, firstly painted and decoupaged...

and secondly stamped onto an alcohol ink background
Whilst we are on the subject of Crafty Individuals, I would like to send a huge 'Congratulations' to my lovely friend Lynne, who was announced as a brand new member of the Crafty Individuals DT during Jean's live yesterday afternoon! I know she will make some stunnng creations and be a real asset to the team! Well Done, Lynne!


Monday, 7 December 2020

A Snowflake bauble for Bee Crafty

                  
Hello there! It is Monday and time for another DT share for Bee Crafty. Today I made a Doodle Art Snowflake Bauble. 
I used:
 A clear bauble (available from various craft shops like Hobbycraft, The Range and The Works)
Ribbon

Here is what I did:
 
I stamped the snowflake 3 times in versafine clair ink. You could use any ink that isn't water- based.
Next I coloured the snowflakes with the ecoline pens and cut them out.
I gently folded each of the snowflakes down the centre line and stuck the three together by two tips on each side.
If you want to go sparkly at this stage add glitter, glitter glue or use a sparkly pen. 
Once dry, place the snowflakes inside the bauble and put the two halves together. 
Add a bow and dangle from your Christmas tree! 
I do hope you like it! 
Thanks for looking and I hope your preparations for Christmas are going well!