Monday, 22 November 2021

Bold Colours!

Hi There! I have been enjoying getting inky and combining some different colours into a simple card where the sentiment is the focus. Here is how I made it.

I began by blending seedless preserves and faded lilac distress oxide inks onto a 14cm square of mixed media paper. 
I then placed over the mandala 4 inkable and blended prize ribbon ink through it 
Next I splattered it with water...
...and some Pretty Gets Gritty Artemis Explosion powder mixed with water. I set it aside to dry. 

I stamped the sentiment in versamark ink and embossed with gold embossing powder before matting and layering it to the card on sticky pads.
Here is a closer look at the finished card. It makes me think of batik fabric. 
I used 
6 x6" blank card
Black card
Mixed media card
Sticky pads or 3d gel for attaching the sentiment
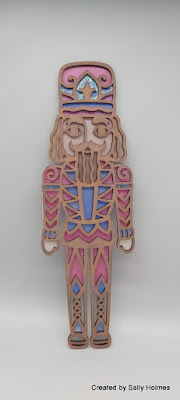
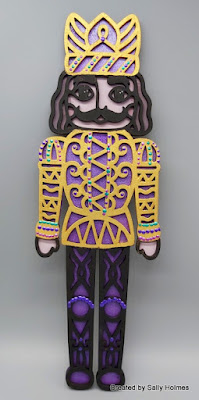
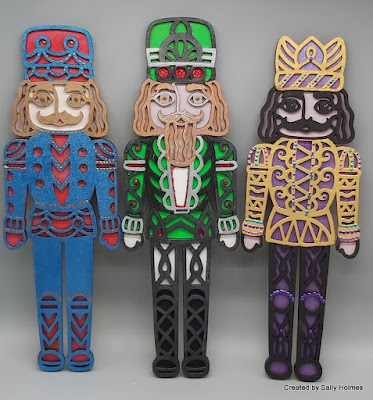
Before I go here are my Nutcracker samples for the Craft Store show last week
I decorated 4 of the regular sized mdf nutcrackers
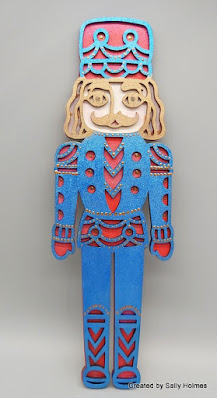
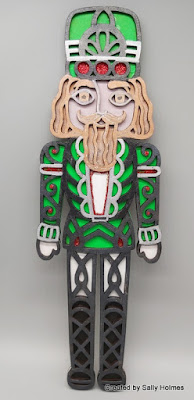
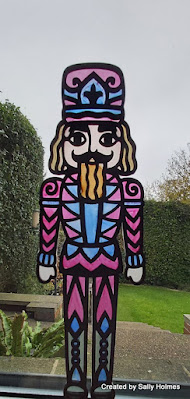
For this one I used alcohol pens on parchment paper stuck behind the front piece
This was the same nutcracker but not backlit
I also made a couple of cards combining the stamps with some older stamps over inky backgrounds...
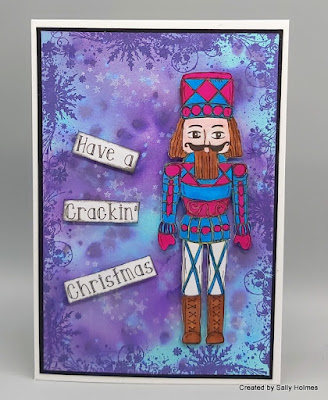
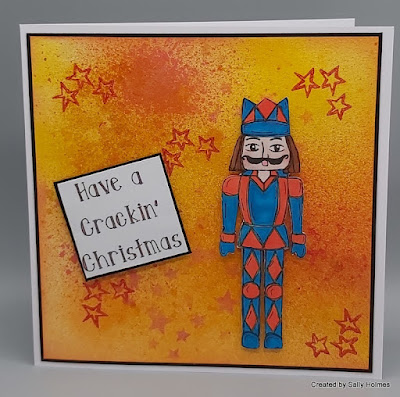
Next week's project may well involve a nutcracker too! 

Thanks for looking and I hope you can join in the challenge over in the Bee Crafty Facebook group where the theme is Stay subtle or Be Bold with your colours! 


Monday, 15 November 2021

Using Masking to make a Festive Card

Hi There! Last Tuesday I shared some ideas for single layer festive cards on the Bee Crafty Facebook page. Here is another idea that is quick and easy to do.

I used a 15cm card blank and stuck a 7.5cm sticky note to the centre.
Next I blended Broken China distress ink through the snowflake inkable on to the area around the sticky note.
I removed the larger note then placed a 5cm square sticky not in the centre and blended a little more ink around it.
I stamped the Holly and mistletoe in black ink and the snowflakes in broken china ink onto the card. 
Next I stamped the sentiment into the central square and coloured the leaves with ecoline pens.
A few drops of liquid pearls and glitter glue finished it off.
Here is another look at the finished card. 
I used:
15x15cm blank card
7.5 and 5cm square sticky notes
Liquid pearls and glitter glue
blending brush

Thanks for looking! 


Monday, 8 November 2021

Warm Winter Woollies Tag

 Hi There! I am here with a step by step for this tag and a bit of bold colour to liven up Monday morning!

Here is how I made it. 
I took a size 10 Dina Wakely tag and painted it with Dylusions paint in patches of fresh lime, periwinkle blue and blue lagoon. I then realised it would be slightly too long to fit on the journal page in my Dylusions mini journal, so I trimmed 2 cm from the bottom edge. 

Next I used the texture border stamps to add some black ink around the edges.
I added some texture circles in unicorn white and twisted citron ink. 
I stamped the Warm winter journaling girl onto a scrap of watercolour card and onto the tag. By doing this you can cut off the fiddly bits but still have them on the background. In this case the beautiful curly locks.
I used ecoline pens to colour my girl and cut her out.
I stuck her onto the tag over the stamped image with matte medium.
Next I chose two sentiments from the winter small words set, stamped in versafine onto black card and embossed with fine detail white embossing powder.
I added these to the tag with matte medium too. 
Here is the finished tag stuck to a page in my journal....
and here is the double page spread showing the bold background from this week in contrast to the subtle one from last week. Both of these would be great entries into our facebook challenge over in the Bee Crafty Stamps Facebook group, where the theme this month is Stay Subtle or Bee bold, and you can enter up to 3 times! 
I used:
Versamark ink
For those of you on Facebook, I will be doing a facebook live tomorrow at 8pm over on the Bee Crafty page making some festive cards, so please do come and join us for a crafty natter and another view of my messy desk, lol! 
Thanks for looking! 

Monday, 1 November 2021

Subtle colours!

Good Morning! The creations in my blog post today were partly inspired by a wonderful journal page by Alison Younge over on the Bee Crafty Stamps facebook group posted on 24th October. She had left a fair bit of white space and used pencils to shade the latest Face stamp, Dream. I decided I would make a card using limited subtle colours, pencil shading and leave some white space too! 

I began by stamping the circles from Journal Art Elements #2 in kitsch flamingo and shaded lilac distress oxide ink down one side of a 14cm square of mixed media card. 
I then stamped the lines stamps around the other three sides as a border in Kitsch Flamingo. 

This was a bit brighter than I had intended so I brushed a coat of white gesso over the top. 
Once this was dry I stamped the Whatever works! face in black Versafine Clair ink. 
I then added some shading in HB pencil...
followed by some highlights with a white pen and a few extra bits of hair with a black fine liner. 
Next I took a 15cm square base card and sponged the shaded lilac ink around the edge. The white card was a very different shade to the mixed media card, so this was a way of making it match.
Then I took a scrap of the mixed media card and stamped the sentiment from Handwritten words #1 in black ink onto it. I also sponged around the edges in the lilac ink. 
I stuck them to the base card using foam pads for the sentiment. 
Here are links to the products I used:
14cm square of mixed media paper
15cm square white card

The Journal page below also uses the same techniques and most of the same products, with additional use of dinkables , the new Dream face and collage papers applied with Matte Medium

I so enjoyed making these that I decided to incorporate them into the theme for this months Challenge over in the Bee Crafty Facebook group, where we are encouraging you to Stay subtle or Be Bold in your colour choices. I do hope you will come and join in the fun! 
Thanks for looking! 

Wednesday, 27 October 2021

Rudolf Days for October


 Here are the cards I made last month and forgot to post plus a few more I have made this month. Last month we had a really busy weekend karate wise with 8 of my students at a tournament on the Saturday and another 7 going to grading on the Sunday. They were all amazing and did me proud - 5 gold medals 4 silver and 2 bronze in the tournament, then all acing their gradings too! I was so proud I was euphoric for days, completely forgetting Rudolf Days!  I made chocolate cupcakes for the whole class. 

Anyway, on to my cards. 


I used stamps and stencils from Inkylicious for these three. All very similar with two on cream cards and one on a white card in shades of blue ink. I added a shadow to make it look 3d - Deby has done a wonderful tutorial on the Inkylicious you tube channel if you want to know how it is done.  
The next one is also using inkylicious stamps and a stencil cut using a die at a crafty session at PDA. I might add a sentiment eventually. 
The next two are also done with inkylicious stamps in more traditional colours, but still single layers. 
Very simple but perfect for quick cards.
Do pop over to Mo's blog for more inspiration and to enter if you get the chance! Mo, if you get round to visiting , I am thinking of you and the family. I really hope your hubby makes a full and speedy recovery. Big hugs! 
Thanks for looking!